
United States Region 8 Laboratory September 2016
Environmental 16194 W. 45
th
Dr.
Protection Agency Golden, CO 80403
Quick Guide
To Drinking Water
Sample Collection
Second Edition, Update

2
Disclaimer
This document provides a general summary of techniques used by EPA Region 8
Laboratory staff for the collection of chemistry samples for drinking water analysis.
Other approaches to sample collection may be acceptable or desirable under given
conditions. This document is intended as a refresher for those already trained in sample
collection. The user is urged to check with the laboratory performing the analysis to
ensure that the bottles, preservatives, and holding times which are to be employed are
compatible with the methods used by the laboratory.
The second edition corrects and expands on the guidance for sampling water lines for
compliance with the lead/copper rule. The first edition should not be used. The second
edition also updates sampling techniques for total coliforms and E. coli and provides a
reference for the Revised Total Coliform Rule. In addition, it contains minor editorial
corrections and updates.
The second edition update expands on the guidance for sampling water lines for
compliance with the lead/copper rule.

3
Table of Contents
Section Page
General Sampling Procedures………………………………………………..… 4
Specific Sampling Procedures
Asbestos………………………………………………………………….. 6
Biological Contaminants
Bacteria and Coliphage………………………..………………..… 7
Total Coliform and E. Coli..……………………………………… 8
Cryptosporidium and Giardia…………………………………..…. 9
Classical Chemistry Constituents and Nutrients (IOCs)
Unpreserved Nutrients, Anions, Etc.……………………..….…….. 10
Preserved Nutrients, Anions, Etc.…………………………………. 11
Cyanide……………………………………………………………. 12
Co
lorimetric Analysis for Disinfectant Residuals……………………… 13
Haloacetic Acids (HAA5s)……………………..………………………… 14
Metals (IOCs)
Common Metal Contaminants………...…………………...………. 15
Radionuclides……………………………………………………...……… 16
Semivolatile Synthetic Organic Compounds (SOCs)…………….…….. 17
Total Organic Carbon (TOC)…………………………..……….……… 18
Volatile Organic Compounds (VOCs)
Common VOCs…………………………………………………... 19
Total Trihalomethanes (TTHMs)……………………………….… 20
4
General Sampling Procedures
This summary document is designed to be used by personnel trained in the collection of
drinking water samples and handling of sample preservatives. Follow the procedures
described below to assist in the collection of an acceptable sample and to maintain the
integrity of the sample after collection.
1. Prepare a Sampling and Analysis Plan (SAP) which describes
the sampling locations, numbers and types of samples to be
collected, and the quality control requirements of the project.
2. Check with the laboratory before collecting samples to ensure
that sampling equipment, preservatives, and procedures for
sample collection are acceptable. It is best to obtain sampling
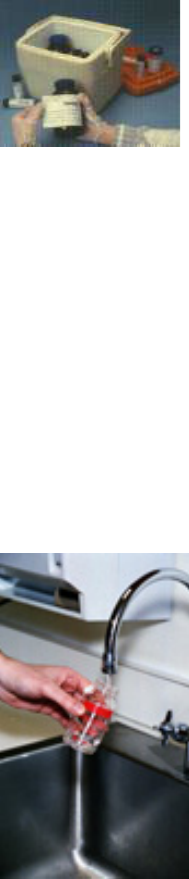
supplies directly from the laboratory performing the analyses.
Gather all equipment and supplies necessary for the project.
3. The acids and bases used in preservation of many types of
samples described in this document are dangerous and must
be handled with care. Always wear gloves and eye protection
when handling preservatives. When opening a preservative
bottle, particularly a glass ampoule, break open the ampoule
away from yourself and others. Have acid/base neutralization
supplies (baking soda) on hand in the event of a spill. If acid
spills on your skin or clothing, remove the contaminated
clothing and rinse the area with water. Do not apply baking
soda (the heat of reaction can cause burns).
4. Collect samples in an area free of excessive dust, rain, snow
or other sources of contamination.
5. Select a cold water faucet for sampling which is free of
contaminating devices such as screens, aeration devices,
hoses, purification devices or swiveled faucets. Check the
faucet to be sure it is clean. If the faucet is in a state of
disrepair, select another sampling location.
6. Collect samples from faucets which are high enough to put a
bottle underneath, generally the bath tub or kitchen sink,
without contacting the mouth of the container with the faucet.
7. Open the faucet and thoroughly flush. Generally 2 to 3
minutes will suffice, however longer times may be needed,
especially in the case of lead distribution lines. Typically the
water temperature will stabilize which indicates flushing is
completed. Once the lines are flushed, adjust the flow so it
does not splash against the walls of the bathtub, sink or other
surfaces.
5
8. Follow the collection instructions provided for the analytes of
interest described on the following pages. Wear eye
protection and gloves if you are handling containers with
acidic/basic preservatives and when you are collecting
samples.
9. Lead and Copper Rule Compliance Samples:
Select a cold water faucet for sampling which is free from
devices that are designed to change the water composition,
such as water softeners or point of use filters. DO NOT
remove any screens or aeration devices. If you are collecting
a first-flush sample for lead/copper, allow the water to sit
undisturbed for at least six hours. DO NOT intentionally
flush the water line before the start of the 6 hour period.
Place a wide-mouth 1 L bottle under the faucet. Open the
faucet and collect the first water out of the tap.
If you want to test a lead service line then 8 to 10 sequential
sample bottles (the number depends on how far the lead
service line is from the tap) would be needed to see the profile
of lead distribution.
For more detailed sampling instructions, refer to the EPA’s
“Clarification of Recommended Tap Sampling Procedures for
Purposes of the Lead and Copper Rule” at:
https://www.epa.gov/sites/production/files/2016-
02/documents/epa_lcr_sampling_memorandum_dated_februa
ry_29_2016_508.pdf.
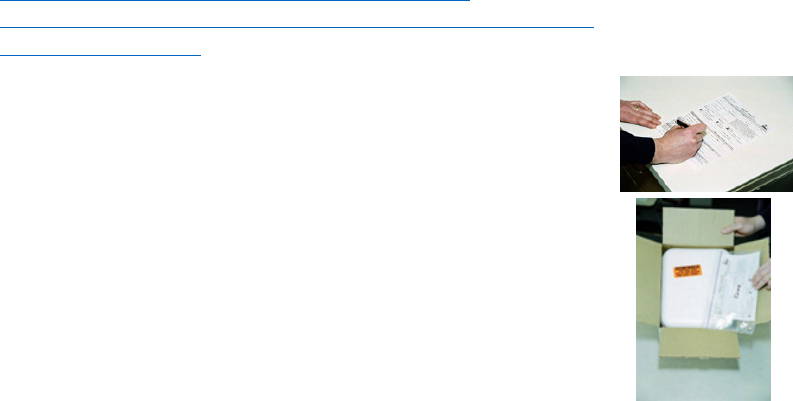
10. Fill out the chain of custody form with the sample collection
information. Record the site location, name of the sampler,
date and time of collection, method of collection, type of
analysis to be completed, and preservative in use.
11. Deliver or ship samples to the laboratory to ensure that
holding times are met. Holding time starts at sample
collection and ends at preparation and/or analysis. Be sure to
allow time for the laboratory to process the samples
12. Return empty preservative containers to the laboratory for
proper disposal.

6
SAMPLING FOR ASBESTOS
Bottles to Use
Or
Plastic or glass bottles may be used but plastic is preferred.
Preservative to Use
Cool to ≤ 4 °C (≤ 39.2 °F)
Holding Times
48 Hours
Sampling Instructions
Check with the laboratory but generally 1 L is required for analysis. Wear gloves and
eye protection when collecting samples. Rinse the bottle and cap three times with
sample water and fill the bottle to within one to two inches from the top. Place the
sample into a cooler with ice for immediate delivery or shipment to the laboratory.

7
SAMPLING FOR BIOLOGICAL CONTAMINANTS
Total coliforms; Fecal coliforms; E. coli;
Enterococci; Heterotrophic Bacteria; or Coliphage
Bottle to Use
Sterile 125 or 150 mL plastic bottles must be used.
Preservatives to Use
Sodium Thiosulfate if sample is chlorinated
and
Cool to < 10 °C (< 50 °F) for source water and groundwater
samples (recommended for drinking water as well) but do
not allow samples to freeze
Holding Times
Holding times are generally very short - 8 hours for source
water compliance samples, 30 hours for drinking water
samples, 48 hours for coliphage samples. Deliver samples to
the lab the day of collection if possible or ship via overnight
delivery.
Sampling Instructions
Wear gloves when collecting samples. Do not rinse the bottles. The bottles are
sterile so care must be taken not to contaminate the bottle or cap. Once the
distribution line is flushed and the flow reduced, quickly open the bottle (but do not
set the cap down), hold the cap by its outside edges only, and fill the sample bottle to
just above the 100 mL line leaving a one inch headspace. Cap the bottle immediately
and place it into a cooler with ice for delivery or overnight shipment to the laboratory.

8
SAMPLING FOR BIOLOGICAL CONTAMINANTS
Tips and Guidance for Total Coliform and E. coli Sampling
Some Tips on Collecting Samples
• Remove any attachments on the faucet
• Allow water to flow for 5 or 6 minutes before sampling
• Do not rinse or overfill container
• Always collect cold water; never sample hot water
• Do not touch the inside of the sample bottle or its cap
Avoid These Sampling Sites for Total Coliform, if Possible
• Outdoor faucets
• Faucets connected to cisterns, softeners, pumps, pressure tanks or hot water heaters
• New plumbing and fixtures or those repaired recently
• Faucets that hot and cold water come through
• Threaded taps
• Swing spouts
• Faucets positioned close to sink or ground
• Leaky faucets
For guidance on sampling related to the Revised Total Coliform Rule (effective April 1,
2016), refer to EPA’s “Quick Reference Guide”, found under the RTCR
Implementation Materials heading at:
http://water.epa.gov/lawsregs/rulesregs/sdwa/tcr/regulation_revisions.cfm

9
SAMPLING FOR BIOLOGICAL CONTAMINANTS
Giardia and Cryptosporidium
using EPA Analytical Methods 1622 1623, or 1623.1
without filtration in the field
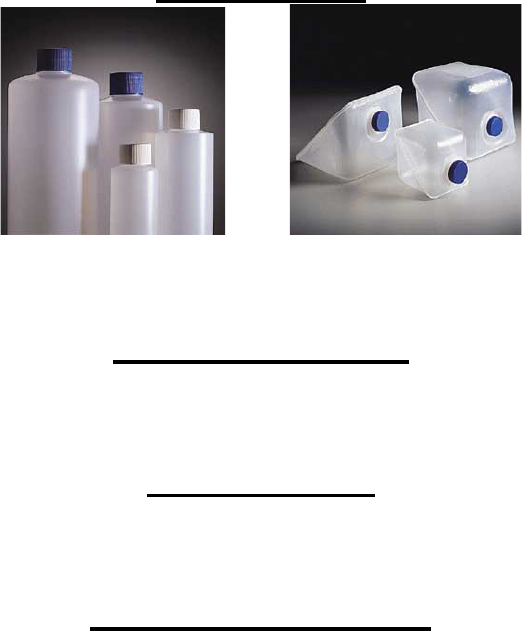
Bottle to Use
Plastic cubitainers or equivalent which can hold 10 L samples are used.
Preservatives to Use
Cool to ≤ 10 °C but do not freeze, keep at < 20 °C during shipment.
Holding Time
96 hours
Sampling Instructions
This method of sample collection is acceptable for EPA analytical methods 1622,
1623, and 1623.1 when sending water samples to the laboratory without filtering in
the field. Talk to the lab to determine if this collection procedure is acceptable for the
analytical method they plan to perform. Wear gloves when collecting samples. Rinse
the sample bottle three times and fill the bottle completely to ensure 10 liters are
collected. Chill samples to 1 – 10 °C as soon as possible by storing in a refrigerator
or by pre-icing them in a cooler prior to shipment. Load samples into a cooler with
fresh ice for either immediate delivery or overnight shipment to the laboratory.
Complete any applicable sample collection forms.
Note: An additional 10 L matrix spike sample may be required by the laboratory.
For additional sampling instructions, including those for filtration refer to the EPA’s
“LT2 Rule Cryptosporidium & E. coli Sample Collection Recommendations Pocket
Guide” found under the Training Modules heading at:
http://water.epa.gov/lawsregs/rulesregs/sdwa/lt2/lab_home.cfm

10
SAMPLING FOR UNPRESERVED CLASSICAL
CHEMISTRY CONSTITUENTS INCLUDING
NUTRIENTS, ANIONS, AND OTHER ANALYTES
AS LISTED (IOCs)
Acidity, Alkalinity, Biological Oxygen Demand, Bromate, Chloride, Chlorite, Color,
Conductivity, Fluoride, Foaming Agents, Nitrate, Nitrite, Odor, o-Phosphate,
Residues, Silica, Sulfate, Surfactants, Total Dissolved Solids, Total Suspended
Solids, Turbidity
Bottles to Use
Or
Plastic or glass bottles may be used but plastic is preferred.
Preservative to Use
Cool to ≤ 4 °C (≤ 39.2 °F)
Holding Times
Most of these analytes have short holding times. Deliver
samples to the lab the same day if possible or ship via
overnight delivery. Check with the lab regarding the
holding times for the specific analytes of interest.
Sampling Instructions
Check with the laboratory on the sample volume required for analysis. Wear gloves
and eye protection when collecting samples. Rinse the bottle and cap three times
with sample water and fill the bottle to within one to two inches from the top. Place
the sample into a cooler with ice for immediate delivery or shipment to the
laboratory.
11
SAMPLING FOR CLASSICAL CHEMISTRY
CONSTITUENTS AND NUTRIENTS REQUIRING
ACID PRESERVATION AS LISTED (IOCs)
Ammonia; Nitrate + Nitrite Combined; Kjeldahl and Organic Nitrogen;
Total Phosphorus
Bottles to Use
Or
Plastic or glass bottles may be used but plastic is preferred.
Preservative to Use
Sulfuric Acid (H
2
SO
4
) to pH < 2
Holding Times
28 days
Sampling Instructions
Check with the laboratory on the sample volume required for analysis. Wear gloves
and eye protection when handling acids and while collecting samples. If the bottle
contains a preservative, do not rinse the bottle. If the preservatives are not included
in the bottle, rinse the bottle and cap three times with sample water, fill the bottle, and
then carefully add the preservatives following the instructions provided by the
laboratory. The bottle should be filled to within one to two inches from the top.
Deliver or ship the sample to the laboratory.

12
SAMPLING FOR CYANIDE (IOC)
Bottles to Use
Or
Plastic or glass bottles may be used but plastic is preferred.
Preservatives to Use
0.6 g Ascorbic Acid if sample is chlorinated.
and
Sodium Hydroxide (NaOH) to pH >12
and
Cool to ≤ 4 °C (≤ 39.2 °F)
Holding Time
14 days
Sampling Instructions
Check with the laboratory on the sample volume required for analysis. Wear gloves
and eye protection when handling acids and other preservatives and while collecting
samples. If the bottle contains a preservative, do not rinse the bottle. If the
preservatives are not included in the bottle, rinse the bottle and cap three times with
sample water, fill the bottle, and then carefully add the preservatives following the
instructions provided by the laboratory. The bottle should be filled to within one to
two inches from the top. Place the sample into a cooler with ice for delivery or
shipment to the laboratory.

13
SAMPLING AND COLORIMETRIC ANALYSIS
FOR DISINFECTANT RESIDUALS
Free Chlorine, Combined Chlorine, Chloramines, Total Chlorine,
Bottles to Use
Glass test tubes are generally used.
Preservative to Use
None
Holding Times
Analyze Immediately On-Site
Sampling and Analysis Instructions for the DPD
Colorimetric Methods
Several methods are approved for analysis of disinfectant residuals. A common
method is the DPD Colorimetric Method (Standard Methods, 18
th
edition or later
4500-Cl G). Test kits for the DPD method are available commercially. The analyst
should follow the specific directions provided with the test kit.
In general, the analyst will need to measure out a known volume of sample using a
test tube or flask provided with the kit and will need to add the DPD reagents in the
order described, wait a specific reaction time, and then measure the pink color that
develops in the sample. The intensity of the pink color that develops after the
addition of a reagent is measured using a spectrophotometer or a color comparator
and relates directly to the amount of disinfection residual present in the sample.
Example Test Kits

14
SAMPLING FOR HALOACETIC ACIDS
(HAA5s)
Monochloroacetic Acid, Dichloroacetic Acid, Trichloroacetic Acid,
Monobromoacetic Acid, Dibromoacetic Acid
Bottles to Use
Glass bottles must be used.
Preservatives to Use
Ammonium Chloride
and
Cool to ≤ 4 °C (≤ 39.2 °F) but do not freeze
Keep samples in the dark
Holding Times
Holding times are either 14 or 28 days depending upon the
laboratory method in use.
Sampling Instructions
Check with the laboratory on the sample volume required for analysis. Wear gloves and
eye protection when handling acids and other preservatives and while collecting samples.
Do not rinse the bottle. If the preservatives are not included in the bottle, carefully add
the preservatives following the instructions provided by the laboratory. Fill the bottle to
within one to two inches from the top. Place the sample in a cooler with ice for delivery
or shipment to the laboratory.

15
SAMPLING FOR METALS (IOCs)
Antimony, Arsenic, Barium, Beryllium, Cadmium, Calcium, Chromium (total),
Magnesium, Manganese, Mercury, Nickel, Selenium, Sodium, Silver, Thallium,
Lead, Copper, Zinc, and other trace metals
Bottles to Use
*
Or Or
Plastic or glass bottles may be used but plastic is preferred.
*Note: 1000 mL wide-mouth bottles are recommended for collection of Lead and
Copper Rule compliance samples
Preservative to Use
Nitric Acid (HNO
3
) to pH < 2
Holding Times
28 days for mercury, 6 months for other metals
Sampling Instructions
Check with the laboratory on the sample volume required for analysis. Wear gloves
and eye protection when handling acid and while collecting samples. If the bottle
contains a preservative, do not rinse the bottle. If the preservatives are not included
in the bottle, rinse the bottle and cap three times with sample water, fill the bottle, and
then carefully add the preservatives following the instructions provided by the
laboratory. The bottle should be filled to within one to two inches from the top.
Deliver or ship the samples to the laboratory.
Lead and Copper Rule Compliance Samples: Refer to Item #9 in the General
Sampling Instructions above. Do not remove aerators or rinse bottles. Use the
bathroom tap if the kitchen tap has a water softener or point of use filter on it.
Note: If samples are not acid preserved, they must be received by the laboratory
within 14 days of sampling.

16
SAMPLING FOR SAMPLING FOR
RADIONUCLIDES
Gross Alpha, Gross Beta, Strontium-89, Strontium-90, Radium-226, Radium-228,
Cesium-134, Iodine-131, Tritium, Uranium, Photon emitters
Bottles to Use
Or
Plastic or glass bottles may be used but plastic is preferred.
Preservatives to Use
Hydrochloric Acid (HCl) or Nitric Acid (HNO
3
)
preservation for all analytes except Iodine-131 and Tritium
which do not require acid preservation. For Cesium-134,
only HCl may be used as a preservative.
Holding Times
8 days for Iodine-131, 6 months for all other radionuclides
Sampling Instructions
Check with the laboratory on the sample volume required for analysis. Wear gloves
and eye protection when handling acids and other preservatives and while collecting
samples. If the bottle contains a preservative, do not rinse the bottle. If the
preservatives are not included in the bottle, rinse the bottle and cap three times with
sample water, fill the bottle, and then carefully add the preservatives following the
instructions provided by the laboratory. The bottle should be filled to within one to
two inches from the top. Deliver or ship samples to the laboratory.

17
SAMPLING FOR
SYNTHETIC ORGANIC COMPOUNDS
(SOCs)
Alachlor, Atrazine, Benzo(a)pyrene (PAHs), Carbofuran, Chlordane, 2,4-D, Dalapon, 1,2-
Dibromo-3Chloropropane (DBCP), Di(2-ethylhexyl)adipate, Di(2-ethylhexyl)phthalate,
Dinoseb, Endrin, Ethylene Dibromide (EDB), Heptachlor, Heptachlor Epoxide,
Hexachlorobenzene, Hexachlorocyclopentadiene (HEX), Lindane, Methoxychlor, Oxamyl
(Vydate), Pentachlorophenol, Picloram, PCBs, Simazine, Toxaphene, 2,4,5-TP (Silvex),
Diquat, Endothall, Glyphosate, Dioxin
Bottles to Use
Or
Glass bottles must be used. The type of cap required will depend upon the analyte and
method the lab is using. Talk to the lab to be sure.
Preservatives to Use
Check with the lab to verify the type of preservation
required which depends on laboratory method in use
and
Cool to ≤ 4 °C (≤ 39.2 °F) but do not freeze
Holding Times
Holding times are generally short – call the lab to be sure.
Sampling Instructions
Check with the laboratory on the sample volume required for analysis. Wear gloves
and eye protection when handling acids and other preservatives and while collecting
samples. Do not rinse the bottles. Ask the lab how to fill the bottle as this may
depend on the bottle in use and the method used for analysis. Place the sample into a
cooler with ice for immediate delivery or shipment to the laboratory.

18
SAMPLING FOR TOTAL ORGANIC CARBON
Bottles to Use
Or
Glass bottles are preferred but plastic may be used as well.
Preservatives to Use
Check with the lab to verify the type of preservation required which depends on
laboratory method in use. Generally, preservation includes
Hydrochloric (HCl) or Sulfuric (H
2
SO
4
)
or Phosphoric Acid (H
3
PO
4
) to pH <2
and
Cool to ≤ 4 °C (≤ 39.2 °F) but do not freeze
Holding Time
28 days
Sampling Instructions
Check with the laboratory on the sample volume required for analysis. Wear gloves
when handling acids and other preservatives and while collecting samples. If the bottle
contains a preservative, do not rinse the bottle. If the preservatives are not included in the
bottle, rinse the bottle and cap three times with sample water, fill the bottle, and then
carefully add the preservatives following the instructions provided by the laboratory. The
bottle should be filled to within one to two inches from the top. Place the sample into a
cooler with ice for delivery or shipment to the laboratory.

19
SAMPLING FOR
VOLATILE ORGANIC COMPOUNDS (VOCs)
Benzene, Carbon Tetrachloride, o-Dichlorobenzene, p-Dichlorobenzene, 1,2-
Dichloroethane, 1,1-Dichloroethylene, cis-1,2-Dichloroethylene, trans-1,2-
Dichloroethylene, Dichloromethane, 1,2-Dichloropropane, Ethylbenzene,
Monochlorobenzene, Styrene, Tetrachloroethylene, Toluene, 1,2,4-Trichlorobenzene,
1,1,1-Trichloroethane, 1,1,2-Trichloroethane, Trichloroethylene, Vinyl Chloride,
Xylenes(total)
Bottles to Use
Or
Clear or amber volatile organic analysis (VOA) glass bottles with Teflon septum-cap
must be used.
Preservatives to Use
Check with the lab to verify the type of preservation required which depends on
laboratory method in use. Generally, preservation includes
Sodium Thiosulfate or Ascorbic Acid if sample chlorinated
and Hydrochloric Acid (HCl) to pH <2 and
Cool to ≤ 4 °C (≤ 39.2 °F) but do not freeze
Holding Time
14 days
Sampling Instructions
Check with the laboratory on the sample volume required for analysis. Typically
duplicate samples must be collected (triplicate preferred) at each sampling location.
Wear gloves and eye protection when handling acids and other preservatives and
while collecting samples. Do not rinse the bottle as it should contain the
preservatives before it is filled. Check to make sure this is the case and if not add the
preservative. Slowly fill the bottle by allowing the sample to gently flow down the
inside of the bottle. Create a meniscus of water at the mouth so that the bottle is
actually overfilled. Cap the bottle so that no air bubbles are present in the bottle and
the excess water spills down the sides of the bottle. Check to make sure that the
bottle does not contain bubbles by inverting the bottle several times. Place the
sample into a cooler with ice for delivery or shipment to the laboratory.

20
SAMPLING FOR TOTAL TRIHALOMETHANES
(TTHMs)
Bromodichloromethane, Dibromochloromethane, Tribromomethane (Bromoform),
Trichloromethane (Chloroform)
Bottles to Use
Or
Clear or amber volatile organic analysis (VOA) glass bottles with Teflon septum-cap
must be used.
Preservatives to Use
Check with the lab to verify the type of preservation required which depends on
laboratory method in use. Generally, preservation includes the following…
Sodium Thiosulfate or Ascorbic Acid if sample chlorinated
and Hydrochloric Acid (HCl) to pH < 2 and
Cool to ≤ 4 °C (≤ 39.2 °F) but do not freeze
Holding Time
14 days
Sampling Instructions
Check with the laboratory on the sample volume required for analysis. Typically
duplicate samples must be collected (triplicate preferred) at each sampling location.
Wear gloves and eye protection when handling acids and other preservatives and while
collecting samples. Do not rinse the bottle as it should contain the preservatives before it
is filled. Check to make sure this is the case and if not add the preservative. Slowly fill
the bottle by allowing the sample to gently flow down the inside of the bottle. Create a
meniscus of water at the mouth so that the bottle is actually overfilled. Cap the bottle so
that no air bubbles are present in the bottle and the excess water spills down the sides of
the bottle. Check to make sure that the bottle does not contain bubbles by inverting the
bottle several times. Place the sample into a cooler with ice for delivery or shipment to
the laboratory.
