
© 2024 ANDRITZ Inc. This program is protected by US and international copyright laws.
You may not copy, transmit, or translate all or any part of this document in any form or by any means,
electronic or mechanical, including photocopying, recording, or information storage and retrieval sys-
tems, for any purpose other than your personal use without the prior and express written permission of
ANDRITZ Inc.
License, Software Copyright, Trademark, and Other Information
The software described in this manual is furnished under a separate license and warranty agreement.
The software may be used or copied only in accordance with the terms of that agreement. Please note
the following:
ExtendSim blocks and components (including but not limited to icons, dialogs, and
block code) are copyright © by ANDRITZ Inc. and/or its Licensors. ExtendSim blocks
and components contain proprietary and/or trademark information. If you build blocks,
and you use all or any portion of the blocks from the ExtendSim libraries in your
blocks, or you include those ExtendSim blocks (or any of the code from those blocks)
in your libraries, your right to sell, give away, or otherwise distribute your blocks and
libraries is limited. In that case, you may only sell, give, or distribute such a block or
library if the recipient has a valid license for the ExtendSim product from which you
have derived your block(s) or block code. For more information, contact ANDRITZ at
© 2024 ANDRITZ Inc. This program is protected by US and international copyright laws. Microsoft
is a registered trademark and Windows is a trademark of Microsoft Corporation. The copyright for
Stat::Fit® is owned by Geer Mountain Software. All other product names used in this manual are
the trademarks of their respective owners. All other ExtendSim products and portions of products
are copyright by ANDRITZ Inc. All right, title and interest, including, without limitation, all
copyrights in the Software shall at all times remain the property of ANDRITZ Inc. or its Licensors.
Acknowledgments
Extend was created in 1987 by Bob Diamond; it was re-branded as ExtendSim in 2007.
The contents of this document are the result of years of work by software architects, simulation en-
gineers, and technical writers and editors of ExtendSim products.
ANDRITZ Inc • 13560 Morris Road, Suite 1250 • Alpharetta, GA 30004 USA
770.640.2500 • [email protected]
www.ExtendSim.com
Table of Contents
Introduction ............................................................................................................ 1
Welcome! ........................................................................................................................1
About this document.......................................................................................................1
Who should read this document .....................................................................................1
Chapters in this reference ...............................................................................................1
Introduction to databases ................................................................................................2
The ExtendSim database.................................................................................................3
Using spreadsheets and databases ..................................................................................6
Where to get more information.......................................................................................6
Basics: Exploring a Database ................................................................................ 9
Overview.........................................................................................................................9
Database basics...............................................................................................................9
Exploring an ExtendSim database..................................................................................10
Tutorial 1: Creating a Database ............................................................................ 15
Overview.........................................................................................................................15
A sample model ..............................................................................................................15
Create the database .........................................................................................................16
Dynamic data linking......................................................................................................19
Tutorial 2: Enhancing Your Database .................................................................. 25
Overview.........................................................................................................................25
Set a database cell to use a random number ...................................................................25
Create a Parent/Child relationship..................................................................................27
Use tabs to categorize tables...........................................................................................29
DB Line Chart block for viewing database data.............................................................30
Other blocks for use with the ExtendSim database ........................................................32
Tutorial 3: Data Exchange ..................................................................................... 35
Overview.........................................................................................................................35
The Data Import Export block for automating data exchange .......................................35
Read and Write blocks ....................................................................................................38
Reference ................................................................................................................. 45
Overview.........................................................................................................................45
Methods for exchanging data with an ExtendSim database ...........................................45
Indexes and data organization ........................................................................................45
Link alerts .......................................................................................................................47
Finding a number or a string...........................................................................................48
Fields with string data types; PRI and PRV....................................................................48
Databases ........................................................................................................................50
Tables ..............................................................................................................................54
Fields...............................................................................................................................57
Records ...........................................................................................................................59
Cells ................................................................................................................................60
Properties and other dialogs............................................................................................60
Read and Write blocks....................................................................................................67
Data Import Export block ...............................................................................................70
DB Line Chart block.......................................................................................................73
Equation-based blocks....................................................................................................77
Query Equation and Query Equation(I) blocks ..............................................................78
Excel Add-In...................................................................................................................85
Changes in the 3rd generation of ExtendSim databases.................................................92

ExtendSim Database
Tutorial & Reference
Introduction
Welcome!
Thank you for using ExtendSim, the power tool for simulation modeling! We hope you enjoy
using ExtendSim and that you find this document helpful.
About this document
The ability to create and use an internal relational database is an essential feature when build-
ing complex or data-intensive models. To enable this, the ExtendSim relational database is pro-
vided in, and fully integrated with, all ExtendSim products.
The purpose of this document is to get ExtendSim modelers knowledgeable about and familiar
with the ExtendSim Graphical Simulation Database.
This document assumes you already know how to launch ExtendSim and build a model. If not,
see one of the Quick Start Guides—Continuous Process, Discrete Event, or Discrete Rate.
Who should read this document
The ExtendSim Graphical Simulation Database (GSDB) is included in all ExtendSim products
and is the best method for managing model information. This document is for:
• All model builders. Whether you think you will use the ExtendSim database in your models
or not, you should at least read this introductory chapter. While it is entirely possible to cre-
ate models without using it, the ExtendSim database provides a robust foundation for build-
ing scalable models. So unless your models are particularly simple or data-sparse, you will
find the GSDB indispensable.
• Modelers who currently use the database. There’s always something new to learn (plus
there’s a section starting on page 92 that describes “Changes in the 3rd generation of Extend-
Sim databases”.
+ The ExtendSim database provides a foundation for building complex and scalable models.
Chapters in this reference
1) Introduction to databases (this chapter of the document):
* Definitions
* About the ExtendSim Graphical Simulation Database (GSDB)

2 Database Tutorial & Reference
Introduction to databases
* Databases and spreadsheets
* Where to get more information
2) Basic information: exploring an existing ExtendSim database
3) Tutorial 1: building a simple database and linking model elements to it
4) Tutorial 2: other aspects of using databases
5) Tutorial 3: reading/writing and importing/exporting database information
6) Reference: using ExtendSim databases and their components
Introduction to databases
Databases provide a well-organized mechanism for data storage and management. They are
indispensable for capturing, manipulating, and analyzing information.
Since simulation is typically used to model complex systems, most simulation modelers use
internal relational databases to store and manage information needed for and generated by the
model.
What is a database?
A database is a structured repository of information—a centralized collection of information
that is organized for convenient access, rapid search and retrieval, and efficient updating. To
facilitate the entry, storage, and retrieval of large quantities of information, databases have:
• Data definitions—the ability to create, modify, and remove the structures that define how the
information is organized
• Update and management features—to enable the insertion, modification, and deletion of the
actual information
• Retrieval features—so information is provided in a form that is directly available, usable,
and accessible from multiple locations
+ A database is used to store and report inputs, results, and everything in between.
How are databases configured?
In a database, information is organized into one or
more tables consisting of columns (called “fields”
in database lexicon) and rows (“records”).
For instance, the database table named Example
Data, shown at right, has 2 fields and 5 records.
Storing data in table format means that new infor-
mation and even new categories of information
can be added without the need for re-organizing
the tables. This allows information to be accessed or reassembled in a number of different
ways.
Relational databases
If a database is relational, the records in one field can be linked to the records in another field
(even a field in another table), establishing a relationship on the basis of the interactions
between them.

Introduction 3
The ExtendSim database
Due to their efficiency, ease of use, and ability to perform a variety of useful tasks, relational
databases are the dominant type of database for high performance applications such as simula-
tion applications.
Advantages of using a relational database for simulation
There are many advantages to using a relational database when simulating. For instance, to:
• Organize information in a logical fashion, either within one database or across several data-
bases.
• Separate the data from the model for scalability and for better project and experiment man-
agement.
• Provide a globally accessible repository of data that can be quickly read from and written to
during the simulation run.
• Gather, view, and manipulate data by product type, location, components, or any other com-
mon characteristic.
• Support decision-making during the simulation run, through the use of Link Alerts.
• Provide a centralized location for information that is used in several parts of a model, getting
easier access to different sets of data depending on model needs.
• Reuse common sets of data from one model to the next.
• Import model inputs from, or export results to, external applications.
While using a database to manage data is indispensable for large models, the user interface
makes it convenient to use an ExtendSim database even for small models.
The ExtendSim database
+ ExtendSim products include the ability to create and use ExtendSim databases.
What is the ExtendSim database?
The ExtendSim database is a relational database specifically designed to meet the needs of
simulation modelers. It allows multiple databases per model and (as discussed below) has
many advanced features to facilitate the entry, storage, and retrieval of information.
ExtendSim databases aren’t just repositories of data.
• They provide model builders with a systematic way to manage information for the model,
import information to the model from existing data repositories, and export model results to
other applications for presentation or further analysis.
• They provide model users with a centralized location for information that can be accessed
for use throughout a model without needing to be concerned about how or where the infor-
mation is stored.
• Most importantly, the ExtendSim database provides a robust foundation when building com-
plex and scalable models.
In addition to being used by model builders and users, the developers of ExtendSim use the
database to manage data for the Scenario Manager, Advanced Resource Management (ARM),
and Reports Manager. It is also the basis for other ExtendSim offerings, such as the Smart
Block feature that provides a list of potential blocks to connect to when you right-click on a
block’s connector.
4 Database Tutorial & Reference
The ExtendSim database
How is the database integrated with the model?
The ExtendSim database is fully integrated with the ExtendSim application. ExtendSim data-
bases are saved as part of the model and interface with the model through:
• Dynamic data linking between block components and database tables
• Link Alerts, which automate the updating of information in real time
• Fast read and write during the simulation run
Example ExtendSim database
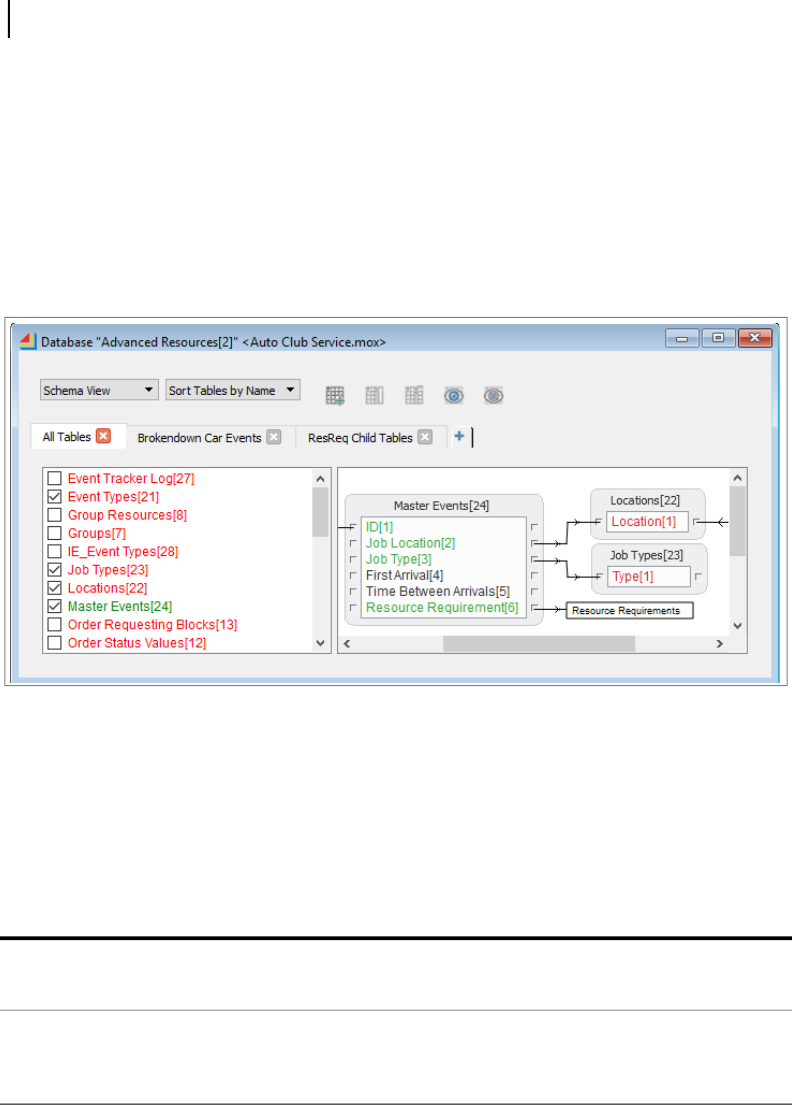
The screen shot below shows the structure (Schema) of a large ExtendSim database.
This database window is in Schema view. The database’s tables are listed on the left and the
structures for the selected tables, as well as parent (red) and child (green) relationships, are
shown on the right. The components of an ExtendSim database are discussed fully in the next
chapter.
ExtendSim database features
ExtendSim databases have several features that make them efficient and reliable components
of simulation models, including:
Feature Description Advantage
Implementation in
ExtendSim
Relational A field can be linked to another
field in the same table or to
fields in another table.
Supports normalized database
design and improves data
integrity.
Parent/Child relations.
Components
have a
unique key
Every database, table, field, and
record has an index. Cells have a
DBAddress composed of those
indexes.
Cells and other database com-
ponents can be individually
and separately addressed.
Read, Write, Data Import
Export, and equation
blocks can access infor-
mation using the keys.

Introduction 5
The ExtendSim database
Linked Parameters and data tables in
ExtendSim models are easily
linked to database cells and
tables.
Blocks can access any infor-
mation in a database; databases
can access block data.
Dynamic Data Linking
(DDL)
Name track-
ing
Automatically tracks database
indexes and alerts model com-
ponents if there is a change to a
linked database component.
Model components point to the
correct locations in the data-
base even if structural changes
have been made.
All blocks that interface
with the database (Read,
Write, Data Import
Export, Equation, etc).
Integrated The database is part of the
ExtendSim application. Data-
base structure and information is
easily accessible and is saved
with the model.
The database was developed
specifically for use with simu-
lation models.
Read/Write access between the
model and the database is fully
supported.
Database structure and infor-
mation is retained with the
model and can’t be lost.
Simple access through
the user interface (menu
and right-click com-
mands) or ExtendSim
IDE (integrated develop-
ment environment).
Automated
real time
updating of
information
A model’s linked parameters
and data tables receive notifica-
tions whenever information
changes in the database, and
vice versa, even during the run.
As soon as the information at
the source changes, the target
is dynamically notified and can
take the appropriate actions to
react to the new value.
Link Alerts and the Link
Alert block (Utilities
library)
Scalable Models can have 2 billion data-
bases, 2 billion tables per data-
base, 1,000 fields per table, and
2 billion records per table.
No imposed upper limit on the
amount of information that can
be stored or how complicated
queries can be.
Database size is limited
only by the computer’s
memory.
Resides in
memory
Database structure and informa-
tion are stored in memory.
Much faster response times
and performance than using an
external application.
Integrated with the appli-
cation.
Querying Searching the database and
retrieval of specific information.
You can query for information
during the run.
Query Equation blocks,
equation-based blocks,
and other blocks. Also
through ExtendSim API
which has many data-
base-related functions.
Connectivity Database information can be
imported from and exported to
external data sources including
Excel workbooks, ODBC and
ADO compatible databases, and
FTP and text files.
Allows analysts who don’t
have ExtendSim to use Excel
or other tools to configure the
structure and contents of an
ExtendSim database.
ExtendSim DB Add-In
for Excel, Line Chart
DB, Read/Write and Data
Import Export blocks,
and technologies such as
OLE/COM, ODBC,
ADO and more.
Feature Description Advantage
Implementation in
ExtendSim

6 Database Tutorial & Reference
Using spreadsheets and databases
Using spreadsheets and databases
Spreadsheets are ubiquitous and most businesses use them extensively. They are easy to use,
have many great features for displaying and analyzing information, and are extremely useful
for simulation modeling.
While not as well known as spreadsheets, databases are ideal for storing large amounts of
information that will be subject to the high-speed queries and changes that occur during a sim-
ulation run. Like spreadsheets, databases are very useful for simulation modeling.
+ ExtendSim has extensive capabilities for interfacing with spreadsheets, as discussed in the User
Reference. Also, it is common that a model would use both spreadsheets and databases.
When to use a database
Consider using a database for your model when:
• There is a lot of information, or the information is complex or messy.
• You want a centralized source of information for a model and reducing redundancy is
important.
• Your model needs to have its information updated whenever the source information changes.
Or vice versa, you want the database component to update whenever model information
changes.
• The information would otherwise be stored in one very large spreadsheet or in multiple
cross-referenced worksheets.
Where to get more information
The ExtendSim documentation, example models, and the video files and documents on the
ExtendSim.com website provide comprehensive help.
User Reference
To learn about other ways that information is handled in ExtendSim, see the User Reference’s
chapter on Data Management. That chapter discusses a variety of standards-based options for
managing and sharing information internally to ExtendSim and exchanging information
between ExtendSim and other applications:
• Data import/export and read/write
• Global arrays and dynamic arrays
• Linked lists
• Standard communication technologies, such as ActiveX/COM/OLE, ODBC, ADO, DLLs
and Shared Libraries, Mailslots, and FTP
Technical Reference
In most cases modelers will use the user interface to create ExtendSim databases and link
model data with database information using ExtendSim blocks. However, the Technical Refer-
ence lists many functions that can be used to create, read, write, import, export, and delete
databases and their components as well as programmatically establish links to the data.
Note that in addition to the programming interface and dialog editor, the ExtendSim integrated
development environment (IDE) gives programmers access to sophisticated tools such as
include files, a code editor, conditional compilation, a source code debugger, code completion,
and external source code capabilities.

Introduction 7
Where to get more information
+ To access these eBooks, see the Documents/ExtendSim/Documentation/folder or launch the
books from the Getting Started “Quick Start” model that opens when ExtendSim launches. The
User Reference and Technical Reference are also available if you select the Help menu when
using ExtendSim.
Example models and videos show you how
ExtendSim includes numerous tutorial models as well as videos and example models that
explain concepts discussed in the User Reference. For example models, see the Documents/
ExtendSim/Examples folder. For videos, see the ExtendSim website.

8 Database Tutorial & Reference
Where to get more information

ExtendSim Database
Tutorial & Reference
Basics: Exploring a Database
Overview
This chapter discusses database terminology and describes database components while explor-
ing an ExtendSim database.
Database basics
Before you open an ExtendSim database, it is helpful to understand the terminology.
Columns and rows/fields and records
While it is common in spreadsheets to refer to columns and rows, the equivalents in a database
are called fields and records. The following table gives information on both of them from the
perspective of how their data is organized.
Tables, fields, and records
As with all relational databases, an ExtendSim database is composed of tables which have
fields, records, and cells.
• Tables represent one entity type (for example, customers, products, or processes). A table is
the set of fields and records. Tables can be thought of as being similar to spreadsheet work-
sheets.
• Each field specifies an attribute or characteristic of that entity (for example, the last name of
a customer, the shipping weight of a product, or a step in a process). Fields are named (First
name, Last name, Company...). When looking at a table’s Data view, fields are the vertical
component, similar to columns in a spreadsheet.
• A record is the set of information that represents the single item (customer Sophia Lee at
Oracle, 400 units of Widget A each weighing 1.5 pounds, a Lathing process that takes 3 min-
utes to setup...). Records have numbers rather than names. When looking at a table’s Data

10 Database Tutorial & Reference
Exploring an ExtendSim database
view, records are the horizontal component, similar to rows in a spreadsheet. (Records are
also sometimes called tuples, but ExtendSim uses the more common term records.)
• Cells represent one piece of information about the item. Each cell is the intersection of one
field and one record. And not to be confusing, but a cell in a database is the equivalent of
what is called a field in a spreadsheet.
+ Depending on the field type, a cell can hold numbers or strings, Boolean checkboxes (Yes or
No), a DBAddress, or even a list of tables. So the word “information” can mean any of those.
Example
For example, a database might be composed of one or more of the following components:
Exploring an ExtendSim database
This section uses a copy of the Reservoir 1 model to discuss databases and their components.
Open the example model
Launch ExtendSim
Open the Reservoir 1 model located at Documents/ExtendSim/Examples/Tutorials/Contin-
uous.
This model represents a reservoir that gets water from two sources during the year—rainfall
and a stream.The estimated effect of rainfall on the reservoir’s level is based on historical
records. The stream’s contribution to the reservoir level is determined by a random distribution
with a minimum of 0 and a maximum of 1 inch of water per month.
Open the model’s database
Go to the Database menu and, at the bottom of the menu, select the Example DB database
This opens the database window, shown below, for that database. By default, the window
opens in Schema view.
The database window
The database window is where databases are created and configured.
Table Fields Records Cells
Customers
First Name
Last Name
Company
1 to 10
Cells for the “First Name” field:
Sofia, Noah, Zeynep, Benjamin,
Seoyeon, Lucas, Louise, Bence,
Junior, Olivia
Products
Product Name
Shipping Weight (pounds)
Inventory Level (units)
1 to 3
Cells for the “Shipping Weight” field:
1.5, 0.4, 3.9
Process steps
Step
Setup Time (minutes)
Operator
1 to 3
Cells for the “Step” field: Lathe,
Drill, Press
Resources
Item
Capacity (gallons)
Pressurized?
1 to 2
Cells for the “Pressurized?” field:
Yes, No

Basics: Exploring a Database 11
Exploring an ExtendSim database
A database window:
• Has in its title bar:
* The word “Database” followed by the name of the database.
* The database’s index, in this case “1”, in square brackets following its name.
* The name of the model the database is attached to, in angle brackets.
• Provides a popup menu for viewing either the structure (Schema) of the database or its infor-
mation (Data).
• Has a button for sorting database tables by name or by index number.
• Has toolbar buttons for performing common tasks, such as adding a table
• Has an All Tables tab and other tabs that display:
* A list of tables on the left of the window (Table List pane)
* The structure of the selected tables (showing their fields and relationships, if any) in a
Tables pane on the right
By default, the All Tables tab is presented in front and lists all the tables in the database; other
tabs can be added.
+ Every database, table, field, and record has an index number (a unique key for identification)
and each cell has a DBAddress that is the combination of those indexes. These are unique to
that component sequence and are used for referring to databases and their components in equa-
tions or ModL code. More information is at “Indexes and data organization” on page 45.
Explore the Schema view
By default the database window opens in Schema view. This view shows the physical structure
of a database, with all its tables and fields. It is also where parent/child relationships are estab-
lished.
Toolbar buttons
Schema view has 6 buttons in its toolbar. They are used to add a table to the database, append
or insert a field into a table, and show, hide, or reposition the tables in the Tables pane.

12 Database Tutorial & Reference
Exploring an ExtendSim database
Tables
As seen in the All Tables tab, this database
has four tables:
1) Stream Amount (with one field—Max
Volume)
2) Rainfall Amount (with two fields—
Month and Rainfall)
3) Stream Volumes (with one field—Vol-
ume)
4) Contents (with two fields—Month and Amount)
The numbers in brackets after the table and field names are their indexes. Tables can be sorted
in the All Tables tab by index or by name.
Each field in a table has connector points on its left and right sides. As will be shown later,
these are used to establish parent/child relationships between fields.
+ Only tables that are checked in the Tables List pane will be shown in the Tables pane on the
right.
Explore the Data view
In the database window, change the popup menu from Schema View to Data View
In Data view, the database window’ shows the fields, records, and cells for the table selected
on the left. This is also where you enter data for the table and can sort a table’s data.
Stream Amount table
In the Table List pane at the left, select the table
named Stream Amount.
+ If the font size is too small, use the Zoom In button in
the ExtendSim toolbar to increase it. As long as Auto
Resize Column is not selected, fields can be resized
manually; this is discussed on page 58.
In Data view, selecting the Stream Amount table causes its field (Max Volume), record (1), and
data (4.00) to be displayed in the Data pane, which is to the right of the Table List pane.
Toolbar buttons
Data view has 6 buttons in its toolbar. They are used to append or insert a record into a field,
delete records, make a cell random or remove randomness, and sort data in the selected table.

Basics: Exploring a Database 13
Exploring an ExtendSim database
Open and explore the Table Viewer
The Table Viewer is a separate window for
each table, displaying the same information
and toolbar buttons as shown in Data view
mode of the database window.
+ The Table Viewer is especially helpful when
your model has multiple tables and you want
to see the data view of each table separately,
or see a table’s data view at the same time as
the database structure.
To open a table’s Table Viewer, do one of the
following:
Double-click the table’s name in the list of tables
Or, in Schema view, double-click the table’s title bar in the Tables pane of the database win-
dow
Either method opens that table’s Table Viewer, showing its fields (columns) and records (rows)
with their data. You can have multiple Table Viewers open at the same time.
Toolbar buttons
The Table Viewer has the same toolbar buttons as the database window in Data view plus a
button for opening the database window so you can see the Schema view separate from the
table.
Summary

14 Database Tutorial & Reference
Exploring an ExtendSim database

ExtendSim Database
Tutorial & Reference
Tutorial 1: Creating a Database
Overview
This chapter shows how to use menu commands to build a simple ExtendSim database, shown
below. The tutorial will also show how to dynamically link between the model and a database,
by adding a two-way link between a model parameter and a database table and a one-way link
between a block’s data table and a database table..
The database built in this chapter will be similar to the one seen in the previous chapter, except
it will have only one table.
A sample model
+ The ExtendSim database feature is included in all ExtendSim products. Since every ExtendSim
product has continuous modeling capabilities, this tutorial creates a database for a continuous
model. And while a database is obviously unnecessary for the Reservoir model, the purpose of
the example is to show how to create and use an internal relational database.
Open the model Reservoir 1 from the Documents/ExtendSim/Examples/Tutorials/Continu-
ous folder.
So that you don’t overwrite the original file, Save the model as Reservoir Tutorial.
The reservoir model has two sources of water flowing into it: rainfall and a stream.
• The amount of rainfall is based on historic averages and varies with the month, as shown in
the data table in the dialog of the block labeled Rainfall (a Lookup Table block).

16 Database Tutorial & Reference
Create the database
• The block labeled Stream (a Random Number block) contributes an amount that is calcu-
lated using a Uniform Real random distribution, with a minimum of 0 inches per month and
a maximum of 1 inch.
Through the tutorials you will link the maximum parameter in the Stream block and the data
table in the Rainfall block to a cell and a table, respectively, in an ExtendSim database.
For expediency, this tutorial adds a database to an existing model. However, it is more com-
mon for a modeler to create the database before building the model. This is best practice
because arranging database tables for the expected inputs and outputs helps with developing
the model.
Create the database
The following example creates a database through the user interface—menu and right-click
commands.
+ As discussed on page 50 there are other ways to create a database but this is the most common.
Assumption
The database you create will have one table, one field, and one record, as shown below.
Create a new database and name it
With the Reservoir Tutorial model
worksheet active, choose the com-
mand Database > New Database.
The New Database dialog opens.
As seen here, the model already has
a database named Example DB.
However, you are creating a sec-
ond database for this model. Name
the new database Reservoir DB.
Click Create New Database. This opens the database window for the Reservoir DB data-
base.
+ The database’s name can be anything you want as long as it does not start with an underscore
(_), is not used by another database in that model, and does not exceed 63 characters. Database
names are not case sensitive and can contain spaces.
The database window
The database win-
dow is where you
create database
tables, add fields to
the tables, and so
forth. The win-
dow’s title bar dis-
Database Name Table Name Field Names # of Records Links To
Reservoir DB Stream Amount Max Vol-
ume
1 “Maximum” parameter in the dialog of
the Stream (Random Number) block

Tutorial 1: Creating a Database 17
Create the database
plays the name of the database and its associated model. The number 2 after the database’s
name indicates it was the second database added to this model.
The database window has two views, Schema and Data. By default, the window opens in
Schema view, as shown here. The Schema view is the graphical depiction of the database’s
structure. This is where the database is logically configured with tables and fields and where
relationships between fields are defined. The Data view is for adding and configuring records
and data.
Save the model
Save the model (you can leave the database window open)
Notice that Reservoir DB is now listed at the bottom of the Database menu
+ Databases are stored with the model. Saving a model also saves the model’s databases.
Add a table
Each table represents one entity type. In this case, the table will represent the maximum vol-
ume of water flowing in the stream.
Methods for adding a table
With the database window active and in Schema view, create a database table using one of
the following methods:
Give the command Database > New
Table.
Or, right-click on the database win-
dow’s Table pane (on the right) and
choose New Table.
Or, click the New Table button in the
database window’s toolbar.
The Create New Table dialog opens with a popup list of existing tables (if any) and a field for
naming the new table.
+ If there are tables in the list of existing tables, you can select one of them and that name will
appear as the New table name. Then append characters or otherwise change the name to create
a unique name for your new table.
Name the table
This table will hold the maximum volume of water that the stream contributes to the reservoir.
Name the table Stream Amount.
Leave the options as is and click the Create New Table button. This closes the dialog and
adds the table to the database.
The new table is placed in the All Tables tab of the
database window. As shown here, names of the
database’s tables are listed in the Table List pane at
the left and a physical view of the tables (the data-
base structure) is shown in the Tables pane on the right.

18 Database Tutorial & Reference
Create the database
Add a field to the table
The next step is to add a field to the Stream Amount table. Fields are characteristics of the
entity that the table represents; in this case, the maximum volume settings for the stream.
Methods for adding a field
Create a field for the table using one of the following methods:
Select the table name (Stream Amount) in the Table List pane and give the command
Database > Append New Field.
Or, right click the table’s name and choose Append New Field.
Or, select the table’s name and click the Append New Field button in the database’s
toolbar.
Name the field
In the Append New Field dialog (a por-
tion of which is shown at right):
Name the field Max Volume.
Leave the default choices as they are.
Since you only want one field, click
the Save Field button to finish.
+ Fields are formatted when created using the Append New Field or Insert New field dialogs.
Their formatting can be changed using the Edit Field Properties dialog. See “Field Properties
dialog” on page 61 for more information.
Add a record to the table
The record will hold the data for the maximum stream volume. Records are numbered, not
named.
Where to add records
Records can be added to a database table either in the database window or by opening the
table’s Table Viewer:
• To use the database window to add a record, change its
popup menu from Schema View to Data View.
• To use the Table Viewer, double-click the table’s
name (Stream Amount) in the Table List pane on
the left or, in Schema view, double-click the
table’s title bar in the Tables pane on the right. The
Table Viewer is shown at right.
Note that the Table Viewer has the same buttons as
the database window in Data View plus an additional
button for opening the database window in Schema
View, so you can see the database structure along
with the table structure.
Change to the Data view to add a record
This tutorial adds records using the database window in Data View mode:

Tutorial 1: Creating a Database 19
Dynamic data linking
In the database window’s popup menu, change the database window from Schema to Data
view.
Select the table’s name (Stream Amount) in the Table List pane on the left.
Methods for adding a record
Create a record for the table using one of the following methods:
Right-click the field’s name (Max Volume) and select Append New Record
Or, click the Append New Records button in the Data
view’s toolbar
Or, give the command Database > Append New
Records
Since you only want one record, in the Append Records dia-
log enter 1 for the number of records and click OK.
The field and record should look like the screen shot at the right.
Enter a value for the cell
In your Reservoir Tutorial model the dialog of the Stream block has a
value of 1 as the maximum number of inches of monthly rainfall. For this
tutorial, you will set the maximum to 4.
There is now one cell in the database, the intersection of the Max Volume field and record #1.
Click on the cell and enter the number 4.
Close the database window and save the model to save your work.
+ By default the values in cells are constants. While it wasn’t done for this example, you can set a
cell to use a random or empirical distribution. See “Set a database cell to use a random num-
ber” on page 25 for more information.
Dynamic data linking
Databases are used to store data for use in the model or to store model outputs before, after,
and during a simulation run. A model can exchange information with a database by any of
these methods:
• Dynamically linking a parameter or data table to the database
• Accessing database cells using specialized blocks (e.g. equation-based, Data Import Export,
Read, or Write blocks)
• Through ModL programming.
+ This section focuses on using dynamic data linking as a method for exchanging data. The other
methods (e.g. data access and equation-based blocks) for exchanging information are dis-
cussed on page 45 and shown in Tutorial 2.
Dynamic data linking (DDL) is the proprietary method ExtendSim uses for creating live links
between a model and an ExtendSim internal data structure. This application-level protocol
tracks which dialog items (model parameters and data tables, including their clones) are linked
to which internal data structures (ExtendSim database tables, global arrays, and dynamic
arrays).

20 Database Tutorial & Reference
Dynamic data linking
Dynamic data links are extremely powerful because they are live and bidirectional. This means
that the value of a linked dialog item can change immediately when the value of the data
source changes, and vice versa.
The same features that make dynamic linking so powerful mean it should be used judiciously.
Avoid overloading models with dynamic links to data sources that get frequently updated; it
could slow simulation performance as messages are sent to linked blocks every time their data
source is modified. For alternatives such as using the Read, Write, and Data Import Export
blocks, see “Read and Write blocks” on page 67.
Link a dialog parameter to a database table
Unless it is already linked for sensitivity analysis, a dialog parameter can be dynamically
linked to a specific cell of an ExtendSim database. Parameter fields that are dynamically linked
to a database are outlined in light blue.
+ Parameter fields are outlined in green for active sensitivity analysis and red for inactive sensitiv-
ity analysis; sensitivity analysis is discussed in the User Reference.
Overview
For this example, you will link the Maximum parameter from the Stream (Random Number)
block’s dialog to a cell in a database. This allows you to use the database, rather than the dialog
parameter, to control the maximum amount of water coming from the stream.
Database Name Table Name Field Names # of Records Links To
Reservoir DB Stream Amount Max Volume 1 “Maximum” parameter in the dia-
log of the Stream (Random Num-
ber) block

Tutorial 1: Creating a Database 21
Dynamic data linking
Create the link
In your Reservoir Tutorial model,
open the dialog of the Random
Number block (labeled Stream).
Right-click in the Maximum
parameter field (currently set to 1)
and select Create/Edit Dynamic
Link. (Note: don’t select or left-
click the parameter field first.)
In the Link dialog that appears,
select the Database tab at the top
of the dialog, as shown at right.
In the Select a Database popup,
choose Reservoir DB (the data-
base you created earlier) and click
Select Database. This causes the
table (Stream Amount), field (Max
Volume), and record (#1) for that
database to be displayed in the
Link dialog.
+ The Stream Amount table only has one
field, Max Volume. If the database
table had multiple fields, you would
choose the field in the Field Name popup.
There are two databases in this model. Be sure to choose Reservoir DB, not Examples DB.
Configure the link
In the Link dialog:
Leave the checkboxes as they are; they are explained at “Link dialog” on page 65.
Click the Link button; this establishes the dynamic link and closes the Link dialog.
Save the model.
Results
In the dialog of the Random Number block (labeled Stream)
the Maximum parameter will now be 4 and the parameter field
will be outlined in light blue, indicating that it is linked to an
internal data structure (ExtendSim database or global array).
Due to the ExtendSim link alerts (discussed on page 47), and since this is a two-way live link,
the Maximum parameter field will get immediately updated every time a change is made in the
database and vice versa. (To cause the database, but not the dialog, to have control over the
parameter, you would choose Read-Only Link in the Link dialog, as discussed in “Configure
and create the link” on page 22.)
+ Hovering over a linked parameter displays the linking information.

22 Database Tutorial & Reference
Dynamic data linking
Link a block’s data table to a database table
Since you already know how to create a database and its components, this example uses a pre-
built database named Example DB and its existing tables, rather than the Reservoir DB you
built earlier.
This section shows how to link from a block’s data table to a database table. The data table
contains monthly rainfall information covering a period of 3 years. The database table it will
link to is in the database named “Example DB”.
+ This section focuses on dynamically linking between a block’s data table and an ExtendSim
database table. Tutorial 3 shows how the data in the database was obtained from Excel.
Creating the link
If the Reservoir Tutorial model you
saved in the previous chapter isn’t
already open, open it.
Open the dialog of the Lookup Table
block labeled Rainfall.
Click the Link button that is in the
bottom left corner of the Months/
Rain data table. A Link dialog
appears, as shown here.
In the Link dialog:
Select the Database tab at the
top of the dialog
From the popup menu, choose
the Example DB and click
Select Database
From the list of table names,
select the Rainfall Amount
table as shown here
Configure and create the link
In the Link dialog:
Check the “Read-only link”
box. This configures the block’s data table to be read-only, so that the value can only be
changed through the database.
Leave the other checkboxes as they are; they are explained at “Link dialog” on page 65.
Click the Link button. This links the data table in the block’s dialog to the database table
named Rainfall Amount.
Database Name Table Name Field Names # of Records Links To
Example DB Rainfall Amount
Month
Rainfall
1-37
Data table in the dialog of the Rain-
fall (Lookup Table) block

Tutorial 1: Creating a Database 23
Dynamic data linking
The dialog of the Lookup Table (Rainfall) block
In the dialog of the Lookup Table block (labeled Rainfall) the initials DB appear in a blue rect-
angle in the upper left corner of the data table. This indicates that the data table is linked to an
ExtendSim database. Double-clicking those DB initials opens the database window in Data
view, so you can see the database table’s fields and records.
Since the database has three months worth of data, the data table it’s linked to now also has
three months of data. You want to be sure the Lookup Table block uses all the data from the
database, and not just the first 12 values.
Uncheck the box in the Lookup Table block’s dia-
log that causes the table to repeat every 12 months
Save the model to save your work.
Results
Due to the ExtendSim link alerts (discussed on page 47), the block’s data table will get updated
every time a change is made in the database. Since it is set to be Read-Only, the block’s data
table cannot be changed through the dialog; it can only be changed through the database.
Because dialog data tables are zero-based, but databases are one-based, a data table’s cell at
row 0, column 0 (the top, leftmost cell) is linked to the database table cell at field 1, record 1
(the top, leftmost cell).
Change a link to point to a different database table
In the previous section you linked the Maximum parameter from the Stream (Random Num-
ber) block’s dialog to a table in the Reservoir DB database. There are times when you might
want to change a link so that a parameter or data table exchanges data with a different table in
the same database or even a table in a different database.
This section shows how to change a parameter link so that it goes to a table in different data-
base—Example DB.
+ A model can’t have two databases with exactly the same name. However, as seen in this exam-
ple, one database’s tables, fields, and records can have the same names as are used by a differ-
ent database.
If your Reservoir Tutorial model isn’t already open, open it.
Open the dialog of the block labeled Stream. As indicated by its blue border, the parameter
field for Maximum is already linked to a database table.
Right-click in the Maximum parameter field (or go to the Model menu) and select Create/
Edit Dynamic Link.
Database Name Table Name Field Names # of Records Links To
Example DB Stream Amount Max Volume 1 “Maximum” parameter in the dialog of
the Stream (Random Number) block

24 Database Tutorial & Reference
Dynamic data linking
In the Link dialog that appears,
change the selected database from
Reservoir DB to Example DB,
then click Select Database.
From the list of Table Names,
select the Stream Amount table.
In the box at the bottom, select the
Max Volume field and click Link.
Save the model to save your
changes.
This changes the link from the Max
Volume field in the Reservoir DB
database to the Max Volume field in
the Example DB database.
+ Similarly, to change a linked data table,
click its Link button to open the Link
dialog and select a new database table.

ExtendSim Database
Tutorial & Reference
Tutorial 2: Enhancing Your Database
Overview
This chapter shows how to do more with an ExtendSim database, such as assign random values
to a cell, create a parent/child relationship, and use the DB Line Chart block. It also mentions
blocks that are helpful when using the ExtendSim database.
Set a database cell to use a random number
A field’s cells take on the formatting assigned to the field through the New Field or Field Prop-
erties dialog. While the numbers in the cells are constants by default, individual cells can be
customized to use random distributions.
For simplicity, and so you don’t have to build new database tables, this example uses an exist-
ing database (Example DB) and its components.
Formatting cells
The tutorial titled “Create the database” on page 16 showed how to create a field using the
default format options in the New Field dialog. That dialog’s options, discussed more on
page 61, allow you to specify a field type, set the number of decimals to display, and more.
Whichever options are selected for the field are also assigned to its cells. And by default, all
the cells for a field are formatted as constants. Instead of a constant value, you might want a
cell’s value to be a random number.
Making a cell random
To cause a cell to use a random or empirical distribution:
Open the Example DB database from the Database menu
In its database window, select Data view
Database Name Table Name Field Name Record #
Example DB Rainfall Amount Rainfall 2

26 Database Tutorial & Reference
Set a database cell to use a random number
In the Table List pane, select the Rainfall Amount table
In the Rainfall field, select record #2 (value = 4.40)
Either give the right-click or Database command Make
Cell Random, or click the Make Cell Random button in the
toolbar
In the Database Random Distribution window that
appears, for the Distribution Parameters choose:
Distribution: Normal
Mean = 4
Std Dev = 0.25
Location = 0
At the top of the dialog, click Submit to Cell
Save the model to save your changes
This creates a randomized value for that month’s
amount of rainfall. The setting will be shown in that
cell of the database table (on the left side of the
screen shot shown here) as well as in the Rainfall
block’s data table (on the right side of the screen
shot).
+ Depending on how you make the selection, you can
randomize one cell, several, or an entire field.
As discussed below, a distribution selection and settings can be saved as a named distribution.
Creating a named distribution
Distributions can be assigned a name and saved for use throughout the database. You can cre-
ate a named distribution as you randomize a cell or afterwards.
To save the distribution you created above as a named distribution:
Go to the database window for the Example DB database and select Data view. Alterna-
tively, open the Table Viewer for the Rainfall Amount table.
To reopen the popup, select the database cell you randomized above and choose to Make
Cell Random using the right-click or Database menu command or the Make Cell Random
button in the toolbar.
In the Database Random Distribution dialog that
appears, choose Save to Named Distribution from the
popup menu at the top of the window
In the Save to Named Distribution dialog that appears,
name the distribution My Distribution
Click Save to close the dialog
In the Database Random Distribution dialog, click Submit to Cell
Save the model to save your work

Tutorial 2: Enhancing Your Database 27
Create a Parent/Child relationship
That cell in the Rainfall Amount table and the corresponding
field in the Rainfall block’s data table now indicate the distri-
bution is a named distribution.
Create a Parent/Child relationship
Establishing a parent/child relationship between database fields is optional but powerful. It is
useful for many situations, such as providing a list of components for a specific product, a
selection of custom colors for a particular model of car, or the properties of a material.
Having a parent/child relationship limits the child field’s set of data to what is present in a des-
ignated parent field. Instead of entering data directly into the child field, you select the data
from a popup data selector in the child field that shows all the possible values present in the
parent field.
Relationships are established between fields, so you can even have one field in a table be
related to another field in the same table.
+ Parent fields have their names in red text and database tables that have parent fields are listed in
the database window in red text. Child field names are in green text and tables that have child
fields but no parent fields are listed in green text.
Assumptions
The following example creates a parent/child relationship, causing a field in one database table
to get its values from a field in a different table.
As with the previous example, this example uses an existing database (Example DB) and its
components.
Create a parent/child relationship
Open the Reservoir Tutorial model you created in the previous chapter.
Go to the Database menu and select the Example DB. This opens its database window.
Go to Schema view
and, if they aren’t
already checked,
check the boxes in
the All Tables tab so
that the Stream
Amount and Stream Volumes tables are visible in the Tables pane
Use point and click to draw a line from a connector point for the Max Volume field (the
child) in the Stream Amount table to a connector point for the Volume field (the parent) in
the Stream Volumes table. In other words, from the child to the parent.
Since the child field has existing data (4.00), the Parent/Child Relationship dialog opens with
options for how the data in the child field should be handled. In this case, you want to clear the
data from the child field so that all data comes from the parent field.
Database
Table Name
Child Field
# of Records in Field
Table Name
Parent Field
# of Records in Field
Example DB Stream Amount
Max Volume 1
Stream Volumes
Volume 4

28 Database Tutorial & Reference
Create a Parent/Child relationship
In the Parent/Child Relationship dialog,
choose that the data is cleared from the
child field as shown here.
Click Set Relationship.
+ The Relationship dialog is discussed more at
page 64.
This establishes the Volume field (Stream
Volumes table) as the parent to the child
field Max Volume (Stream Amount
table). As shown here, the names of par-
ent fields are in red text; the names of
child fields that aren’t also parents are in green text.
When establishing a parent/child relationship, always draw the line from the child to the par-
ent, so the arrow points to the source of the data.
Select data for the parameter field
To select which record from the parent table that the Stream block will have as its Maximum
amount:
In Schema view, double-click the header for the Stream Amount
table to open the Table Viewer. (Or, switch the database window
to Data view and select Stream Amount in the Table List pane at
the left.)
For record #1, double-click the triangle on the right of the popup
to expose the Child popup options coming from the parent field.
In the selector, chose the value 1.75.
Close the window and save the model to save your work.
The child cell for record 1 of the Max Volume field in the Stream
Amount table is now set to 1.75. It gets that value from the parent
field in the Stream Volumes table. If the parent value changes, the child value will change (but
not vice versa).
Note that whichever amount is selected in the child field is now
shown as the Maximum value in the dialog of the Stream block,
as shown here.
+ In the Stream block’s dialog, you can change the Maximum parameter from the choice made in
the database’s client field but only to one of the 4 values in the parent field. Entering any other
number would result in an error message.
Dealing with strings in child fields
Database fields are often formatted as strings. On the other hand, a model’s block connectors,
dialog parameters, and attributes require numbers to perform calculations.
If a child field is linked using DDL to a model’s parameter field (as was done above) or data
table, and the child field is a numeric data type, the link is simply created. However, if the child
field is a string data type, ExtendSim automatically handles the translation between string and
number using the Parent Record Index (PRI) “behind the scenes” as discussed on page 48.

Tutorial 2: Enhancing Your Database 29
Use tabs to categorize tables
However, the translation must be handled explicitly if you:
• Use a block that reads or writes to an ExtendSim database, rather than use dynamically link-
ing
• And, one or more of the linked database fields is a child field
• And, the field is of type “string”
In this case the translations is accomplished using the Parent Record Index (PRI). For more
information, see “Fields with string data types; PRI and PRV” on page 48.
Use tabs to categorize tables
A database window’s All Tables tab will always list all of the database’s tables. This works
fine since there are only 3 tables in the Example DB database. However, if a database has a lot
of tables you might want to organize them onto different tabs. You do this by cloning the tables
from the All Tables tab to tabs that you add.
As discussed in the Quick Start guides, clones are exact copies of parameter fields, text, tables,
or graphs. Similar to a shortcut or alias, clones behave identically to the original. While you
can’t move a database table from the All Tables tab, you can clone the table onto another tab or
tabs you designate. The table remains listed on the All Tables tab and its clone is displayed on
some other tab.
Clone a table to a new tab
To add a tab to the database window and clone a table to that tab:
Go to the Database menu and select the Example DB. This opens its database window.
In the database window (Schema view), click on the plus sign to the right of the name All
Tables; this opens a dialog for naming the new tab.
Name the new tab Rainfall.
With the database window in Schema view, select the name of the Rainfall Amount table in
the Table List pane on the left or select the Rainfall Amount table in the Tables pane on the
right.
Give the command Database > Clone
Selected Tables to Tab. (If you’ve selected
the table in the Tables pane, you can right-
click and give that command.)
In the dialog that appears, select the Rain-
fall tab to clone the table to.
+ A database table can be cloned to multiple tabs.
Any changes made to a table on one tab will be reflected in that table’s original and clones on
all the other tabs.
Remove a cloned table from a tab
To remove a table from a tab:
Select the table and give the command Edit > Clear Selected Tables or click the Delete or
Backspace key.
The Delete Tables from Tab dialog
opens with the choices shown here.

30 Database Tutorial & Reference
DB Line Chart block for viewing database data
Click Remove from Tab
DB Line Chart block for viewing database data
The DB Line Chart block (Chart library) displays database data as a graph and reports that data
in a table. You use the DB Line Chart block (Chart library) to:
• View data stored in one or more ExtendSim databases
• Monitor what happens to a database cell’s value during a simulation run
• Compare sets of database data to each other— compare a cell, a record in a table, or a data-
base table to another cell, record, or table respectively
Instead of reading values from input connectors as most of the chart blocks do, this block dis-
plays values from an existing ExtendSim database. It is shown below and discussed in detail
starting on page 73.
+ The DB Line Chart block is the best method for viewing a cell’s data history.
Using the block in a model
The following example uses the DB Line Chart block in a continuous model. It can also be
used in a discrete event or discrete rate model. In any case, the model must have an ExtendSim
database.
Add the block to the model
Open the Reservoir Tutorial model you created in the previous chapter.
Place a DB Line Chart block (Chart library) anywhere on the model worksheet
+ Since the DB Line Chart block gets its information directly from the model’s ExtendSim data-
bases, it is not connected to other blocks and can be placed anywhere on the model worksheet.
Choose settings for the graph
The traces and graph for the DB Line Chart block can be customized in numerous ways, as
explained in the User Reference. For this example, just set a few simple conditions.
Double-click the DB Line Chart block’s icon to open it. By default, the Graph tab opens in
front.
In the Graph tab:
Right-click on the graph to bring up the Graph Properties dialog
For the X value, change the name to Month and enter 6 for
the intervals
For the Y value, change the name to Rainfall (Inches) and
enter 7 for the intervals
Close the Graph Properties dialog
Go to the Dialog tab, on the left side of the graph
Select the Display tab at the top of the Dialog tab:
Choose Graph: opens at end of simulation
Choose Autoscale: at end of simulation
Now, at the top of the Dialog tab, select the Data Collection tab

Tutorial 2: Enhancing Your Database 31
DB Line Chart block for viewing database data
Choose the data collection options
The next step is to choose what type of information should be reported, what should be plotted
(a cell, a field, or a table), and when the data should be collected. This example will look at
rainfall by month, so the DB Line Chart block should look at fields.
In the section of the dialog for Data collection type:
Select the data source as one field per trace
Choose Data Collection: at end of simulation
Select the data source
For this example, you will trace two fields in the Rainfall Amount table of the Example DB
database.
In the Data collection options section of the Data Collection tab:
For the database, choose Exam-
ple DB
For the table, choose Rainfall
Amount
For the time field, choose Month
In the Trace Name table, select
Rainfall as the name in the Field
column
Click OK to close the DB Line Chart’s dialog
Save the model to save your settings
Run the simulation
When the simulation ends, the DB Line Chart’s graph is
displayed. Since the example was simple by design, the
DB Line Chart block reports and displays the same Rain-
fall information as seen in the Line Chart block.
Other information
Some other features of the DB Line Chart block to note:
• You don’t need to run a simulation to use the DB Line
Chart block. It is also useful when you just want to
visualize and compare sets of data within a database or
between one database and another. After selecting the data sources and options, use the Plot
Now button in the Data Collection tab to graph the data. (Note that this option is not avail-
able if you are graphing one cell per trace.)
• If you choose “one cell per trace” for the data collection, the best way to drill down to the
wanted cell is by clicking first in the Select column. This takes you to the Database Address
Selector so you can choose the database, table, field, and record in one window.

32 Database Tutorial & Reference
Other blocks for use with the ExtendSim database
• See complete information about this block and its uses on page 73.
Other blocks for use with the ExtendSim database
In addition to the DB Line Chart block, other blocks are useful when using the ExtendSim
database.
Blocks for exchanging data with an ExtendSim database
The ExtendSim database is a very powerful tool used both by ExtendSim developers and
model developers. Accordingly, ExtendSim includes blocks for exchanging data between the
model and a database and between a database and external applications and files.
Tutorial 1 showed how to create a dynamic data link (DDL) between a model and a database.
There are other and more powerful data exchange options when you don’t want to, can’t, or
shouldn’t link a dialog item or data table to a database table.
* These blocks are not available in all products.
Block Library Purpose See
Read and Write
Read(I) and Write(I)*
Value
Item
Value library blocks exchange data between the
model and ExtendSim databases (as well as
global arrays, Excel workbooks, or text files).
Item library blocks only exchange data between
the model and ExtendSim databases.
page 39
page 41
Data Import Export Value
Exchange data between the ExtendSim database
and external files (Excel, text files, ADO and
ODBC compatible databases, or files from the
Internet via FTP).
page 35
Equation
Equation(I)*
Queue Equation
Value
Item
Item
Create equations that use database information
as part of their calculations and/or that output
the results of calculations to a database. A pow-
erful alternative to using the read/write blocks
because equation blocks have full access to the
ExtendSim API.
page 77
Query Equation*
Query Equation(I)*
Value
Item
Create an equation that, according to the criteria
you specify, selects one record from an Extend-
Sim database table for use in the model. Has
access to the ExtendSim API.
page 78
Your custom block N/A Use programming to create your own block for
custom features and actions.
Technical
Reference

Tutorial 2: Enhancing Your Database 33
Other blocks for use with the ExtendSim database
DB Statistics block
The DB Statistics block (Report library) calculates the
mean, variance, standard deviation, minimum, maximum,
median, and other information for a field in a database
table.
Place the block anywhere on a model. It does not need to
be connected to other blocks to capture the information.
Select a field on the block’s Database tab and the results
will be calculated automatically and displayed on the
Results tab. In the Database tab, choose to calculate statis-
tics either at the end of each run (to calculate values as
each run completes) or at the end of all runs (to calculate
values after all of the simulation runs have completed).
Equation-based blocks
These blocks use database information as part of their calculations and/or output the results of
calculations to a database. For more information, see “Equation-based blocks” on page 77.
Link Alert block
The Link Alert block (Utilities library)
tracks and notifies when an ExtendSim
database or one of its components
changes either its contents or its struc-
ture during the simulation run.
Once you specify a database location to
be monitored (database, table, field, or
record), the block senses if there are any
changes to the content of, or the struc-
ture at, that location.
Whenever a change occurs, the block’s
output connectors report the change as
well as the Global Object ID of the block
that caused the change. This block also
has an option to log the information in a
data table, capturing any changes that
occurred during the run.
Place the block anywhere on a model.
It does not need to be connected to other blocks to log the information.

34 Database Tutorial & Reference
Other blocks for use with the ExtendSim database
Popups block
Use the Popups block
(Utilities library) to
define a custom popup
menu that you can clone
to the model worksheet
and use as a numeric
input to the model.
To use this block to
obtain the index of the
selected record, select
Database Record as the
popup type and enter the
database information.
It is common to connect
this block’s output to the
R input on a Read or
Write block (Value
library), so you can
manually change which
record is being read or
written to.

ExtendSim Database
Tutorial & Reference
Tutorial 3: Data Exchange
Overview
The previous chapter showed how to use the DB Line Chart block to see data stored in an ExtendSim
database. This chapter shows how to use the:
• Data Import Export block to exchange data between ExtendSim databases and external applications/
files
• Read and Write blocks to exchange data between a model and an ExtendSim database
The Data Import Export block for automating data exchange
The Data Import Export block (Value library) controls the automated exchange of data between Extend-
Sim databases and external applications and files. It transfers the data from source to target and con-
trols the timing of the data exchange.
The main advantages of using the Data Import Export block is that the data gets completely copied in a
single operation and the exchange can happen at the beginning, during, or after the run.
The left side of the screenshot above shows importing from Excel to an ExtendSim database. The right
side shows exporting to Access from an ExtendSim database.
The following examples show how to import data from Excel into a continuous model’s ExtendSim
database and export data from the database to Access.
+ For a complete description of the Data Import Export block, see page 70.
Import data from Excel to an ExtendSim database
This example uses a continuous process model that all ExtendSim modelers have access to. An Excel
worksheet is the source of the data and an ExtendSim database table is the target.
+ The tutorial on page 22 dynamically linked a block’s data table with an ExtendSim database table, caus-
ing the block to get its data from the database. The data in the database came from an Excel worksheet;
this tutorial shows how the database got that data from Excel.

36 Database Tutorial & Reference
The Data Import Export block for automating data exchange
Configure the model
If the Reservoir Tutorial model you created isn’t already open, open it.
Place a Data Import Export block (Value library) anywhere on the model worksheet
Open the Data Import Export block’s dialog to its Import Export tab
Choose the settings
In the Select action section of the block’s dialog:
In the first popup menu, choose Import from
Excel spreadsheet (the default)
To: ExtendSim database
In the Specify ExtendSim data target section of the
dialog, choose:
DB: Example DB
Table: Rainfall Amount
View the information in the database
The information about this database table—its field names
and each record’s data—is now displayed in the Data Import Export
block’s ExtendSim Data tab. Use this to verify that you have selected the
correct database location to get data from or, as in this case, send data to.
You can also click the Show Database and Show Table buttons in the
block’s Import Export tab to view the database structure and verify
you’ve selected the correct data target or source, as applicable.
Notice that there is already data in the Rainfall Amount table, and that
the data for rows 13 to 24 is as shown at right. If you’ve completed the
previous tutorials, that will be the same data in the block labeled Rain-
fall, since its data table is dynamically linked to the Rainfall Amount
database table.
Importing data from Excel will overwrite the data in this table, changing what is available to
the Rainfall block in the model.
Select the data source
In the Specify external data source section of the Import Export tab:
Browse to File Name:
Rainfall.xlsx, located at
ExtendSim/Examples/Tuto-
rials/Continuous
If Excel isn’t already open, this step will launch Excel, open the appropriate workbook, and
immediately minimize it. So you may see that window quickly open and close.
+ The Data Import Export block will browse first to the folder that contains the model. As best
practice, keep any files that will be sources or targets in the same folder as the model. Other-
wise, the File name field will show the entire path (as shown above) rather than just its name.
Select Worksheet: Sheet 1

Tutorial 3: Data Exchange 37
The Data Import Export block for automating data exchange
Check the box to Import at beginning of simulation (the default)
Click OK to close the dialog and save its changes
Import the data and verify the results
Run the simulation or click the Import Now button in the block’s dialog
Open the database window for the Example DB database
With the window in Data view, select the Rainfall Amount table so that
its data is displayed
Compare the database table’s data to what is in the Excel worksheet to
verify that they are the same.
Notice that the amounts in rows 13 to 24 of the Rainfall Amount table
are not the same as what had been in the database prior to importing
(shown on page 36). Also notice that the new amounts are immedi-
ately available for use by the Rainfall block, since its data table is
dynamically linked to this database table.
+ Excel will remain open until you close it.
Export data from an ExtendSim database to Access
The following example requires that a 64-bit compatible version of Microsoft Access be
installed on your computer. Since ExtendSim is a 64-bit application, your version of Access
and its drivers must be 64-bit compatible.
The Data Import Export block can be configured to export an ExtendSim database table, and
even an entire ExtendSim database, to a selected ADO-compliant database. The following
example shows how to export an ExtendSim database to Microsoft Access.
Create an Access database file
Create an empty database file using Microsoft Access. The file will import its structure from
the ExtendSim database.
For best results, locate the Access database file in the same folder as the model you will
export data from.
Configure the model
If the Reservoir Tutorial model you created in the Tutorial 1chapter isn’t already open, open
it.
Place a Data Import Export block (Value library) anywhere on the model worksheet
Open the block’s dialog to its Import Export tab
Choose the settings
In the Select action section of the
dialog:
In the first popup menu, choose
Export to
In the popup menu to its right, select ADO database
For the ADO database, choose Access (the default)
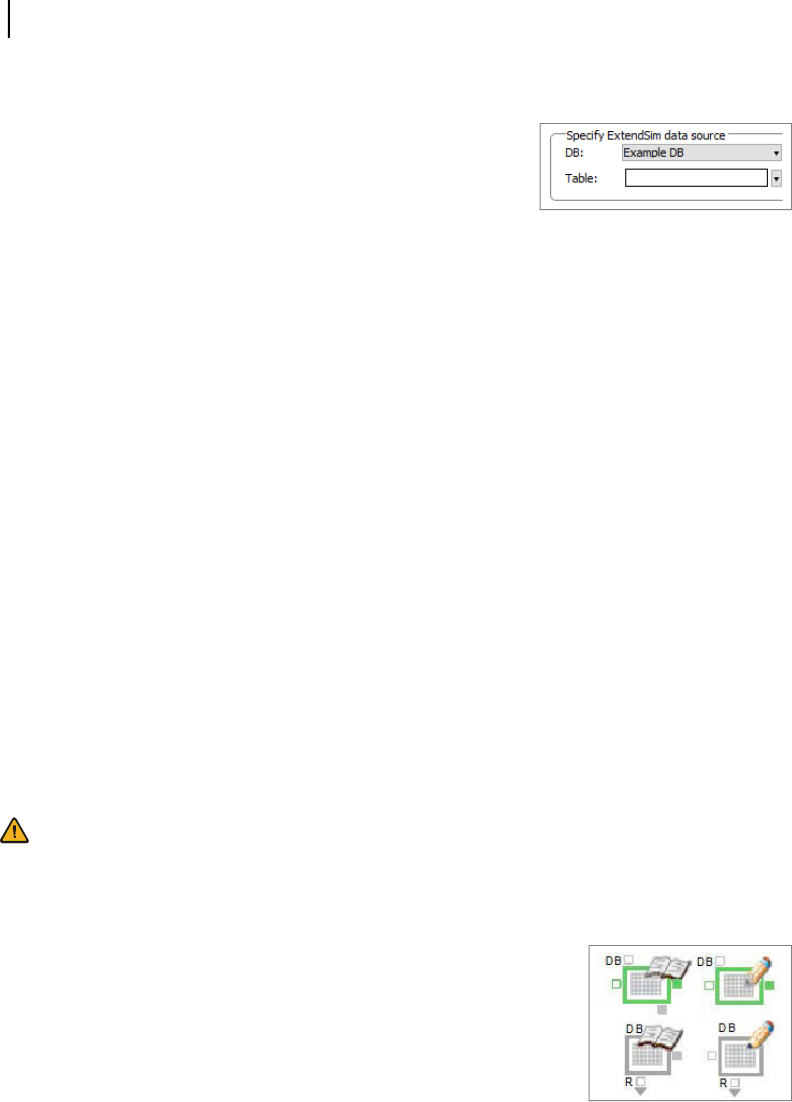
38 Database Tutorial & Reference
Read and Write blocks
For the From location, choose ExtendSim database (the default)
In the Specify ExtendSim data source section of the dialog,
choose:
DB: Example DB
To export the entire database, leave the table name
blank, as shown above.
+ Leaving the table name blank (or choosing None from the list of tables) causes the Data Import
Export block to export the structure and data for an entire database.
Select the target
Click the Show Database button in the block’s Import Export tab to verify you’ve selected
the correct data source.
In the Specify external data target section of the Import Export tab:
For the File name, browse to the Access file you created for storing the data
Leave the Table name blank, since an entire ExtendSim database will be exported to
Access
Check the box to Export at end of simulation
+ If you were importing from, rather than exporting to, an ADO database, you would check the
box to Import at beginning of simulation.
Export the data and verify the results
Run the simulation or click the Export Now button in the block’s dialog
To verify the results, compare the tables and data in the ExtendSim database to what is in
the Access database file.
Running the simulation, or clicking the Export Now button, causes the Data Import Export
block to export all the data and database structure from the Example DB to the Access database
file. A dialog table in the data target section displays the Field Name and Field Type for each
table you select in the Table popup.
For ADO compliant databases, the path to the external source or target file varies depending on
which database is selected. For Access it is specified by a file name. For MySQL and SQLS-
erver the source/target is specified using a server name and a database name. For Oracle, a user
name and database name must be specified.
Read and Write blocks
The the Read(I) and Write(I) blocks (Item library) shown at the top
of this picture and the Read and Write blocks (Value library) shown
at the bottom of the picture are typically used to exchange data
between model components while the simulation is running. Since
the ExtendSim database is part of the model, these blocks are often
used to exchange data between the model and an ExtendSim data-
base.
+ The Read and Write blocks in the Value library have multiple data
sources and targets; the Read(I) and Write(I) blocks (Item library) only exchange data between
the model and ExtendSim databases.

Tutorial 3: Data Exchange 39
Read and Write blocks
Compared to using dynamic data linking (DDL) to link a model parameter or data table to an
ExtendSim database, these blocks have some advantages:
• They allow you to dynamically control which database or table is accessed during a simula-
tion run as well as when it is accessed
• The data can be more easily accessed at several places in the model
+ For a complete description of the Read and Write blocks, see page 67
Use a Write block to send model data to an ExtendSim database
The following example uses a Write block (Value library) in the Reservoir DB model. This is
obviously completely unnecessary for this small model and in fact requires the additional step
of adding a System Variable block. However, the purpose is to show how to use a Write block
to send data from a model to an ExtendSim database, and all ExtendSim modelers have access
to continuous process models such as the Reservoir model.
In this tutorial you will write the contents of the reservoir to the Contents table in the Example
DB database. That table has two fields, Month and Amount, and 37 records for holding data.
Open the model and add the block
Open the Reservoir Tutorial model you created in the previous chapter
If the model includes the Data Import Export block (from the tutorial above), delete it. You
don’t want ExtendSim to write to the database at the same time as the data is being exported
from it.
Place a Write block (Value library) on the model worksheet and label it Write to DB
In the Write block’s Write Data dialog, specify the
database coordinates:
DB: Example DB
Table: Contents
Field: Multiple Fields
Leave the Record and other fields in the
Write Data dialog as is
+ If the block had been set up to write to a child field,
the dialog would display the text “Write the parent’s
record” and give options for the record value (PRV) or index (PRI). This is discussed on
page 48.
In the Write block’s Options dialog, define when writing will take place:
Check the box “Write data during run”
Choose Continuous (since the Reservoir Tutorial
is a continuous model)
Also in the Write block’s Options dialog, to make sure there are enough records in the data-
base table to hold all the generated data:
Check the box “Expand number of records in the data destination, if necessary”
So that the connections are clearer, check the box to Show connector numbers

40 Database Tutorial & Reference
Read and Write blocks
Close the Write block’s dialog and Save the model
+ Notice that the database window does not need to be open to set the database coordinates in the
Write block. The database is part of the model and all its information is known by the blocks in
the model.
Connect the Write block to the model
There are now two input connectors in the left side of the Write block that corre-
spond to the Month and Amount fields in the Contents table. The input connector
on the top (#1) is for the month and the one below it (#2) is for the amount of
water in the reservoir.
Months
To indicate which month each amount is getting reported for:
Place a Simulation Variable (Value library) block on the worksheet and connect its output
connector to the #1 input connector on the left side of the Write block.
+ This is a perfect opportunity to right-click on the Write block’s #1 input connector and use the
Smart Block technique to add and connect a Simulation Variable block. If you don’t know how
to do that, see one of the Quick Start Guides.
In the Simulation Variable’s dialog:
Select Current Time (the default) as the system
variable to output
Label the block Month
Amount
To get the information about the reservoir’s contents from the model:
Connect from the Contents output connector on the Holding Tank block (labeled Reservoir)
to the second input connector on the Write block.
+ This is a good place to use a named connection! If you don’t know how to do that, see the User
Reference.
Write each piece of data to a record
Continuous models recalculate their data at each time step, and you want each piece of data to
be written to a separate record in the database. To cause data to be written to a different record
at each step of the simulation:
Place another Simulation Variable (Value library) block on the worksheet, near the Write
block
Connect its output connector to the R (record) input connector at the bottom of the Write
block
In the Simulation Variable’s dialog:
Select Current Step as the system variable
to output
Since data tables are 0 based, and databases
are 1 based (see “Indexes and data organiza-
tion” on page 45), choose to Add 1 to the result

Tutorial 3: Data Exchange 41
Read and Write blocks
Name the block Write Each Step
+ This second Simulation Variable block was added in this model so that
data calculated at each step would be recorded in a new record.
Save your model. The affected part of the model should look like the
segment shown here.
Run the simulation
The data (Contents) has been written to the Example DB. In the
dialog of the Write block, notice that the Write Data tab has a sec-
tion that shows the Month and Amount, shown here. This is the
same information recorded in the Contents table of the Example
DB database and in the Data tab of the Line Chart block.
+ One way to see the Contents database table is to click Show ExtendSim Database in the Write
block’s dialog. This will open the Table Viewer for the database table named Contents.
Use a Read(I) block to get data for the model from an ExtendSim database
This part of the tutorial uses the Read(I) block from the Item library in a discrete event model.
If you only have the ExtendSim CP product, you won’t have the Item library and you won’t be
able to create or run the following example.
Unlike the Read and Write blocks in the Value library, the Read(I) and Write(I) blocks in the
Item library only exchange data between a model and an ExtendSim database rather than also
with Excel, text files, and global arrays. Furthermore, since they only do the exchange when an
item passes through, the Read(I) and Write(I) blocks must be connected to the flow of items in
the model.
About the model
Open the model Step 1 DE Tutorial. It is located at ExtendSim/Examples/Tutorials/Dis-
crete Event
This model simulates a simple system where cars enter a line to be washed. Cars arrive at the
car wash facility randomly, as simulated by the Create block labeled Dirty Cars. They then
wait in a single line until they can enter the Wash Bay. Each car takes 6 minutes to be washed
before exiting the system.
The following tutorial will change the model so that each time a car item leaves the Entry Line
and heads towards the Wash Bay, the Read(I) block will get a value from a cell in an Extend-

42 Database Tutorial & Reference
Read and Write blocks
Sim database. That value will provide a random delay for the time it takes to wash the car. The
database cell has been customized to use a random distribution, as was discussed on page 25.
Make a copy of the Car Wash model
So that you don’t overwrite the example model:
Save the model under the name “My Read Tutorial”
Add a Read(I) block to the model
Insert and connect a Read(I) block (Item library) between
the Queue block labeled Entry Line and the Activity block
labeled Wash Bay. (If you know how to use the Smart
Blocks technique, separate the two blocks and right-click
the output connector of the Entry Line to insert and con-
nect the Read(I) block.)
Save your model, because its the right thing to do
In the Read(I) block’s Read Data dialog tab, select Database: Car Wash DB. (By default,
the first database in a model is automatically selected by default.)
In the first column (Read Name) of the dialog table, enter the word Delay. This will be used
to label the connector that outputs the values as they are read from the database.
In the second column (Table) of the dialog table:
Click once on the down arrow in the cell to reveal the popup shown at
right
Choose Select from list
From the popup list, select the table named Wash Delays
In the third column (Field) of the dialog table:
Click once on the cell’s down arrow to reveal the popup
Choose Select from list
From the popup list, select the field named Delay Time
In the fourth column (Record) of the dialog table:
Click once on the down arrow in the cell to reveal the
popup
Choose Select from list
From the popup list, select the triangular distribution,
the second record
+ Notice that the cell displays the information about the Triangular distribution—a minimum of 5,
maximum of 7, and most likely value of 6. This is helpful if records have distributions with the
same name.
Leave the other columns in the dialog table in their default settings and go to the block’s
Options tab

Tutorial 3: Data Exchange 43
Read and Write blocks
Connect the data flow into the model
The Read(I) block is now prepared to get a value from the selected database cell each time an
item arrives at the block. However, it still needs to be set up to transfer those values to the
appropriate place in the model.
In the Read(I) block’s Options tab, check the box to Show output connector labels. This
causes the word Delay (from the first column of the dialog table in the Read Data tab) to
appear on the block’s output connector
Click OK to close the block’s dialog and save changes
In the model worksheet, connect from the Read(I) block’s Delay
output connector to the D input connector at the bottom left of the
Activity labeled Wash Bay. Note: As seen in the Activity’s Pro-
cess tab, this automatically causes the Wash Bay to get its pro-
cessing (delay) time from its D input connector, rather than from
the constant (6) originally set in its dialog.
Save the model
Conclusion
Run the model
Before the change, the Wash Bay was
taking a constant 6 minutes. Thus its
Current, Average, and Maximum
Wait times, as reported in the Wash
Bay’s Results tab, were all 6. Now the
block’s Results tab indicates that the Wait times are random.
To validate the model, compare the delay at each point to the data coming from the database:
• Connect from the Wash Bay’s D output connector to an input on the Line Chart block.
(You’ll need to expand the variable connector at the bottom left side of the Line Chart.)
• Connect from the Read(I) block’s Delay output to an input connector on the Line Chart
block.
• Then run the simulation and look in the Line Chart’s Data tab; the values from the Read(I)
block (which come from the database) will be identical to the values for the delay in the
Wash Bay.
+ For more information about the Read and Write blocks, as well as some example models that
use these blocks, see “Read and Write blocks” on page 67.

44 Database Tutorial & Reference
Read and Write blocks

ExtendSim Database
Tutorial & Reference
Reference
Overview
This section provides additional information about using and managing ExtendSim databases.
It also has a section highlighting the changes and enhancements since ExtendSim 9.0.
Methods for exchanging data with an ExtendSim database
ExtendSim provides the following methods for exchanging data with its databases.
+ In addition, the Query Equation and Query Equation(I) blocks search a database and locate spe-
cific records according to the criteria you specify. They are discussed on page 78.
Indexes and data organization
When interfacing between a model and an ExtendSim database, or between an ExtendSim
database and an external application’s files, it is important to know how data is organized and
how data locations are indexed.
Method Description See
Dynamic Data Linking
(DDL)
Establish live links between dialog items (parameters
and data tables) and database tables
page 19
Read and Write blocks
(Value and Item libraries)
Exchange data between a model and database tables.
Compared to DDL this gives more control over when
and how data is exchanged.
page 38 (tutorial)
and page 67
Data Import Export block
(Value library)
Exchange data between an ExtendSim database and an
external file: Excel, ADO and ODBC compatible data-
bases, text files, FTP
page 35 (tutorial)
and page 70
Equation-based blocks
(Value and Item libraries)
Use logic, equations, and code to call database func-
tions
page 77
Programming
Use ModL and database functions to create custom
methods
the Technical Refer-
ence

46 Database Tutorial & Reference
Indexes and data organization
Indexes and organization by data type
An index is a numeric type of identifier, as opposed to a name used as an identifier. An address
is a collection of indexes that can be used to identify a specific member or component within a
hierarchical data structure.
Indexes and addresses are unique and make it faster to find components and easier to sort
them. An index usually starts with 1 or 0. In addition, data sources are organized by rows and
columns or some similar arrangement.
The following table lists indexing and organization conventions for different data source types.
+ When exchanging data, it is important to compensate for the fact that the data tables in Extend-
Sim blocks are 0-based, and ExtendSim databases are 1-based. Usually this is accomplished by
adding 1 to the output from the data table to the database (as shown on page 40), or subtracting
1 from a database input going to a data table.
ExtendSim database indexes and addresses
ExtendSim assigns a unique index number to each database. As seen for the Example DB data-
base discussed in the tutorials, that number is appended to the database name and enclosed in
square brackets.
Likewise every database table, field, and record is assigned an index number that is displayed
after its name. And each cell has a DBAddress that is the combination of those index numbers.
+ A DBAddress is a single value that contains between 1 and 4 numbers—the index numbers for a
specific database, table, field, and record as appropriate.
Database index numbers start with 1, such that the first database in a model has an index of 1,
the first table in a database has an index of 1, and so forth. ExtendSim uses a database’s index
information to assign addresses to the database and to each of its components.
Data Source Type Indexing How organized
ExtendSim Data Tables 0-based Row/Column
Spreadsheets 1-based Row/Column
ExtendSim Databases 1-based Field (column)/Record
(row)
External Databases 1-based Field (column)/Record
(row)
Arrays 0-based Row/Column
Text Files N/A Row/Column

Reference 47
Link alerts
These numbers are unique to that component sequence and are used for referring to databases
and their components from blocks or in equations or ModL code. For instance, every read/
write operation in a block requires a fully qualified address that specifies a specific set of data-
base components and hence the location of the targeted data.
+ ExtendSim databases and their tables and fields have both name and index identifiers. By
default, records only have index identifiers. However, through the Field Properties dialog, each
table can have one Record ID field so that records can also have names.
Since they can change, indexes can be an unstable way to reference locations in a database. For
example, a field index will change if you move the field’s location. To avoid issues, database
aware blocks such as the Equation and Read and Write blocks store names rather than index
values. Then at the beginning of the run, the block does a one time lookup using the names to
find the index values. This name tracking feature allows the block to track database addresses
even if the indexes have changed.
Read/Write Index Checking command
This command in the Database menu is helpful if you program and use database read/write
functions. It causes error messages to be displayed if a read/write function call has illegal
indexes.
This is a good tool for finding illegal indexes, and enabling this option does not impact the
speed of a simulation run. Leave it unchecked if it is preventing a legacy model from running.
New models have this menu command checked by default.
Link alerts
Live update messages, called Link Alerts, are automatically sent to ExtendSim blocks and the
ExtendSim databases or global arrays they are dynamically linked to. This means that as soon
as the data at the source changes, an alert will be dynamically sent to all the blocks linked to
that location so those target blocks can take actions to react to the new value.
For example, if you write to a location in an ExtendSim database, ExtendSim will send update
messages to all the Read blocks in the model linked to that location. When the Read block
receives the alert message, it will act on the fact that the data value changed.
Writing to a cell in an Excel spreadsheet or to a text file will not have the same live link effect.
Link alerts can significantly slow simulation speed if enabled during the simulation run. To
control when they are sent, see:
• “Link dialog checkboxes” on page 66 for managing the alerts during the simulation run
when block parameters and data tables are linked to an ExtendSim database or global array

48 Database Tutorial & Reference
Finding a number or a string
• The checkbox When receive database link alert msgs in the Equation block (Value library)
• The data source changes check box in the Options tab of the Read block (Value library)
For the most part, link alerts will just make the blocks that have implemented them work as
expected—when data changes, the blocks will respond appropriately. However, due to all the
opportunities for response, link alerts are an especially powerful tool for those who use equa-
tion-based blocks or who create custom blocks.
If you are developing a block that needs to respond to changes in data in ExtendSim database
or global or dynamic arrays, or you are creating sophisticated equations that need this, or you
need to use the Link Alert block, go to the Technical Reference to understand more about how
Link Alerts work.
+ See also the Link Alert block discussed at page 33.
Finding a number or a string
Use the Edit > Find command (or the right-click
menu) to find data (a number or string) within a
database. With the database window open in
Schema or Data view, give the command Edit >
Find. This opens the Find Data in Database dia-
log, shown at right.
To only search within a specific table, open that
table’s Table Viewer before giving the Edit >
Find command; the Find Data in Table dialog appears. The Table Viewer is discussed on
page 13.
+ To locate a table by name, click in the All Tables pane in Schema or Data view. Then type the
first letter (or more) of the table’s name. The first table with those initials will be highlighted.
Repeat that letter (or set of letters) to go to the next table name with those initials.
Fields with string data types; PRI and PRV
Database fields are often formatted as strings. On the other hand, a model’s block connectors,
dialog parameters, and attributes require numbers to perform calculations. ExtendSim provides
a mechanism for translating strings in the database into the numbers the model requires.
The translation is based on the fact that child fields have both an index value and a data value.
This means that each child field can be referenced by one of those two values: either the data
(which can be a number or a string) or the index (which points to the location of the data).
How the translation occurs depends on the circumstances, as discussed below.
Database field>>>
Numeric Type,
Not a Child Field
String Type,
Not a Child Field
Numeric Type,
Child Field
String Type,
Child Field
Dynamic Data Link Link is created Error message Link is created Automatic transla-
tion when the link
is created
Read/Write Read/write is estab-
lished
Error message Read/write is
established
Tell block to use
PRI when reading/
writing

Reference 49
Fields with string data types; PRI and PRV
Dynamic link between a model and a non-child field
As shown on “Field type popup menu” on page 62, field data types can be numeric or string;
except for String, all of the data types are numeric.
If a parameter or data table is dynamically linked to a non-child field in a database using DDL
(discussed in “Dynamic data linking” on page 19), and:
• The field has a numeric data type (that is, not a string)—the link will, of course, get created
• The field has a string data type—the link will be rejected with an error message because it
doesn’t make any sense
Dynamic link between a model and a child field
If a parameter or data table is dynamically linked to a child field in a database using DDL (dis-
cussed in “Dynamic data linking” on page 19), and:
• The field has a numeric data type—the link will get created normally
• The field has a string data type—ExtendSim automatically handles the translation of the
string value into the appropriate numeric value. This is discussed in “Dealing with strings in
child fields” on page 28.
Read/write exchange between a model and a non-child field
If data is exchanged between blocks that read or write and a non-child field in a database, and:
• The field has a numeric data type—the exchange will happen normally
• The field has a string data type—the exchange will fail with an error message because it
doesn’t make any sense
Read/write exchange between a model and a child field
If data is exchanged between blocks that read or write and a child field in a database, and:
• The field has a numeric data type—the exchange will happen.
• The the field has a string data type—you must select the parent record index (PRI) in the
block’s dialog, as discussed below.
PRI and PRV
The following blocks exchange data with ExtendSim databases:
• Read (Value library) and Read(I) (Item library)
• Write (Value library) and Write(I) (Item library)
• Equation-based blocks
• Query Equation (Value library) and Query Equation(I) (Item library)
Whether you are reading from the database or writing to it, when you specify database coordi-
nates in those blocks, you tell the block to read or write the value(s) at the designated location
in the database.
If the value at the designated location is numeric and does not come from a child field, there
are no issues. However:
• If the value is a string and the location is a child field, the string must be translated into a
numeric value.

50 Database Tutorial & Reference
Databases
• If the value is numeric, the location is a child field, and the parent field contains a lot of
data, searching for that value throughout all the parent cells can slow performance.
ExtendSim provides a mechanism that performs a string to numeric translation for the first sit-
uation and improves performance when in the second situation. Since, as mentioned on
page 48, child fields have both data values and index values, ExtendSim does this using the
parent record index, or PRI.
• The Parent Record Value (PRV) is the actual value that you see in the child field. (It is also
one of the values in the parent field.)
• The Parent Record Index (PRI) is the index at the parent’s location for the PRV
For example, if a Read block is set up to get data from a
child field that has a string, the block’s dialog will display
the Read the parent’s record value(PRV)/index(PRI)
option. If you choose PRI, ExtendSim will automatically translate a cell’s string into a numeric
value that can be used in the model.
+ It is best practice to use PRI whenever you’re doing a read/write and there is a parent/child rela-
tionship. In most cases there is a lot of parent data and PRI will increase reliability and enhance
performance.
Databases
ExtendSim databases are created and managed through the:
• Database menu
• Right-click (context/shortcut) menu
• Database window
• Database List window
Creating an ExtendSim database
There are several ways to create an ExtendSim database:
1) The most common method is through the user interface—using a menu command to create
a new database as illustrated on page 16,
2) Using the ExtendSim DB Add-In for Excel, as shown starting on page 85.
3) Importing a database text file from an already-existing ExtendSim or SDI database as dis-
cussed in “Importing or exporting an ExtendSim database” on page 52.
4) Using database functions in an equation-based block from the Value or Item library. These
blocks are discussed in “Equation-based blocks” on page 77.
5) Programming with ModL code. For more information, see the Technical Reference.
Upon creation, every database is assigned an index, a unique key for identification. A data-
base’s index number is displayed in square brackets after its name.
Naming and saving a database
ExtendSim databases are named when created or imported; they can be renamed as discussed
below. The database’s name can be anything you want as long as it does not start with an
underscore character (_), is not used by another database in that model, and does not exceed 63
characters. Database names are not case sensitive and they can contain spaces.

Reference 51
Databases
Databases are part of the model and are saved when the model is saved.
Opening a database window
The database window is for viewing and changing its structure (schema) or data. To open a
database’s window do one of the following:
Select the database from those listed at the bottom of the Database menu.
Or, give the command Window > Database List. when the list appears at the bottom of the
library window tiles, double-click the name of the database in the list to open it.
The database window is shown and discussed starting on page 10.
Editing a database’s properties
+ The only property of a database that can be changed is its name.
Accessing the Edit Database Properties dialog
To access the Edit Database Properties dialog:
Either make a model that has one or more data-
bases the active window, then going to the Data-
base > Edit Database Properties command
Or, give the Window > Database List command
and right-click on the database’s name in the list
that appears at the bottom of the library windows
area
Renaming a database
To rename a database:
• Use one of the methods above to access the Edit Database Properties dialog
• From the popup menu, select the database to rename
+ The database’s name can be anything you want as long as it does not start with an underscore
(_), is not used by another database in that model (although see “Overwriting an existing data-
base” on page 53), and does not exceed 63 characters. Database names are not case sensitive
and they can contain spaces.
Copying or deleting a database
As is true for the Database menu, the Database List displays all the model’s databases and is
useful for opening and renaming databases. However, unlike the list in the menu, the Database
List also lets you copy and delete a database.
To access the Database List, give the command Window >
Database List. This places the list of databases at the bottom
of the same area as the library windows.

52 Database Tutorial & Reference
Databases
Copy, duplicate, move
To copy or duplicate a database, select it in the
Database List and either use the right-click menu
shown here or give the command Edit > Copy (or
Edit > Duplicate) Database in the menu bar.
You can paste a database into the current model or
into a different model. You can paste into the
Database List or onto a model worksheet.
Duplicating, or pasting into the current model’s
Database List, places a copy of the database into
that Database List. It will be under a different
index number and a modified name so as to not overwrite the existing database.
Pasting into a different model’s Database List or onto a different model’s worksheet copies the
database into that model with the same name as the original database.
+ Giving the Paste command on the model worksheet places a copied ExtendSim database in the
Database menu and the Database List and makes it available to that model. It does not put a
visual representation of the database on the worksheet.
To move a database from one model to another, select the database in the Database List and
right-click to cut the database, then paste the database into the other model.
Delete
To delete an entire database:
In the Database List, select the database to be deleted
Use the Delete or Backspace key or right-click and choose Clear
Importing or exporting an ExtendSim database
+ Unless they are exported as text files and translated using the language of a target application,
exported ExtendSim databases can only be imported to an ExtendSim model or to the Extend-
Sim DB Add-In for Excel.
Export an entire database
The Database > Export Database command exports the entire ExtendSim database—all tables,
fields, records, and so forth—into a specially formulated database text file.You export a data-
base so you can do one or more of the following:
• Import the entire database into another model
• Send the database as a text file to another ExtendSim user so they can import it
• Prepare a database text file for use by the ExtendSim DB Add-In for Excel (discussed on
page 85)
+ The command Database > Export Database is only active when an ExtendSim database window
is active.
To export only specific tables from a database, see the discussion on page 57.

Reference 53
Databases
Import an entire database
The Database > Import Database command creates a
new ExtendSim database by importing a database
text file that was exported using the Export Database
command.
In the dialogs that appear, select the database text file
to import then name and import the database. This
command imports all the tables, fields, records, rela-
tions, and data from the exported file and creates a
new database.
If the imported database is named the same as an existing database in the model, see “Over-
writing an existing database” below.
To instead import tables to an existing database, see “Importing and exporting database tables”
on page 53. See also “Excel Add-In” on page 85.
Overwriting an existing database
Databases can have the same name as long as they are in different models. They are not
allowed to have the same name in the same model. Importing a database with the exact same
name as an existing database can overwrite the contents of the existing database.
If the name you give while import-
ing a database is the same as a data-
base that already exists in the
model, ExtendSim will automati-
cally append a 1 to the name before
the database is imported as well as
give you the opportunity to change
the name.
Alternatively, you can choose that
the name of the new database is the
same as the name of an existing
database. If you do that, when you
click the Import Database button a
dialog appears for choosing how the
import should be handled.The dia-
log allows you to:
• Cancel and give the database a new name
• Or, only replace tables that have the same name as the imported tables
• Or, to entirely overwrite the existing database, deleting any tables and relations that aren’t in
the import
Importing and exporting database tables
The Import Database command creates an entire new database in the model. You can instead
import selected tables from one ExtendSim database into another ExtendSim database.
With the database window for an existing ExtendSim database active, the Import Tables to
Database command opens a dialog for selecting a database text file that was exported using the

54 Database Tutorial & Reference
Tables
Export Selected Tables command. This imports the tables in the text file and adds them to the
selected database. If you end up with unneeded tables, you can delete them.
Reserved databases
An underscore character (_) as the first character of a database name designates that database
as a Reserved database. Reserved databases are used by developers and are purposefully hid-
den from the model user. If you want more information, see the Technical Reference.
Tables
Database tables represent one type of entity, such as Customers, Products, Process Steps, or
Resources, as shown in the table on page 10.
Creating and naming a table
There are three ways to create a database table and add it to the database:
1) Through the Database menu using the New Table command
2) By right-clicking on a blank area in the Tables pane while in Schema view
3) By selecting the New Table button in the database window’s toolbar
See more information in the tutorial, starting on page 17.
Upon creation, every table in a database must be given a unique name. Each table is also auto-
matically assigned a unique index for identification. A table’s index number is displayed in
square brackets after its name.
+ The table’s name can be anything you want as long is not used by another table in that database.
Table names are not case sensitive and they can contain spaces.
Opening and viewing tables
If a database window is open, the database’s tables are open but they might not be displayed.
To see how the table fits into the database’s structure, check the box to the left of the table’s
name in the Tables List pane when in Schema view. To see a table’s structure, open its Table
Viewer.
In the database window
A database window’s All Tables tab lists all the
tables for the database.
In Schema view the database window shows the
structure of the database, with its tables and fields as
well as any parent/child relationships.
In Data view it shows the fields, records, and cells for each selected table.
In the Table Viewer
When your model has multiple tables, it’s helpful to see the data view of each table separately,
or see a table’s data view at the same time as the database structure. This is accomplished by
opening Table Viewers.
To open a table’s Table Viewer, do one of the following:
Double-click the table’s name in the Tables List pane at the left of the database window
Or, double-click the table’s title bar in the Tables pane of the database window

Reference 55
Tables
Either method opens that table’s Table Viewer, showing its fields (columns) and records (rows)
with their data. You can have multiple Table Viewers open at the same time.
If you’ve “lost” the database window, use the Open Schema button in the Viewer to bring
the database window to the front.
+ The Table Viewer is a separate window for each table, displaying the same information and
toolbar buttons as if the table were selected in the database window in Data view mode.
Showing and hiding tables
With the database window in Schema view, you can show and hide the table structure dis-
played in the Tables pane.
To show or hide a specific table, use the checkbox to the left of its name in the Table List
pane of the database window. Checked tables will appear in the Tables pane.
To show or hide all the tables, use the Show All Tables or Hide All Tables buttons
in the database window’s toolbar. Selecting Hide All Tables clears the checkboxes at the left
of every table’s name in the Table List pane.
+ If there are a lot of tables and you only want to show certain ones, use the Hide All Tables but-
ton. Then select the tables you want to display using the checkboxes in the Table List pane.
Sorting tables
Whether in Schema or Data view, a popup menu in
the database window allows you to choose how tables
are listed in the Tables List pane—by name or by
index.
As discussed on page 46, an index is a unique key for identification that is assigned to each
ExtendSim database, table, field, and record when it is created. For a table, its index number is
displayed in square brackets after its name.
+ No matter which sorting choice is selected in the database window, it does not affect how data-
base tables are presented in selector windows throughout ExtendSim. Selector windows
always present table names alphabetically.

56 Database Tutorial & Reference
Tables
Editing table properties
To access the Edit Table Properties
dialog:
Open the database window
Select a table’s name in the
Tables List pane and either:
Go to the Database > Edit
Table Properties command
Or, right-click on the table’s
title in the Tables pane
(database window in
Schema view) and select
Edit Table Properties.
The editing options are:
• Choose a different table to mod-
ify
• Rename the selected table
• Initialize the table so that all records are deleted only on the first run of a multi-run simula-
tion or on every run
• Enter text for tooltips to display when hovering over the table
Copying, renaming, or deleting
Database tables can be copied or moved from one database to another and duplicated within
the same database.
Copying and moving
To copy a database table, with the database window in Schema view do one of the following:
Either select the table name in the Tables List pane and give the command Edit > Copy
Selected Tables. Then give the Edit > Paste Tables command
Or, right-click on the table’s title in the Tables pane and choose Copy Selected Tables. Then
give the Paste Tables command.
The table can be pasted into the same database’s window or into a different database’s window.
To move tables from one database to another, use the Edit > Cut Tables command instead of
the Copy Tables command. This removes the table from one database and places it in the Clip-
board so it can be pasted into the database window of other database.
+ Tables cannot be moved from the All Tables tab to a different tab. However, they can be cloned
to new tabs as discussed in “Use tabs to categorize tables” on page 29.
Renaming and deleting
To rename a database table, access the Edit Table Properties window as shown on page 56.
To delete a table, use the Delete key, the Edit > Cut Selected Tables or Edit > Clear Selected
Tables commands, or right-click to the commands.

Reference 57
Fields
Importing and exporting tables
There are types of files for imported/exported ExtendSim database tables:
• As database text files for use by an ExtendSim database or the ExtendSim DB Add-In for
Excel. See “Importing and exporting database tables” on page 53.
• As delimited files for use in other applications, as discussed below
The main purpose of exporting a table as a delimited text file is so the file can be read by Excel
or some other application. And the main purpose of importing a delimited file is to use a file
created in Excel or some other application. However, delimited files are not automatically for-
matted as an ExtendSim database table as would be generated using the Export Selected Tables
or Import Tables to Database commands. If you want to work on ExtendSim databases in
Excel, a better method would be to use the ExtendSim DB Add-In as discussed on page 85.
Exporting a delimited file
With a database window open, export the
selected table by giving the command Database
> Export Table to Delimited File. After you
give the file name, ExtendSim puts up the col-
umn separator dialog (shown here), so you can
specify which type of separator to use in the
text file. You can read the text file in Extend-
Sim (however, see warning above) or in a word
processing or spreadsheet application.
Importing a delimited file
With a database window open and a database
table selected, import a table into the current
database by giving the command Database > Import Delimited File to Table. This imports a
text file that has been exported from an external application such as a word processing or
spreadsheet application.
+ See also “Excel Add-In” on page 85. The Add-In is a better method for working on ExtendSim
databases in Excel compared to importing/exporting delimited text files.
Fields
As shown on page 10, each field specifies some attribute or characteristic of whatever the data-
base table represents, for example:
Every field has a name, an index, and a defined data type—integer, string, date/time, and so
forth—that defines the structure of the information or data. Fields can also have parent/child
relationships with each other.
Table Fields
Customers Last Name, First Name, Company
Products Product Name, Shipping Weight (pounds),
Inventory Level (units)
Process Steps Step, Setup Time (minutes), Operator
Resources Item, Capacity (gallons), Pressurized?

58 Database Tutorial & Reference
Fields
+ The field’s name can be anything you want as long is not used by another field in that table and
is less than 64 characters. Field names are not case sensitive and can contain spaces.
Creating a field
There are several methods for creating a field. See “Methods for adding a field” on page 18.
Upon creation, every field is assigned an index, a unique key for identification. A field’s index
number is displayed in square brackets after its name.
+ To create a field with a mixed format (for instance, with both strings and numbers), set the field
as a string type in the Field Properties dialog. Enter numbers or strings into the cells.
Formatting and editing a field
• Fields are formatted using the Field Properties dialog discussed in “Properties and other dia-
logs” on page 60. To access the Field Properties dialog for an existing field, with the data-
base window in Schema view double-click or right-click the field, or select the field and use
the Edit Field Properties menu command.
• Each cell in the field takes on the formatting assigned to the field through the Field type set-
ting shown on page 62. (As discussed in “Formatting” on page 60, by default cells are con-
stants but can be changed to be random.)
• To reorder fields in a table, with the database window in Schema view click and drag the
fields.
• Use the ExtendSim Zoom In tool to cause fields to be larger; the zoomed setting is saved
with the model.
• To resize a field’s column width, put the database window in Data view. Then hover the cur-
sor over the column divider until it turns into a resize cursor and click and drag to resize.
+ If the column has been set in the Field Properties dialog to Auto-
size column width (see page 61), you won’t be able to resize by
dragging the column divider. To turn off auto resizing, right-
click somewhere within the column (in Data View or Table
Viewer mode) and select Manually Resize Column.
Creating parent/child relationships
See “Create a Parent/Child relationship” on page 27 for how to establish relationships between
fields.
Editing data
To access data for editing, in the database window do one of the following:

Reference 59
Records
Double-click a table’s name in the database
window’s Table List pane to open the Table
Viewer window, shown here.
Or, change the database window from
Schema to Data view, select the table in the
Tables pane, and edit the cells.
The records and fields for the selected table
will be displayed.
Records
Each record is the set of information (cells)
that represents the single item. Records are
composed of one or more fields, each of
which contains one piece of information. For
example:
When looking at a table in
the database window’s
Data view, records are the
horizontal component,
similar to rows in a spread-
sheet. For example, the
records shown here are #1 and #2.
Creating a record
Records can be added to a database table either when the database window is in Data view or
by when the database’s Table Viewer is opened. See “Add a record to the table” on page 18 for
more information.
Upon creation, each record is assigned an index number, a unique key for identification.
By default, new records are appended to (placed below) any other records in the field. Records
can also be inserted using the Insert New Records command, right-click, or button.
Table Fields Records Cells
Customers
Last Name
First Name
Company
1 to 10
Cells for the “First Name” field: Sofia,
Noah, Zeynep, Benjamin, Seoyeon, Lucas,
Louise, Bence, Junior, Olivia
Products
Product Name
Shipping Weight (pounds)
Inventory Level (units)
1 to 3
Cells for the “Shipping Weight” field: 1.5,
0.4, 3.9
Process Steps
Step
Setup Time (minutes)
Operator
1 to 3
Cells for the “Step” field: Lathe, Drill,
Press
Resources
Item
Capacity (gallons)
Pressurized?
1 to 2 Cells for the “Pressurized?” field: Yes, No

60 Database Tutorial & Reference
Cells
Formatting and editing a record
Records take on the formatting assigned to the fields through the “Field type popup menu” on
page 62. (Note that individual cells are constant by default, but can be set to use a random dis-
tribution, as discussed in “Cells” on page 60.) Records are deleted using a menu command or a
button in the Data view’s toolbar.
Sorting data
With the database window in Data
view, use the Sort Data button in the
toolbar to sort a table’s data by numeric
or string values.
The dialog lets you choose up to three
fields where each field can be sorted in
either ascending or descending order.
For example, use this to sort a table’s
records first by last name, then by first
name, and then by city.
Cells
Each cell is the intersection of one field and one record.
Definition
Cells represent one piece of information, such as a customer’s last name, a product’s weight, or
a process step.
Cells can be:
• Required—information needs to be manually entered or needs to be imported from some
other place
• Optional—the cell can be left empty
• Calculated—the cell’s information is calculated based on a formula involving one or more
other cells.
Formatting
Each cell in a field takes on the formatting assigned to the field through the Field type popup
shown on page 62.
By default cells formatted as numerics are constants. Individual cells can be made random by
selecting a cell and using a menu command, right-clicking, or using the Make Cell Random
button in the Table Viewer or the database window’s (Data View) toolbar. Making a cell ran-
dom allows it to access any of the ExtendSim built-in distributions or even a named distribu-
tion. For more information, see the “Database Random Distribution dialog” on page 63.
+ See “Formatting and editing a field” on page 58 for information about manually resizing a
record or having the record auto resize to accommodate large numbers in cells.
Properties and other dialogs
Most of the database dialogs are self-explanatory. The following require some explanation.

Reference 61
Properties and other dialogs
Table Properties dialog
When they’re created, ExtendSim database
tables have a Create New Table dialog. After
creation, a table’s properties can be viewed
or changed in the Table Properties dialog.
The two dialogs have the same options.
In the database window, access the Edit
Table Properties dialog by selecting a table
and giving the command Database > Edit
Table Properties or by right-clicking a data-
base table (Schema view of the database
window) and selecting Edit Table Proper-
ties.
The Table Properties dialog allows you to:
• Rename the selected table.
• Delete all the records. If selected, the ini-
tialization is done at the beginning of each
run or at the beginning of a multi-run sim-
ulation. Always check this if you are
doing multiple runs and the number of
records could change.
• Enter a Tooltip. This is the same as entering text in the field at the right side of the Database
window’s header. The text will be displayed in the Table Viewer or when a cursor is hovered
over the table.
Field Properties dialog
When you append or insert a field in a database table, the Append New Field or Insert New
Field dialogs present formatting and other options. These options are the same as shown in the
Field Properties dialog, described below.
To open the Field Properties dialog for an existing field:
• Double-click the field’s name while in the database window’s Schema view.
• Or, select the field in the database window’s Data view and give the command Database >
Edit Field Properties. (Note: the field must have at least one record to be selectable.)
• Or, right-click the field name while in the database window’s Data view..

62 Database Tutorial & Reference
Properties and other dialogs
Options
Field type popup menu
This table describes the options for the “Field type” popup menu in the Field Properties dialog,
discussed above.
Option Description
Field name Enter any unique name, up to 63 characters. Spaces and special charac-
ters are allowed. Duplicate field names are not allowed in the same
table. In the Edit Field Properties dialog you can rename the field.
Autosize column width When checked, causes columns to automatically resize depending on
the maximum width of cells. You can also manually resize columns
using the right-click menu.
Field type Format for the field. For details, see “Field
type popup menu” on page 62.
Display decimals/sig-
Figs
Displayed only for certain field types. For general format or scientific
numbers, the number of digits to display. For currency and percent, the
number of digits to the right of the decimal point.
Use separators Displayed only for certain field types. Inserts commas and periods to
separate digits.
Record ID field Used when you want the records in a table to have an identifier, such as
a name. Similar to a key field in other databases.
Each value unique When checked, the number or string for each record in this field must
be unique.
Read only When checked, prevents the data in a linked dialog parameter field
from being changed.
Initialize every record
in this field to:
If checked, initializes the data for all the records in the selected field to
the parameter value entered in the field. If the parameter is left blank,
initializes the field’s records to a blank.
First run...Every run Specifies when the record initialization takes place.
Information to display For displaying important information about the field.
Field type Description
Number An integer or double-precision floating point number. Choose general,
scientific, percent, currency or integer.

Reference 63
Properties and other dialogs
Database Random Distribution dialog
By default all data-
base cells are con-
stant. They can be
formatted as ran-
dom numbers as
shown on page 25.
To make one or
more cells random,
select the cells and
choose the Make
Cell Random but-
ton in the toolbar.
Or right-click the
cell and choose
Make Random. This opens the Database Random Distribution dialog, shown at right.
The random distributions in this dialog are the same as for the Random Number block (Value
library). For a complete list and short description of those distributions, see the User Refer-
ence.
Named distributions
A special feature of the Random Distribution dialog is that
you can assign a custom name to a distribution you’ve
specified, allowing that distribution and its arguments to
be selected by name elsewhere in the database.
For example, enter typical values for an empirical table
and name it Machine Time Distribution. Or give a custom name to an exponential distribution
with specific arguments.
String An alphanumeric string up to 255 characters
Date/Time Calendar date and time
Data address Describes the coordinates of a cell in a database table
Boolean checkbox Places a checkbox to indicate yes or no, true or false, on or off, etc.
List of tables Provides a popup menu of all the tables in the database, so you can
select a table.
Field type Description

64 Database Tutorial & Reference
Properties and other dialogs
Relationship dialog
When a parent/child relationship is
created and the field that will become
the child already has data, this dialog
opens and allows you to arbitrate
what happens. If there is no existing
data, the dialog does not open.
The options are:
• Try to match existing data in the
Child field to a record in the Parent
field. If existing data in the child
matches data in the parent, the data is left unchanged. Otherwise, it is cleared and the record
is left blank so the value can be manually selected using the Child popup selector
• Clear Child data. This option clears all the existing data in the child so the choice can be
manually selected using the Child popup selector.
Child popup selector
When you click the down arrow in a Child cell it displays a popup
menu with 3 types of options. The choices are to:
• Choose No value yet, which leaves the cell blank.
• Add a new parent value, which gets appended to the parent field
• Select one of the numbers listed in the popup
• Using this selector is discussed in “Select data for the parameter
field” on page 28

Reference 65
Properties and other dialogs
Link dialog
This dialog opens if you
click a data table’s Link
button or (by using the
menu command or right-
click) select Create/Edit
Dynamic Link for a dia-
log parameter.
Use the Link dialog to
create a dynamic link
between a block’s param-
eter or data table and a
database or global array.
It can also be used to
delete a link, change link
settings, and even change
between linked data struc-
tures.
Dialog structure
As shown here, the Link
dialog opens with two
tabs: Database and Global
Array.
• If the data table or
parameter is already
linked to a database or
global array, the dialog
will display informa-
tion about the existing link. For example: Link: DB Link - Reservoir DB:Stream
Amount:Max Volume. You can change or delete the link.
• If the data table or parameter is already linked to a dynamic array, the Link dialog will dis-
play Link: No user created link. (A dynamic array is an internal data structure only accessi-
ble through programming.) You can create a link to a database table or global array.
• If the data table or dialog parameter is not linked to anything, the dialog will display Link:
No link. You can create a link to a database table or global array.
+ See also “Finding linked dialog items” on page 67.
Delete Link button
The Link dialog is also used to delete a link.
A parameter or data table can only link to one data structure. If you change any of the compo-
nents, such as linking to a different database table, the previous linkage will be automatically
deleted.
Deleting a linked parameter
To delete a link between a dialog parameter and a database:

66 Database Tutorial & Reference
Properties and other dialogs
Right-click in the linked parameter field and select Create/Edit Dynamic Link. (Note:
don’t select or left-click the parameter field first.)
In the Link dialog that appears, click the Delete Link button.
Deleting a linked data table
To delete the link to a model’s data table:
Click the Link button at the bottom left of the data table
In the Link dialog that appears, click the Delete Link button.
+ ExtendSim knows which link is being deleted, so you don’t need to select the table the parame-
ter or data table is linked to before deleting the link.
Link dialog checkboxes
When the Database Table or Global Array option is selected in the Link dialog, it displays four
checkboxes that allow you to control the link’s behavior:
• Init messages
• Sim messages
• Final messages
• Read-Only link
Alert messages
As discussed on page 47, link alert messages are sent whenever the dynamically linked data
changes at the source, whether the simulation is running or not. Outside of a simulation run,
those alert messages are available to the Link Alert block (Utilities library; see page 33), equa-
tion-based blocks, and blocks you create. You can then use the alerts to detect changes or cause
something to happen in the linked blocks.
However, it is most common to want alerts about data changes during the simulation run. The
Link dialog’s Init messages, Sim messages, and Final messages check boxes control whether
or not all blocks receive link alert update messages when linked values change during specific
points in a simulation run. For example, the “Init messages” option determines whether a block
receives a message if a linked value changes during the InitSim message.
• These three options default to on. Turning an option off prevents ExtendSim from
sending data update messages to the linked blocks if the data source is updated during
that phase of the simulation.
• To maximize simulation speed you may not want these update messages sent during
certain phases of a run. For example, if you know the dynamic link only updates during
the FinalCalc message, it will reduce the messaging and speed up the simulation to
uncheck the Init messages and Sim messages options.
• When the Init messages and Final messages options are checked, linked blocks will
receive an additional message during InitSim and/or FinalCalc, causing an update of
the linked dialog items during those phases.
Use these options carefully and consider your objective (get the most up-to-date data, get a
consistent set of data, etc.) since they can dramatically affect runtime performance and results.

Reference 67
Read and Write blocks
Read-Only link
The fourth checkbox is the Read-Only link option, which is off by default. If checked, the
linked data can only be changed from the internal data structure (database or global array). In
that case, you will not be allowed to edit the parameter or the data table in the block’s dialog
and the live link is only one-way (from the database or global array to the data table or param-
eter).
Finding linked dialog items
The Model > Open Dynamic Linked Blocks command opens the Find Links dialog. This is
useful for examining and locating linked dialog items, and the options in the dialog allow you
to selectively choose which types of links you want to open.
Read and Write blocks
The Read and Write blocks (Value library) and the Read(I) and Write(I)
blocks (Item library) make it easy to get data into or send data out of
model components.The blocks are typically set to transfer data during a
simulation run.
+ An earlier chapter showed how to use these blocks. See “Use a Write
block to send model data to an ExtendSim database” on page 39 and
“Use a Read(I) block to get data for the model from an ExtendSim data-
base” on page 41.
About the blocks
+ The Read and Write blocks in the Value library have multiple data sources and targets; the Item
library blocks only exchange data between the model and ExtendSim databases.
Name tracking
Since they can change, indexes can be an unstable way to reference locations in a database. For
example, a field index will change if you move the field’s location. To avoid issues, database
aware blocks such as the Read and Write blocks store names rather than index values. Then at
the beginning of the run, the block does a one time lookup using the names to find the index
values. This name tracking feature allows the block to track database addresses even if the
indexes have changed.

68 Database Tutorial & Reference
Read and Write blocks
Reading
The two Read blocks look up information found at a specified data source:
• For the Read block (Value library) the data source could be an ExtendSim database or global
array, Excel workbook, or a text file
• For the Read(I) block (Item library) the only source is an ExtendSim database.
The blocks then report that information through their value output connectors. The Read(I)
block can also store the information as an attribute on items passing through, so the informa-
tion can be used by other blocks in the model.
Writing
The two Write blocks send information to a specified data target or destination:
• For the Write block (Value library) the data target could be an ExtendSim database or global
array, Excel workbook, or text file
• For the Write(I) block (Item library) the data target is an ExtendSim database.
The information to be sent can come from their value input connectors. The Write(I) block can
also send the attribute information that has been found on items passing through.
Link alerts in Read and Write blocks
The link alert feature makes the Read, Read(I), Write, and Write(I) blocks especially powerful
when used to exchange data between blocks in the model and an ExtendSim database or global
array. When either the target or the source is an ExtendSim database or global array, the read/
write blocks can create a one-way live link between the target and the source. Writing to a cell
in an Excel spreadsheet or to a text file will not have the same live link effect.
See “Link alerts” on page 47 for more information.
Compared to DDL
Dynamic data linking (DDL) is discussed on page 19. Instead of dynamically linking data from
a block’s dialog parameter or data table to a database cell or table, you can use the blocks that
read or write to access the cells in a database for use throughout a model.
The advantages of using blocks that read and write rather than dynamic data linking (DDL)
are:
• These blocks allow more control over which database values get used, and where and when
they are used.
• Database usage is clarified visually. Instead of a blue outline around a parameter field inside
a block’s dialog, it is more obvious when a database value is coming from a Read block.
• Dynamic linking is limiting because it is fixed point-to-point. While you can change the
value at the data source, you can’t dynamically change which database cell is accessed
during a simulation run or in a series of runs.
• Rather than setting up a dynamic link for each parameter or data table, data can be more eas-
ily accessed at several places in the model.
• The read/write blocks support name tracking whereby blocks are alerted if there is a change
to the structure of a ExtendSim database component, such as the insertion or deletion of a
record. DDL does not support name tracking.

Reference 69
Read and Write blocks
• In some blocks there is no dialog parameter or data table you can directly link to.
• It is often easier to perform mathematical calculations on the database values.
• It is more convenient for hierarchical blocks, allowing access to a different record for each
instance of the hierarchical block in a model.
Compared to importing/exporting
Rather than using the Data Import Export block (described on page 35), which exchanges the
entire set of data at a time, the Read and Write blocks are usually used to exchange data piece-
by-piece as required during the run. Even though it may slow simulation speed, models may
need to write and read data while the simulation is running. For example, it is common that the
data that is written is in turn read and used in another part of the model.
See page 72 for some advantages of importing/exporting compared to reading/writing.
A potential disadvantage of using the Read and Write blocks is that reading and writing the
data each time the block is calculated can impact simulation speed. If the data to be read or
written will not change over the course of the simulation, you should import/export the data as
a local copy in the block before or after the run. If the data is not going to change at all, con-
sider using another method, like a one-time copy/paste or import/export.
Where to get more information
• For a tutorial showing how to use these blocks in a model, go to page 38
• For an example of how the blocks are used, explore the Monte Carlo and DB Job Shop mod-
els discussed below
• Since the Read and Write blocks in the Value library have uses beyond interfacing with data-
bases, they are also discussed in the How To: Data Management chapter of the User Refer-
ence.
Monte Carlo model
The Monte Carlo model (located at ExtendSim/Examples/Continuous/Standard Block Models)
is a continuous model that uses an ExtendSim database named “Scenarios” to store the model’s
inputs and results. Using a database allows the model to experiment with alternative scenarios.
Rather than dynamically linking specific dialog parameters and data tables to a database, the
model uses Read and Write blocks (Value library) to provide the interface to the database. The
Read blocks get random values from the database and use them to represent model parameters
where the actual values are not known with certainty. The Write blocks capture and report
results to a database table that displays the results of the base case as well as each of the 23 sce-
nario options.
DB Job Shop models
+ These models use blocks from the Item library. They cannot be opened using the ExtendSim CP
product.

70 Database Tutorial & Reference
Data Import Export block
The DB Job Shop Read(I) and DB Job Shop
Read(I) Lookup models are located at Extend-
Sim/Examples/Discrete Event/Routing. These
models simulate three parts, each with their
own process sequence, being routed through
five potential processes (milling, drilling, lath-
ing, cutting, and exiting).
Depending on the part, a process sequence is
made up of some combination of the processes.
For example, the process sequence for part
100-3 is cut, mill, lathe, drill and then exit, while the sequence for part 100-1 only contains a
milling step before exiting. Each step in the process has a random delay that is unique to each
part type.
The purpose of these models is to demonstrate how the ExtendSim database can be used to
control a discrete event model. In particular the database in these job shop models is used to:
• List the different products being made (in this case there are 3)
• Create a production schedule database table that is used by the Create block
• Describe the different routes or process steps required to build each of the three products
• Define processing delay times for each process step in each product's process sequence
One advantage of using a database for these models is that more products can be added to the
database and the production schedule can be changed without having to change the structure of
the model. Also, if this were a real model, production statistics would also be kept in the data-
base.
+ See also the “DB Job Shop Query model” on page 84. That model uses the Query Equation
block to find the current part's next process step and its associated delay.
Data Import Export block
Simulation models require input data and generate output data. This data is often derived from
one or more sources that reside in applications such as Excel, relational databases, SAP, and
from files residing on remote computers. The management of this data is an integral compo-
nent of the simulation modeling process.
As the complexity and fidelity levels of simulation models increase, the amount of data that
has to be managed increases as does the time devoted to model configuration and data manage-
ment. As the volume and complexity of data being managed increases, it becomes more desir-
able to automate as much of the data management process as possible.
Automation reduces data input errors, scenario setup time, and output data management time.
Consequently, it is highly desirable to automate the direct exchange of data between simulation
models and data management applications.
Overview
The Data Import Export block (Value library) provides modelers with a mechanism for con-
trolling the automated exchange of data between ExtendSim models and external data sources
and targets. It performs two primary functions:
1) Transfers data from specified data sources to specified data targets where either the source
or the target can be an external application or file

Reference 71
Data Import Export block
2) Controls the timing of when data exchanges occur—at the beginning, during, or after the
simulation run
+ The main advantage of using the Data Import Export block is that information is exchanged as
one piece rather than step by step during the simulation run. Thus it is typically used to load the
model with data before the simulation run and export results at the end of the run.
Import and Export modes and interfaces
The Data Import Export block can be configured to operate in either import or export mode. It
exchanges data between an ExtendSim database and:
• A Microsoft Excel workbook (specified by rows and columns,
named ranges, or by workbook table)
• External databases that are ODBC or ADO compliant (Microsoft
Access, Oracle, MySQL, SQLServer; Windows only).
+ The Oracle and SQLServer databases are useful as automated
bridges between ExtendSim databases and ERP programs such as
SAP.
If you use the Data Import Export block to exchange data with an ODBC or ADO database
such as Access, the database and its drivers must be 64-bit compatible.
• An FTP (file transfer protocol) data source type, where the file resides on a remote machine
and access to it requires a user name and password.
• Text files such as those generated by Notepad or Excel or any other applications where the
modeler has read access to a file that resides on the local computer or a local area network
(LAN).
• An XML (extensible markup language) file, a flexible way to share structured data with
external databases, the World Wide Web, intranets, and elsewhere.
+ The Data Import Export block even allows you to export an entire ExtendSim database to an
ADO-compliant database, such as Access.
Configuring the block for external applications and files
Each of the allowed applications and file types above have their own set of requirements for a
successful import or export and the Data Import Export block changes settings and fields
accordingly.
For example, the tutorial on page 37 showed that, when exporting from an ExtendSim database
to an Access database file, the block presents a field for the name of the Access file. However,
depending on the external application or file type selected, the fields for specifying it as a
source or target will vary. In addition, for server-based applications such as SQL Server and
Oracle, you will need access to the server and/or a user name and password.
+ For ADO compliant databases, the path to the external source or target file varies depending on
which database is selected. For Access it is specified by a file name. For MySQL and SQL

72 Database Tutorial & Reference
Data Import Export block
Server the source/target is specified using a server name and a database name. For Oracle, a
user name and database name must be specified.
If information other than a file name and location is required, the block’s Options tab will be
enabled. The Options tab is helpful for configuring tables, entering a data source name (DSN)
data structure, and so forth. As is true when files are selected and configured on the Import
Export tab, the fields on the Options tab will vary depending on the external application or file.
If there is nothing additional to configure, the Options tab will be disabled.
+ See “Fields with string data types; PRI and PRV” on page 48 if the block will exchange data
with an ExtendSim database’s child field.
Import and export timing
The Data Import Export block provides three options for when the external source or target
exchanges data with the ExtendSim database:
• Manually whenever the Import Now or Export Now button is clicked, even if the simulation
is not running.
• During the simulation run, when the block’s input connector gets a value greater than 0
(zero).
• During a specified phase of the simulation run:
If the Import at beginning of simulation checkbox is checked, data is automatically
imported at pre-CheckData. The Options tab offers alternative import points.
If the Export at end of simulation checkbox is selected, data is automatically exported
at EndSim.
Compared to reading/writing data
The advantages of using blocks that read/write, rather than import/export, to exchange data
between a model and a database are discussed on page 69.
The advantages of using import/export compared to reading and writing data include:
• Import/export might be faster than reading and writing data because the data gets completely
copied in a single operation. Whether the exchange happens before, during, or after a simu-
lation run, all the data is made available to the target at the same time, rather than transfer-
ring piece by piece during the simulation run.
• The information can be accessed even if it originated on a different computer or an external
device.
For example, simulations often run faster because the data is exchanged as one piece—all the
data is made available to the target at the same time rather than transferring piece by piece
during the simulation run. This is true whether the data is imported/exported before, during, or
after a simulation run.
Where to get more information
• For a tutorial showing how to use this block in a model, go to page 35
• For an example of how the block is used, explore the Dynamic Resource Qualification
model discussed below
+ Since the Data Import Export block has uses beyond interfacing with ExtendSim databases, it is
also discussed in the How To: Data Management chapter of the User Reference.

Reference 73
DB Line Chart block
Dynamic Resource Qualification model
+ This model uses blocks from the Item library. It cannot be opened using the ExtendSim CP
product.
The Dynamic Resource Qualification model is
located at ExtendSim/Examples/Discrete Event/
Resources and Shifts/Advanced Resources. It
uses stochastic distributions to represent the fre-
quency and duration of resource down events.
A database table named Step Qualification Rules
specifies, as a function of the number of units processed by a given resource, which process
steps that resource is qualified to perform. As items pass through the unit processing loop in
the Unit Processing hierarchical block, Equation block [30] checks the count of the number of
units processed by each resource allocated to a unit item. When this count crosses one of the
thresholds specified by the Step Qualification Rules database table, the Equation block updates
the Qual Matrix table entries for the associated resource based on the new set of process step
qualifications for the new Units Processed between PMs Level value.
Where to get more information
• For a tutorial, go to page 35
• For an example of how the block is used, explore the Dynamic Resource Qualification
model discussed above
DB Line Chart block
The DB Line Chart block (Chart library) displays database data as a graph and reports that data
in a table. You use the DB Line Chart block (Chart library) to:
• View data stored in one or more ExtendSim databases
• Monitor what happens to a database cell’s value during a simulation run
• Compare sets of database data to each other— compare a cell, a record in a table, or a data-
base table to another cell, record, or table respectively
Instead of reading values from input connectors as most of the chart blocks do, this block dis-
plays values from an existing ExtendSim database. To see how it is used in a model, go to
page 30.
+ The DB Line Chart block is the best method for viewing a cell’s data history.
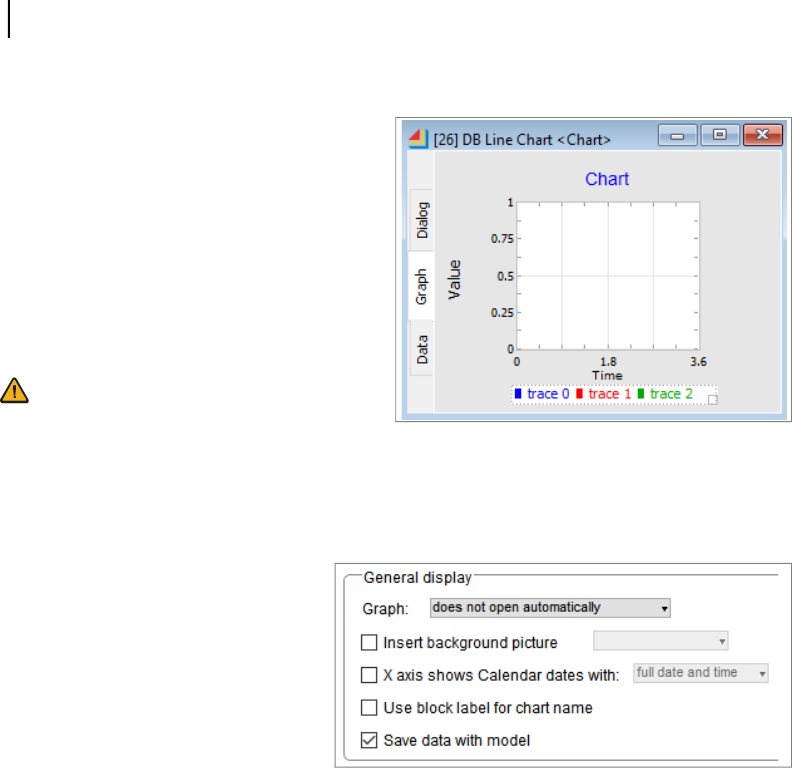
74 Database Tutorial & Reference
DB Line Chart block
Block structure
When the DB Line Chart’s icon is double-
clicked on the model worksheet, it opens
with the Graph tab being front most. There
are three tabs along the left side—Dialog,
Graph, and Data.
The Data tab is for recording data, and the
Graph tab is for displaying data, during the
simulation run. The Dialog tab is for enter-
ing settings for the block. As shown below,
additional tabs appear if the Dialog tab is
the active window.
See the User Reference for complete infor-
mation about the Trace Editor and Graph
Properties dialogs that appear when you
right-click the Graph tab in Chart library blocks.
Dialog tab
When the Dialog tab on the left side is selected, the block shows three tabs across the top: Data
Collection, Display, and Comments.
• The Display tab is much the same
for all the blocks in the Chart
library. Use it to set general
options such as whether the
graph opens automatically, how
autoscaling is handled, and so
forth. For example, you might
not want to see the graph until the
end of the simulation or until you
manually open the block’s dialog.
Or you might clone the graph onto the model worksheet and never need the block’s dialog to
open. See the User Reference for more information about the options in the Dialog tab’s Dis-
play tab.
• The modes and options in the Dialog tab’s Data Collection tab, shown and discussed below,
are specific to graphing database data. In addition to having options for what exactly gets
graphed and when, the tab has options that limit the amount of recording time and the
amount of data that gets recorded.
Data Collection tab
On the Dialog tab, the Data Collection tab is for specifying what data should be collected and
when it should be displayed.
What should be shown on the graph
The Data collection type frame at the top of the Data Collection tab is for deciding what should
be shown on the graph and when. The options are:
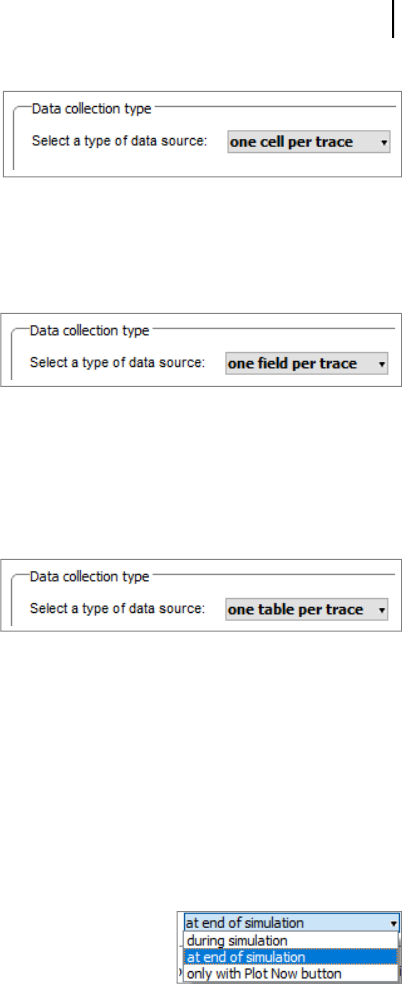
Reference 75
DB Line Chart block
• One cell per trace. This is the easiest
way to view the history of one or more
database cells. The values for each
selected cell are displayed on a separate
trace in the block’s Graph tab and
reported in a separate column in the Data tab. The source cells can be from the same or dif-
ferent databases. The block reports and displays the values of the cells during the simulation
run such that each point on the graph’s trace represents the value of the cell at that specific
time.
• One field per trace. For graphing data
from different fields of the same data-
base table. This choice gets the time
information from one (and only one) of
a table’s fields and gets the data information from one or more other fields in that database
table. All the fields must come from a single specified database table and that database table
must have a time field. The block will report and display the value of each field’s records at
the associated times in the time field. Thus each record is a point on the graph and a value in
the block’s data table. The display can occur during or after a simulation run or whenever the
graph is manually plotted.
• One table per trace. Used to chart data
coming from fields in different database
tables. For this option, each table must
have its own time field as well as at least
one data field and each trace will represent one time field and one data field from one data-
base table. If all the fields come from the same database table, it is similar to what happens if
you choose “one field per trace”.
+ Each DB Line Chart block has a limit of 20 traces that it can display.
When the source data is collected
The options for when the data is collected are:
• For the “One cell per trace” mode, the data is always collected during the simulation run.
• For the “One field per trace” and “One table per trace” modes, the data collection options
are:
• During the simulation. Note: this option can slow the run
because data will be constantly collected.
• At the end of the simulation.
• Only when the Plot Now button is clicked. Use this
option if you just want to view what is currently in the database. For example, when
you don’t want to run a simulation or you have paused the simulation and want to view
intermediate results.

76 Database Tutorial & Reference
DB Line Chart block
Where the source data is located
The Data collections
options per trace frame in
the middle of the DB Line
Chart’s Data Collection tab
is for selecting the loca-
tion that holds the data to
be graphed, one row per trace. Most of the option headers are self-evident; the rest are
explained here.
+ Depending on what data is collected and whether the model is continuous or not, some of the
following options may not appear in the dialog’s Data Collection tab.
• Open. After the complete data source location (address of database, table, field, and record,
as appropriate) has been entered, click the button in the Open column to open the Table
Viewer. Until then, the button won’t be able to open the Table Viewer.
• Select. If present, use the Select column to quickly specify the exact database address, rather
than selecting each component of the address from the other columns. See the next page for
a picture of the Database Address Selector.
• Checking the box for the Fix column (shown to the right) causes the trace to take the
same name as the identifier (the cell ID or the name of the field or table) for the com-
ponent that is being traced.
• Blank. Depending on the option selected, if a Blank value is received the block can
ignore it or interrupt the line.
• Offset. Adds the entered number to the trace’s Y or Y2 value, offsetting
where on the graph the trace gets displayed. Use this if many traces
could lie on top of or too close to others. (This option is not available in
continuous process models.)
Data recording options
The bottom frame in the Data Collection tab
allows you to either:
• Completely turn off data recording (saves
recalculating time and memory)
• Only collect data during a specific window of
time
• Record only the latest specified number of points (“worm chart”)
Miscellaneous
Some other features of the DB Line Chart block to note:
• Each DB Line Chart block has a maximum of 20 traces.
• You can graph multiple database cells, or fields, or tables on separate traces in a DB Line
Chart block, but you cannot mix cells, fields, and tables in the same block. Instead, use sepa-
rate blocks for each component.

Reference 77
Equation-based blocks
• You don’t need to run a simulation to use the DB Line Chart block. It is also useful when you
just want to visualize and compare sets of data within a database or between one database
and another. After selecting the data sources and options, use the Plot Now button in the
Data Collection tab to graph the data. (Note that this option is not available if you are graph-
ing one cell per trace.)
• If you choose “one cell per trace” for the data collection, the best way to drill down to the
wanted cell is by clicking first on a cell in the Select column. This takes you to the Database
Address Selector so you can choose the database, table, field, and record in one window.
• To increase the number of available rows, and hence the number of traces, in a table
in the dialog’s Data Collection tab, click the +/- button (as shown to the right) in the
lower right corner of the table. Unused rows will appear as empty columns in the
Data tab.
Equation-based blocks
The equation-based blocks calculate values for, and perform operations in, models based on
formulas and ModL code entered in their dialogs.
Overview
There are five equation-based blocks:
+ The Buttons block (Utilities library) is also equation-based but is used for more specific pur-
poses. It is discussed in the User Reference.
Block Library Purpose See
Equation Value Computes user-defined equations
and outputs the results
User Reference, How To:
Math and Statistics
Equation(I) Item Computes user-defined equations
when an item arrives, then outputs
the results
User Reference, How To:
Math and Statistics
Queue Equation Item Stores items and releases them based
on the results of user-entered equa-
tions.
User Reference, How To:
Math and Statistics
Query Equation Value A user-defined equation selects one
record from an ExtendSim database
table
page 78
Query Equation(I) Item A user-defined equation selects one
record from an ExtendSim database
table when an item arrives
page 78

78 Database Tutorial & Reference
Query Equation and Query Equation(I) blocks
These blocks provide access to over 1,200 ExtendSim ModL functions of the ExtendSim API;
you can also use operators to enter logical statements, write compound conditions, and specify
loops. The most common use of equation blocks is to write if-then-else logic statements.
The equation can be as simple as performing a mathematical operation on the value from an
input connector or it could be as complex as a full programming segment. You can use include
files (See Include Files in the Technical Reference) within your equation to reuse your own
functions among many equation blocks, and you can use the source code debugger (see the
User Reference) to check the equation if you have a problem.
The components of an equation are the input variables, the equation, and the output variables.
An equation-based block takes input variables, uses those values in the equation, and outputs
the results of the calculation. There are several pre-defined input and output variables with
static variables you can use in equations and several of them relate to the ExtendSim database.
For example, DB address, DB database index, DB table index are pre-defined input variables
while DB write value and DB write value using attribute are output variables.
Use with ExtendSim databases
In addition to the Read/Write blocks from the Value and Item libraries, equation-based blocks
also allow you to perform read/write database operations. And while equations require more
effort to access the database, sometimes the added control and flexibility they provide are
needed. For example:
• Searching. Combine reading and looping logic by searching an entire field (reading one
record at a time) for a particular value by calling DBGetDataAsNumber() inside the “for”
loop.
• Reading. Specify a DB Read Value as the input variable in the block, then use the read value
to influence the if-then-else logic in the equation.
• Writing. Use the value of an input connector variable to write different kinds of information
to a database using if-then-else logic.
+ The Equation, Equation(I), and Queue Equation blocks are used extensively whether a model
has a database or not. They are discussed fully in the How To: Math and Statistics chapter of
the User Reference. Since the two Query Equation blocks are only used to perform Extend-
Sim database queries, they are discussed below.
Query Equation and Query Equation(I) blocks
+ Unlike the Read/Write, Data Import Export, and equation-based blocks which have multiple
uses, the Query Equation and Query Equation(I) blocks are unique blocks that are only used
with the ExtendSim database. Therefore, these two blocks are discussed fully here rather than
in the User Reference.
A query finds records in a database according to the criteria you
specify. The Query Equation blocks are used to search an ExtendSim
database, rank the records, and intelligently select one record based
on a ranking rule. A user-defined equation in the block’s dialog is
calculated once for each record in the table; the results are used to
assign a ranking for each record. The record with the best ranking is the one that gets selected.
The query blocks are used when a database holds information that is required for making deci-
sions in a model. While the querying and ranking behavior could be accomplished using the

Reference 79
Query Equation and Query Equation(I) blocks
Equation blocks, the equations would be long and complicated. Furthermore, the query blocks
provide critical pieces of information that support writing more powerful queries.
There are two query blocks:
• Query Equation (Value library)
• Query Equation(I) (Item library)
The major differences between these two blocks is presented in the table on page 83.
The Query Equation blocks are advanced modeling tools. They are not available in all Extend-
Sim products.
How the blocks work
A query cycle is the point in time when a query block executes its equation to pick the next
“winning” record.
• In the case of the Query Equation(I) block in the Item library, this occurs every time an item
passes through.
• For the Query Equation block in the Value library, its Options tab has choices for controlling
the initiation of the query cycle.
Importantly, only the results of the equation for the winning record are used for that particular
query cycle. For example, if the query table has 10 records, the equation will be calculated 10
times, and 10 individual sets of equation results will be collected. However, only the equation
results from the record with the best ranking are used and the results from the other 9 records
are discarded.
The blocks’ input and output variable types are specifically designed to help modelers write
equations that will properly rank the records and select the winning record. So that each record
will have a ranking, the user-defined equation is calculated once for each record.
The records are ranked according to the ranking rule selected in the block’s Options tab; the
rules are listed on page 82. The block's internal data structure keeps track of the ranking and
any other results of the equation for each record.
+ At least one DBQ record rank output variable is required so that each record can have a ranking.
Spawned items
A feature unique to the Query Equation(I) block is the ability to optionally create additional
items. These spawned items can then be used for special purposes in the model. This is an
independent and parallel system to how the items that pass through the block got created.
+ A spawned item essentially represents a record that has been “spawned” as an item.
Typically items are created outside of the block and pass through the block. These items are
called pass-through items. In some instances, you might want to create additional action items,
called spawned items, based on equation logic and what has been found in the query table. If a
spawn is created for a particular record, an equation can be defined in such a way that results
particular to the spawned record may be saved as attributes on the spawned item.
To use this feature, enable spawning on the Options tab. This causes a new item output connec-
tor to appear on the top edge of the block's icon. It also causes some additional equation vari-
able types, with the prefix DBQS (for database query spawn), to be available. Those variables
are shown in the table on page 81.

80 Database Tutorial & Reference
Query Equation and Query Equation(I) blocks
+ The equation results for pass-through items are calculated independently from those for spawns.
Pass-through results are associated with the pass-through item and spawn results are associated
with the spawned item. For example, results for the pass-through item might get taken from
record 6 (because 6 possessed the best pass-through record rank), while the spawn might use
results from record 2 (because 2 possessed the best spawn record rank).
When a spawned item is created, it represents a record from the query table. Consequently, you
can think of this newly created item as a “spawned record”.
+ One pass-through item can result in anywhere from 0-n spawns being created, where n is the
number of records in the query table. The number is determined by spawn settings and the
equation results.
Variables
The Query Equation blocks have several types of input and output variables. Most of those
variables are the same as shared by other equation-based blocks. However, the following vari-
ables are unique to the query blocks.
+ See the How To: Math and Statistics chapter of the User Reference for a list of the input and out-
put variables that are shared by all equation-based blocks.
To modify the number of rows used in the variable tables:
• Change the number of rows in the table by clicking the green +/- resize button in the table’s
bottom right corner and entering the number of rows desired.
• Delete rows by first selecting the rows you wish to delete, clicking the green +/- resize but-
ton, and then selecting the option to “delete selected rows”
• Duplicate any rows by first selecting the row you wish to duplicate, clicking the green +/-
resize button, and then selecting the option to "copy selected row."
Input variables
This list is only for variables that are unique to the query blocks; see the How To: Math and
Statistics chapter of the User Reference for descriptions of the other input variables.
.
Input Variable
Query Equation
Query Equation(I)
Uses
DBQ read value X X Requires the user to choose a field in the query table.
As the query block starts to loop through each record,
this variable automatically takes on the value found in
that field for the current record. (This is easier than
calling DBDataGetAsNumber() to reference informa-
tion residing in the query table for the current record.)
DBQ read PRI X X The Parent Record Index value from the specified field
for the current record. See note below.

Reference 81
Query Equation and Query Equation(I) blocks
+ The notation PRI (Parent Record Index) is used in blocks that interface with the ExtendSim
database. It describes the type of value that is being read or written when dealing with a Child
field. See “Fields with string data types; PRI and PRV” on page 48.
Output variables
This list is only for variables that are unique to the query blocks; see the How To: Math and
Statistics chapter of the User Reference for descriptions of the other output variables.
DBQ start record X X The record to start the query cycle. (The default behav-
ior is to start at record 1.)
DBQ num records X X The number of records in the query table.
DBQ current record index X X The index of the record currently being evaluated in the
query cycle.
DBQ static query init X X A static input variable that gets initialized at the begin-
ning of every query cycle.
DBQ current best rank result X X Current best record rank result in the current query
cycle.
DBQ current best record X X The record index with the best rank at this point in the
current query cycle. If the value of this input is < 1,
then no record has yet to be given a ranking.
DBQ num non-blank ranks X X Number of non-blank ranked records at this point in the
current query cycle.
DBQS current best rank
result
X Current best spawn rank result in the current query
cycle. (Only enabled if spawning is enabled.)
DBQS current best record X The record index with the best spawn rank at this point
in the current query cycle. If the value of this input is <
1, then no record has yet to be given a ranking. (Only
enabled if spawning is enabled.)
DBQS num non-blank ranks X Number of non-blank spawn ranked records at this
point in the current query cycle. (Only enabled if
spawning is enabled.)
Input Variable
Query Equation
Query Equation(I)
Uses

82 Database Tutorial & Reference
Query Equation and Query Equation(I) blocks
As mentioned earlier, while you can specify other equation results, at least one of the output
variables has to be of the type DBQ record rank. Furthermore:
• Only the results for the record ranked best will be output.
• You can use more than one DBQ record rank variable; the secondary ranking variable will
be used to arbitrate in the case of tied ranking. This is useful if you are concerned with tie
breaking for two or more records having the same primary. What constitutes a tie can also be
defined on the Options tab with the parameter Records ranked within +/- X are equal.
• If the Spawning option is enabled, at least two output variables are required – one variable of
DBQ record rank type plus one variable of DBQS record rank type.
Ranking rules
The rules that determine which record is selected are given on the block’s Options tab:
For a pass-through item
• Highest pass-through record rank. Each record’s rank value is calculated by the equation.
The one with the highest rank is chosen.
• Lowest pass-through record rank.Each record’s rank value is calculated by the equation.
The one with the lowest rank is chosen.
• First True record rank. The equation will be calculated once for each record until either:
Output Variable
Query Equation
Query Equation(I)
Uses
DBQ record rank X X Rank result for the current record
DBQ halt query X X A True value halts the current query cycle
DBQ next record X X Tells block which record to query next
DBQS record rank X Spawn rank for the current record
DBQS attribute X For assigning attribute values to a spawned item. If the
record's spawn rank is good enough to merit a spawn-
ing, then results from that record can be attached to the
spawned item in the form of DBQS attributes. See
“Spawned items” on page 79.
DBQS item quantity X Item quantity to be placed on spawned item. Also see
DBQS attribute, above.
DBQS item priority X Item priority to be placed on spawned item. Also see
DBQS attribute, above.
DBQS 3D object ID X 3D object ID to be placed on spawned item. Also see
DBQS attribute, above.
Reference 83
Query Equation and Query Equation(I) blocks
• A record receives a True ranking
• Or, there are no records left to evaluate
For a spawned item
• Highest spawn record rank. Each record’s rank value is calculated by the equation. The
one with the highest rank is chosen.
• Lowest spawn record rank.Each record’s rank value is calculated by the equation. The one
with the lowest rank is chosen.
• First True spawn record rank. The equation will be calculated once for each record until
either:
• A record receives a True ranking
• Or, there are no records left to evaluate
• True spawn record ranks. Any record receiving a spawn rank 0.5 will be spawned. This
makes it possible to create any number of spawned action items for one pass-through item.
Differences between the query blocks
Description
Query Equation
Query Equation(I)
Query cycle initiated only when an item arrives (similar to the Equation(I) block). X
Query cycle initiation is controlled using options on the Options tab (similar to the
Equation block).
X
Supports Spawning X
Works in continuous models X
Works in discrete event models X X
Works in discrete rate models X X

84 Database Tutorial & Reference
Query Equation and Query Equation(I) blocks
DB Job Shop Query model
The DB Job Shop Query model is located at ExtendSim/Examples/Discrete Event/Routing.
The model simulates three parts, each with their own process sequence, being routed through
five potential processes. Depending on the part, a process sequence is made up of some combi-
nation of milling, drilling, lathing, cutting, and exiting. For example, the process sequence for
part 100-3 is cut, mill, lathe, drill and then exit, while the sequence for part 100-1 only contains
a milling step before exiting. Each step in the process has a random delay that is unique to each
part type.
All the information needed to drive this model is located in the ExtendSim database named
Database 1. The table structure of that database is shown here.
• The Products table contains the names of the three parts that are modeled.
• The Production Schedule table is used by the Create block (through linking) to create parts
by schedule.
• The Operations table contains a list of the five different potential operations – mill, drill,
lathe, cut, and exit.
• Each of the three part types has an associated Production Specs table. This is used to define
the steps in a part's production sequence and the delays associated with each step. The From
and To fields are used to define the appropriate destination given a particular origin: “If you
come from here, go to there next.”
In the model, one Query Equation(I) block is used to find the current part's next process step
and its associated delay. Both pieces of information are then stored as attributes on the pass-
DB Job Shop Query model
Table structure of Database 1

Reference 85
Excel Add-In
through item. When the next item/part arrives, the query block starts looping through the Pro-
duction Specs table associated with that part.
In this example, the query block is looking for the record whose From value matches the curr-
Step attribute found on the item. Once that is found, the block then finds the associated To and
Process Time values for that record and stores them as attributes on the item.
The equation in the query block is:
if(currStep == fromField)
{
rank = True;
currStep = toField;
activityDelay = delayField;
}
else
{
rank = False;
}
Given the complexity of what the query block is doing, the code is very simple.
Excel Add-In
The ExtendSim DB Add-In is a tool for externalizing the modification and construction of
ExtendSim databases.
Uses
Use the Add-In to:
• Import an ExtendSim database text file into Excel for editing, then export it back to Extend-
Sim.
• Create new, fully structured, ExtendSim database files within Excel, then export those files
for use within ExtendSim.
• Let Excel be the master for documenting the data and database structure. For instance, charts
and data tables can be added in Excel to help explain or analyze inputs to the database. (Any
tables that do not start on row 20 can be used because they are not considered ExtendSim
database tables and will be discarded when the file is exported to ExtendSim.)
The data and structure of an ExtendSim database can thus be edited or created in Excel, sepa-
rate from, and even in the absence of, the ExtendSim application. For example, analysts can
structure or edit database files for use in models without knowing anything about ExtendSim.
+ The DB Add-In for Excel is included only in specific ExtendSim products; it can also be pur-
chased separately by those who have other ExtendSim products or who don’t have ExtendSim.
Using ExtendSim versus the DB Add-In to create or modify a database
Depending on which environment you feel more comfortable in, you can choose to create data-
base files in Excel or in ExtendSim. There are some things to note though:
• There is no undo in the Add-In.

86 Database Tutorial & Reference
Excel Add-In
• In ExtendSim, database tables can exist on multiple tabs. In Excel, a database table can only
exist on one worksheet.
Installing the Add-In
The DB Add-In only works on Windows operating systems and requires Office 2007 or better.
To install the Add-In into Excel:
Follow the Excel instructions for installing
an Add-In. These will differ depending on
the version of Excel and the platform you’re
installing on. For example, in Excel you
might go to Insert > My Add-ins. Then from
the My Add-ins popup choose Manage
Other Add-ins > Manage Excel Add-ins >
Go...
In the Add-ins dialog, click the Browse but-
ton.
Navigate to the ExtendSim DB Add-
In.xlam file; it is located in the Documents/
ExtendSim/Extensions folder.
Select the ExtendSim DB Add-In.xlam file
and click OK. This puts ExtendSim DB
Add-In in the list of available Add-Ins as shown here. (Make sure the checkbox next to
ExtendSim DB Add-In is checked.)
Click OK to close the Excel Add-Ins dialog.
This action installs a new menu into Excel
named “ExtendSim DB with commands (shown
here) for creating a new database, importing a
database, and so forth as shown here.
After a database text file has been imported or
when a new database file is being created, other
commands appear in the ExtendSim DB menu
for adding a table, making a cell random, editing parent/child relations, and so forth.
If you have an older version of the Add-In (the older extension is .xla), uncheck the existing
Add-In in the Add-Ins dialog, then browse to the newer DB Add-In and follow the above pro-
cess. You must restart Excel to finish the update.
Importing and exporting database files
If the Add-In is used, the files exchanged between ExtendSim and Excel are formatted as data-
base text files.
Exporting from ExtendSim
To export a database file from ExtendSim so that Excel can import it, see “Importing or export-
ing an ExtendSim database” on page 52. The exported file will be in a special database text file
format.

Reference 87
Excel Add-In
Importing to Excel
To import a database text file into Excel, give the command ExtendSim DB > Import Database.
Then choose a database text file that has been exported from ExtendSim using the Export
Database command, as mentioned above.
During importing, the Status bar at the bottom of the workbook reports the current table as well
as the number of the record being imported and the total number of records that will be
imported.
After the file has been opened, you will be given the opportunity to perform a database consis-
tency check, discussed on page 91.
If some or all of the database tables had been organized onto different tabs in the database, as
discussed in “Use tabs to categorize tables” on page 29, Excel will populate the workbook with
worksheets that correspond to those tabs. Thus each worksheet is the equivalent to one of the
tabs in the imported database.
Exporting from Excel
To export a database file from Excel so that ExtendSim can import it, give the command
ExtendSim DB > Export Database. The workbook will be exported as a database text file.
The DB Add-In will not allow you to export a database from a workbook until the database
structure and content have been successfully validated, as discussed on page 91. During
export, the Indexed Fields table (Data Relationship tab) in the workbook will be erased and
repopulated with the current data from the workbook.
+ Only ExtendSim formatted tables, those with fields present on row 20 of the worksheets, will be
exported. If you use tables or pivot tables in the workbook to help explain or analyze input,
start those on rows other than row 20.
Importing to ExtendSim
See “Importing or exporting an ExtendSim database” on page 52.
Creating a new database in Excel
The ExtendSim DB Add-In can be used to fully specify an ExtendSim database in Excel,
including parent/child relationships, formatting, data validation, and more.
To create a new ExtendSim database in Excel, install the ExtendSim DB Add-In and give the
command ExtendSim DB > Create New Database. This opens a new workbook with three
tabs:
• All Tables
• Tab 1
• Data Relationships
The All Tables and Data Relationships tabs are discussed in “Required and protected work-
sheets” on page 88.
The All Tables and Tab 1 worksheets are for creating ExtendSim database tables. Add more
worksheets as desired.
Any tables that you want registered as ExtendSim database tables must have their fields present
on row 20. Any other tables will be discarded upon export.

88 Database Tutorial & Reference
Excel Add-In
Required and protected worksheets
Depending on the file’s contents, a new or newly imported database file will have two or three
worksheets that are required for the database’s internal structure:
• All Tables is similar to the ExtendSim database’s All Tables tab. However, because Excel
database tables can only exist on one worksheet at a time, the only tables that show on this
worksheet are those that don’t appear on other worksheets. You can rename or, if empty,
delete this worksheet. If this worksheet is not present when the file is exported from Excel,
the Add-In will create it and ExtendSim will populate it with a duplicate reference to all the
tables in the Excel database.
• Data Relationships has an Indexed Fields table for storing all parent-child relationships in
the database. This worksheet is placed after any imported worksheets.
• Named Distributions stores a list of the named distributions used in the model, if any. If
present, this worksheet is placed after the Data Relationships worksheet.
Do not delete or rename the Data Relationships or Named Distributions worksheets. Further-
more, do not place any other tables on those worksheets.
Creating or modifying database components
Use the Add-In commands to create or delete tables, add/delete/modify fields, and so forth. Do
not use the regular Excel menu commands.
Adding a table
Click in any column of the worksheet and give the command ExtendSim DB > Add Table.
In the dialog that appears, name the table and indicate how many fields it should have. (See
note below about renaming a table.)
The new database table will be added to the worksheet with its field name(s) on row 20.

Reference 89
Excel Add-In
Modifying table or field characteristics
• To modify table or field characteristics, click one of the
Ungroup (+) buttons at the far left of the worksheet. The top
Ungroup button is for table properties; the lower Ungroup
button is for field properties. As shown at right, clicking these
buttons expands the header rows above row 20 so you know
which rows govern which properties.
• To change a property, select the cell associated with that
property and make the change. Some properties, such as Dec-
imal, are changed by entering the desired number. Other
properties, such as Comma and Unique, are changed using
the cell’s Yes/No popup. Format has a popup that allows the
same options as the ExtendSim database.
To change a table’s name, double click the name and make the
change in the Rename a Table dialog that appears. Do not
change table names using the Excel formula bar.
Modifying the table size
To add a field (column) to a table:
Select an existing field’s name at row 20 so that additional
Add-In menu commands are enabled.
Then give the command ExtendSim DB > Insert New Field
(to place the new field to the left of the selected field) or
ExtendSim DB > Append New Field (to place the new field to the right of the selected
field).
+ You must select a field’s name in row 20 to enable the Add-In menu commands.
To add more records (rows) to a table:
Click the bottom right corner of the table until the cursor changes to a resize arrow.
Then drag to get the correct number of records. The screen shot above shows two records
below the Field 1 identifier.

90 Database Tutorial & Reference
Excel Add-In
Cell randomization
To make a data cell random:
Select the cell and choose
the command ExtendSim
DB > Make Random.
In the Randomize dialog
that appears, select the dis-
tribution and enter required
values.
Empirical tables must be
named and require additional
information. In the Random-
ize dialog’s “Distribution
name” popup select Save to
Named Distribution, then give
the table a name. Choose if the
values are discrete, stepped, or
interpolated. Then click the Set Values button and enter values and probabilities on the Empir-
ical Table Data worksheet that appears. Be sure to enter probabilities that total 100 for all the
rows you want values in, then click OK. To view the table, go to the Named Distributions
worksheet.
• Other than for the empirical table, it is optional to name the distribution. However, named
distributions appear on the Named Distributions worksheet and are made available to other
cells when Make Random is clicked.
• You can only randomize cells with an appropriate format, such as general. If the Make Ran-
dom command is not enabled, check the field format.
Parent/child relationships
Parent and child fields are color-coded in the workbook. This matches the parent/child color
coding in ExtendSim – red text for parent fields and green text for child fields. All relations are
stored on the Data Relationships worksheet.
+ A parent field must be designated as Unique and must have Record ID enabled. Make those
changes in the parent’s field properties header before creating a relationship.

Reference 91
Excel Add-In
• To create a parent/child relationship, right-
click the name of the proposed child field
to get the Edit Relation dialog shown at
right. Then either:
• Click the Select Parent Column but-
ton and select the column that con-
tains the field you want as the parent.
• Or, use the popups to choose the par-
ent table and field.
• To change relationships, go to the Data
Relationships worksheet and select the per-
tinent cell in the Indexed Fields table. Then
give the command ExtendSim DB > Edit
Parent Child Relations and enter the correct table and field names into the Edit Parent-Child
Relations dialog.
Child field names are hyperlinked to their parent fields. For example, clicking on a child field’s
green header takes you to the linked field in the parent table. This allows use to quickly find
parent tables and view the list of valid child values.
Check Database Consistency
One of the ExtendSim DB Add-In menu options is “Check Database Consistency”. This com-
mand performs validations of the database and its parent/child relations, ensuring that the data-
base structure and data content are internally consistent and valid.
Database consistency is checked every time a database file is exported from Excel and (option-
ally) when a database file is imported to Excel. You can also click the button to check consis-
tency at any time.
If errors are found a message is displayed at the completion of the check and the errors are
recorded in an Errors Summary worksheet. The Errors Summary worksheet will have hyper-
links to the errors so they can be fixed.
The Check Database Consistency command performs the following checks.
3) Parent/child data content. For each child field, the contents are checked to ensure that cor-
responding values exist in the parent fields of the parent tables.
4) Parent/child relations. The user-defined parent/child relations in the Indexed Fields table
are validated. This check ensures that each child and parent table and each parent and child
field referenced in the Indexed Fields table actually exists in the database workbook.
5) Table and field name uniqueness. This ensures that each table name in this specific work-
book is unique and each field name is unique for the given table.
6) Each value unique. This looks at the record contents for each field where the field property
named Unique is designated as Yes. The validation ensures that all values in the corre-
sponding tables are unique.
7) The database is checked for any required unique fields. If some parent fields are not
marked as unique, the Add-In will resolve any parent/child conflicts by linking the child to
the first appropriate parent field it locates.

92 Database Tutorial & Reference
Changes in the 3rd generation of ExtendSim databases
Any errors are reported on an Excel worksheet with hyperlinks to each error and an appropriate
error message.
Find Table by Sheet
This command allows users to quickly find and go to a database table in their workbook.
Selecting the command opens a dialog that displays a list of all the worksheets for the database
and all the tables in the selected worksheet.
Changes in the 3rd generation of ExtendSim databases
The ExtendSim internal relational database was completely rewritten for its 3rd generation
release. In addition to all the capabilities of the previous iteration, the 3rd generation release is
more powerful, easier to use, and has a newer interface..
The new features include:
• Sort the list of tables by name or by index in Schema or Data view, as shown above.
• Use the ExtendSim toolbar buttons to zoom in or out on database
tables, fields, and records. Zoomed appearances are saved with
the database.
• Rename a database using either the new Database > Edit Database Properties command or
the Window > Database List command.
• Click to add, delete, or rename a tab in the
database window.
• Store a virtually unlimited amount of data
in tables due to the ExtendSim 64 bit capa-
bility.
• Create multiple new databases, tables, and fields
from the same window using the Save and Create
New buttons.
• When creating a new database, table,
or field, selecting an existing name in
the popup menu will cause that name
to appear as the New name. Append
characters or otherwise change that
name to create a unique name for
your new database, table, or field.

Reference 93
Changes in the 3rd generation of ExtendSim databases
• When creating a new field, choose Auto resize to have the col-
umn automatically minimize based on the size of its largest
cell. To select Auto resize after creating the field, select the
field in Schema view using the Edit Field Properties command or right-click menu.
• To autosize or manually resize a column, in Data view or the
Table Viewer select a field and right-click for the menu shown
here.
• In blocks that access an ExtendSim database, such as the DB
Line Chart block (Chart library), quickly capture an entire data-
base address by selecting components or by entering names or indexes in the database
address selector.
• When editing properties, select a database, table, or
field to modify by scrolling through the popup list at
the top of the dialog.
• Find a number or a string using the Find Data in Table or Find Data in Database commands.
• Open Schema view, or bring it forward if already open, using a new Open Schema
View button in the Table Viewer.
• The new Clean Up Tables button allows you to cause visible tables to reposition so
they don’t overlap.
• As discussed starting on page 73, there is also a new DB Line Chart block (Chart library)
that either traces the history of values received over time during the simulation or reports the
content of database tables. The Chart can display up to 20 lines; each line gets its values
from an ExtendSim database. The block can be used in discrete event, discrete rate, and con-
tinuous process models.

94 Database Tutorial & Reference
Changes in the 3rd generation of ExtendSim databases

A-C
Access
import from or export to 71
using Data Import Export block 37
Add-ins dialog
86
address
definition 46
address selector
46
ADO compliant databases
71
All Tables tab
11, 17
Append New Field command
18
Append New Field dialog
61
Auto Resize Column command
58
Autosize column width option
62
Blank value in Chart library block
76
Boolean checkbox option
63
cells
60
definition 10
changing number of rows
80
Chart library
Offset 76
Select column 76
worm chart 76
Check Database Consistency option
91
Child popup selector (for database)
64
Clean Up Tables button
93
Clone Selected Tables to Tab command
29
clones
29
column index
46
connector points
12, 27
Copy (or Duplicate) Database command
52
Copy Selected Tables command
56
Create New Table dialog
17
Create/Edit Dynamic Link command
21, 23
Cut Tables command
56
D-F
data
editing in database 58
import and export 71
randomizing a cell 25
read and write 38
sorting 60
Data address option
63
Data Collection tab
74
Data Import Export block
35, 70
advantages 72
configuring 71
exporting to Access 37
ExtendSim Data tab 36
importing from Excel 35
modes 71
Show Database button 36, 38
Show Table button 36
timing of the data exchange 72
data pane
12
data tables
indexes 46
Data view
12, 17
database
accessing with Read and Write blocks 38, 67
address selector 46
addresses 46
advantages of using 3
All Tables tab 17
Append New Field dialog 18
cells 10, 60
changing a linked parameter 23
changing links 23
chart 30, 73
child popup selector 64
comparison with spreadsheets 9
copying, renaming, or deleting 52
creating a field 18
creating a linked parameter 20
creating a new database 16
creating a table 17
creating records 18
creation methods (overview) 50
data pane 12
Data view 12, 17
Database Random Distribution dialog 63
database window 11, 16
DB initials in data table 23
DB Job Shop Query model 84
DBAddress 46
deleting 52
deleting a linked parameter 66
editing data 58
exporting 53
exporting to external applications 35, 70
ExtendSim DB Add-In for Excel 85
features 4
Field Properties dialog 61
field type popup menu 62
fields (definition) 9
fields (managing) 57
Find command 48
formatting options 61
importing 53
importing from external applications 35
index 11, 50
index number 46
Index
indexes 46
information 10
interfacing methods 45
link alerts 33, 47
Link button 22
Link dialog 21, 65
linking data 19
moving 52
name (changing) 51
named distribution 26
names 16, 50, 51
new database 16
parent/child relationships 27
query 78
random numbers for cells 25, 63
Read/Write Index Checking 47
Read-only link 22
records 9
records (managing) 59
rename 51
reserved databases 54
Schema view 11, 17
selector windows 55
sorting data 60
statistics 33
Table List pane 11, 17
Table Properties dialog 61
Table Viewer 13, 18, 54
tables (definition) 9
tables (managing) 54
tables pane 11, 17
tuples 10
underscore (_) character 16, 50, 51
when to use 6
window 10
Database Address Selector
31, 77
database list
accessing 51
Database List command
51
database management
45
Database Random Distribution dialog
26, 63
Database Random Distribution window
26
database tables
indexes 46
database window
11
All Tables tab 11
Data view 18
opening 51
Schema View 16
title bar 11
databases
ADO compliant 71
definition 2
ExtendSim 3
linked 5
relational 2, 4
Date/Time option
63
DB initials in data table
23
DB Job Shop Query model
84
DB Job Shop Read(I) Lookup model
70
DB Job Shop Read(I) model
70
DB Line Chart
Open column 76
DB Line Chart block
30, 73
Data Collection tab 74
Display tab 74
Fix column 76
maximum of 20 traces 76
options for when data is collected 75
DB Statistics block
33
DBAddress
46
DBQS (database query spawn)
79
DDL (dynamic data linking)
19
debugging
Read/Write Index Checking 47
Decimals option
62
Delete Link button
66
delete rows
80
deleting a database
52
Dialog tab
74
Display tab
74
distributions
named 26
duplicating rows
80
dynamic data linking (DDL)
19
finding linked dialogs 67
Dynamic Resource Qualification model
73
Each value unique option
62
Edit Database Properties dialog
51
Edit Table Properties dialog
56
equation-based blocks
77
ERP programs
import from or export to 71
Excel
Add-ins dialog 86
creating ExtendSim database files 85
exporting files to ExtendSim database 53, 86
ExtendSim DB Add-In 85
ExtendSim DB command in 86
importing database files for 53, 86
using Data Import Export block 35, 71
using Read and Write blocks 68
exchanging data
Data Import Export block 35
dynamic data linking (DDL) 19
piece-by-piece 69
using Read/Write blocks 35
export data
71
Export Database command
52
Export Selected Tables command
53
ExtendSim DB Add-In for Excel
85
Check Database Consistency 91
Find Table by Sheet 92
ExtendSim Graphical Simulation Database
(GSDB)
3
field (database)
connector points 12, 27
Field name option
62
Field Properties dialog
61
Field type option of Field Properties dialog
62
Field type popup menu (for database)
62
fields (database)
23
adding to a table 18
definition 9
managing 58
names 58
parent/child 27
strings in child fields 28, 48
fields (parameter)
outlined in green 20
outlined in red 20
Final messages, in Link dialog
66
Find command
48
Find Data in Database dialog
48
Find Data in Table dialog
48
Find Links dialog
67
Find Table by Sheet command
92
First run...Every run option
62
Fix column
76
formats
for database fields 61
FTP
import from or export to 71
G-I
Graphical Simulation Database 3
green parameter fields 20
green text on database fields
27
GSDB
3
Hide All Tables command
55
import data
71
Import Database command
53
Import Delimited File to Table command
57
Import Tables to Database command
53
index
definition 46
index for a database
11, 46
index number
46
indexing
table by data source type 46
information (definition)
10
Information to display
62
Init messages, in Link dialog
66
Initialize every record in this field to option
62
Insert New Field dialog
61
Insert New Records command
59
J-L
job shop 70, 84
key field
62
Link Alert block
33
link alerts
5, 21, 23, 33, 47, 66
Link button
22
Link dialog
21, 65
checkboxes 66
deleting a link 65
link update message options
66
List of tables option
63
M-N
Make Cell Random command 26
Manually Resize Column command
58
Microsoft Access
37, 71
modes (for database)
Data 12, 16
Schema 11, 16
Monte Carlo model
69
move a database
52
MySQL
import from or export to 71
name tracking
5, 47, 67, 68
named distributions
26
New Database command
16
New Database dialog
16
Number option for field type
62
O-P
Offset 76
One cell per trace
75
One field per trace
75
One table per trace
75
Open column in DB Line Chart
76
Open Dynamic Linked Blocks command
67
Open Schema View button
93
Oracle
import from or export to 71
parameters
changing a link to a database 23
deleting a link to a database 66
green 20
linking to a database 20
red 20
parent record index
49
Parent Record Index (Query Equation blocks)
81
parent record value
49
parent/child relationships (for database)
27
definition 27
green text on field 27
PRI and PRV 49
red text on field 27
relationship dialog 64
pass-through items
79
ranking rules 82
Paste Tables command
56
Plot Now button
31, 75, 77
Popups block
34
PRI
49, 81
PRV
49
Q-S
query 78
query cycle
79
Query Equation block
78
differences from Query Equation(I) block 83
input variables 80
output variables 81
ranking rules 82
Query Equation(I) block
DB Job Shop Query model 84
DBQS 79
differences from Query Equation block 83
input variables 80
output variables 81
pass-through items 79
query cycle 79
ranking rules 82
spawned items 79
random distributions
25
random numbers
for database cells 63
Read block (Value library)
38, 67
Read only option (field properties)
62
Read(I) block (Item library)
38, 42, 67
Read/Write Index Checking command
47
Read-only link
22, 66
Record ID field option
62
records
creating 18
definition 9
managing 59
red parameter fields
20
red text on database fields
27
relational database
2, 4
rename a database
51
reserved database
54
row index
46
SAP
import from or export to 71
Schema view
11, 17
buttons 11
Select a Database popup
21
Select cell in Data Collection tab
31, 77
Select column
76
Show All Tables command
55
Show Database button
36, 38
Show Table button
36
sigFigs option
62
Sim messages, in Link dialog
66
Sort by Index
55
Sort by Name
55
Sort Data tool
60
spawned items
79
ranking rules 83
spreadsheets and databases
9
SQLServer
import from or export to 71
statistics
33
String option
63
strings
in child fields 28, 48
T-V
Table List pane 11, 17
Table Properties dialog
61
Table Viewer
13, 18, 54
tables
changing number of rows 80
creating and managing 54
definition 9
deleting rows 80
duplicating rows 80
names 54
showing and hiding 55
sorting 55
Tables pane
11, 17
text files
import from or export to 71
tuples
10
Use separators option
62
W-Z
worm chart 76
Write block (Value library)
38, 39, 67
Write(I) block (Item library)
38, 67
XML
import from or export to 71

6
Extend
