
Focus University Instructional Guide
Topic: Teacher Seating Chart
FOCUS SCHOOL SOFTWARE 1
February 2020
Purpose: The Seating Chart feature allows teachers to create a seating chart for each class
section, which includes students’ names, students’ pictures, desks and other furniture present
in the classroom such as tables, the American flag and more. Once setup, teachers can use the
seating chart to take attendance and award positive behaviors. Multiple seating charts can be
created to reflect different layouts.
Agenda
Completed Seating Chart 2
Seating Chart Setup 3
View and Edit Existing Charts 4
Add New Charts and Delete Charts 6
Navigation and Tools 7
Chart tab 7
Assign tab 8
Layout tab 8
Other Options 9
Creating the Furniture Layout 9
Basic Layout 10
Add More Furniture 11
Move Furniture 12
Delete Furniture 13
Clone/Copy Furniture 13
Rotate Furniture 13
Change Size of Furniture 14
Seating Students 14
Smart Shuffle Seating 15
Last Name Seating 15
First Name Seating 16
Random Seating 16
Manual Seating 16

Focus Training: Teacher Seating Chart
FOCUS SCHOOL SOFTWARE 2
Take Attendance 18
Awarding Positive Behavior 19
Add a Badge to the Whole Class 20
Adding Comments 20
Remove Badges 22
Training Site URL (Use Chrome or Firefox only):
xxx.focusschoolsoftware.com/training
Completed Seating Chart
Seating Charts can be as simple or as complicated as the teacher wants to make them. Here is
an example of a completed seating chart to give an idea of the dynamics of the seating chart
functionality within Focus.
Info: CTE and schools that are configured to take hourly attendance can still
setup seating charts but they cannot be used for taking attendance and will not
have access to Positive Behaviors.

Focus Training: Teacher Seating Chart
FOCUS SCHOOL SOFTWARE 3
Seating Chart Setup
Before the Seating Chart can be used, some setup is required.
1. Go to the Attendance menu and select Seating Chart
If there are no Seating Charts created or a new seating chart needs to be added, the following
screen will appear.
2. Chart Name - enter a name for the seating chart. It is helpful to include the room
number.
3. Starting Point – Set the initial desk layout.
Grid - chart starts with a grid of desks facing the front with the selected number of
rows and columns.
Freeform - chart will start completely blank.
Copy Previous Layout - teachers can copy from their other classes in the current or
previous school years. The chart will start with the furniture layout from the selected
chart.

Focus Training: Teacher Seating Chart
FOCUS SCHOOL SOFTWARE 4
4. Front of Class - default is “up.” Use the arrows to automatically orientate desks to the
front of the classroom.
5. Rows/Columns - only appears if Grid is selected as the Starting Point. Enter the number
of rows and columns for desks are in the classroom but desks can be added or deleted
while editing after the initial creation of the chart.
6. Existing Room Layout - only appears if Copy Previous Layout is selected as the Starting
Point. This is required for Copy Previous Layout. Select the existing room layout.
7. Link Additional Periods - check the periods where the seating chart needs to applied. By
default, the period for the selected section is checked. If a teacher is in the same room
all day, they can apply the seating chart to all of their periods.
8. Click Create.
9. The layout will appear and designing can begin.
Info: If the preference to Combine sections in the same period for taking
attendance is enabled, the seating charts, which share the same school_period, will
include students from both course_periods. Also, the seating charts available in the
manage charts modal will be all the charts from all combined periods.
View and Edit Existing Charts
After students are placed in the seating chart there will be times when their seating information
or seating assignment needs to be changed.
1. On the Layout screen select the student to be edited.
2. The selected student displays in the list on the right side of screen.
3. Change the flags for the student by selecting the appropriate button. Once the flags
have been updated, click Quick Seat to seat the student based on the updated flags.

Focus Training: Teacher Seating Chart
FOCUS SCHOOL SOFTWARE 5
4. Click Locked to keep the student in their current seat regardless of the number of times
the students are reseated or shuffled. The Locked
icon will turn orange when locked.
5. To remove a student from their seat, select the
student and click Unseat or <backspace>. The
student is placed back in the student list.
6. By default, both the student name and photo are displayed in the classroom. Using the
tools in the lower left corner, the photo and/or student name can be removed.
Deselecting Photo creates more space on the page.
7. Clicking on a student name or photo will display a student menu for easy access to
student information and the ability to Lock to Seat.
8. Click Save.

Focus Training: Teacher Seating Chart
FOCUS SCHOOL SOFTWARE 6
Warning: When working on the Layout screen, it is recommended to Save
periodically.
Add New Charts and Delete Charts
1. Go to Attendance and select Seating Charts.
2. Click Charts tab.
3. The Charts pop-up displays all existing seating charts linked to the section selected from
the section drop-down located in the header.
Add New Chart
1. Click New Chart create a new seating chart.
2. A New Chart pop-up modal opens where information can be entered.
3. Click Save.
Delete Chart
1. Click delete (red minus sign) next the applicable seating chart to delete.
2. Click Save.

Focus Training: Teacher Seating Chart
FOCUS SCHOOL SOFTWARE 7
Navigation and Tools
The Layout page is opened by default. If Grid is selected in the setup, a grid of desks is added
based on the number of Rows and Columns set. The chart name displays at the top of screen.
Chart tab
The Chart tab manages the seating charts for the selected period.
The following options are available:
Sort - adjust the Sort Order of the seating charts. The chart with the lowest number is
used as the default chart. By default, all charts are given a sort order of 1.
Title - title of the chart can be edited if necessary.
Front - change the front of the classroom. Options are up, down, right, and left.
Created - date and timestamp of when the seating chart was created.
View/Edit - options for view/edit
o
Assign - select Assign to enter either attendance or positive behavior using the
associated seating chart.
o
Layout - select Layout to edit a specific seating chart.
Green New Chart - select New Chart to create a seating chart.

Focus Training: Teacher Seating Chart
FOCUS SCHOOL SOFTWARE 8
Assign tab
The Assign tab allows assigning attendance codes and positive behaviors (optional).
Attendance sub-tab - Allows teachers to take attendance.
Badges sub-tab - Allows teachers to assign Positive Behavior Badges.
Layout tab
The Layout tab allows editing of the active seating chart where furniture can be
added/removed, student flags can be changed and students can be reseated.
Students sub-tab - displays a list of students in class and allows the placement of
students.
o
Smart Shuffle - shuffles the students around the classroom with the exception of
students flagged with “Front of the Class” and
“Talkative”. Use the drop-down to select how
to shuffle the students: Last Name, First
Name or Random.
o
Quick Seat - students from the class are
automatically reseated except for students
who are “locked” to their chairs.
o
Student Display Options - bottom left corner
Name - shows student name
Photo - shows student photograph if district has imported photos
Unseat - removes student from seating arrangement
Furniture sub-tab - displays the options for furniture placement.
o
Grid - use the drop-down to select type of seating arrangement: Horseshoe, Square
Table or Round Table.

Focus Training: Teacher Seating Chart
FOCUS SCHOOL SOFTWARE 9
Visibility - click to view the grid lines.
Snapping - click to enable snapping furniture into place on invisible grid lines.
Delete - remove the selected furniture from the seating chart.
Clone - copy the selected furniture.
o
Generate - click this tab to generate seating arrangement selected in previous tab.
o
Furniture Display Options - bottom left corner
Click Visibility to see grid lines.
Click Snapping to snap single pieces of furniture to the grid even if the grid is
not visually displayed. Deselecting the Snapping tool allows the placing of
items that are not lined up with grid lines.
Other Options
1. Print - print a copy the seating chart or download the seating chart to your computer as
a PDF. If in the Layout area with the Furniture tab selected, the printout will not include
student information, only the furniture.
2. Show/Hide - click the double arrows to minimize the side panel. Click again to restore
the panel.
3. Zoom - click and move the scroll bar to zoom in and out by scrolling left or right.
Creating the Furniture Layout

Focus Training: Teacher Seating Chart
FOCUS SCHOOL SOFTWARE 10
Before seating students there are numerous options for setting up the classroom layout.
Teachers have the ability to arrange desks in a multitude of configurations and to place tables,
chairs, windows and doors in the classroom.
Basic Layout
1. Go to the Attendance menu and select Seating Chart.
The screen will display the Layout view of the seating chart.
2. Click Furniture tab.
3. Click Grid drop-down to select the desk arrangement.
Grid - places a grid of 16 desks on the screen.
Horseshoe - places a horseshoe configuration of 10 desks.
Square Table - places a square table with four chairs.
Round Table - places a round table with four chairs.
4. Click Generate.
5. A yellow dotted line will surround the group of desks/table.
Drag the yellow square to move the desks to the correct place.

Focus Training: Teacher Seating Chart
FOCUS SCHOOL SOFTWARE 11
Click and drag the mini yellow squares on any side to enlarge/decrease the grid size.
Click the arrows in the middle to rotate the desks to face the correct direction.
6. Click Save.
Add More Furniture
1. Go to the Attendance menu and select Seating Chart.
2. Click Furniture tab.
3. Select the appropriate piece of furniture.
Students - add a Chair or Desk where students will be seated.
Teacher - add a teacher’s Desk.
Tables - add tables of varying shapes (Rectangle, Round, Trapezoid or Kidney).
Décor - add classroom items such as Blackboards, Door, Windows, AV Cart, Flag,
Computer and Lab Table.
4. Select a color for the item. This is NOT available for every item.
5. Click in the seating chart where the piece of furniture will go.

Focus Training: Teacher Seating Chart
FOCUS SCHOOL SOFTWARE 12
Move Furniture
1. Go to the Attendance menu and select Seating Chart.
2. Click Furniture tab.
Move single item
3. Click the item and drag it to the appropriate location.
4. Click Save.
Move group of items
3. Click and highlight the area where all applicable furniture is located.
4. Once all items are selected, click and drag to move the items.
5. Click Save.

Focus Training: Teacher Seating Chart
FOCUS SCHOOL SOFTWARE 13
Info:
If you try to move an item within the space of another item, the furniture will
turn red indicating that the object cannot be placed.
If you try to place the item on top of another object, the furniture will
automatically move back to the original location.
Delete Furniture
1. Go to the Attendance menu and select Seating Chart.
2. Click Furniture tab.
Delete single piece of furniture
3. Click on the item until it highlights with a yellow line.
4. Click Delete at bottom of screen.
5. Click Save.
Delete group of furniture
3. Click and drag a yellow area around the items to delete.
4. Click Delete at bottom of screen.
5. Click Save.
Clone/Copy Furniture
1. Go to the Attendance menu and select Seating Chart.
2. Click Furniture tab.
3. Click and drag a yellow area around the items to be cloned.
4. Click Clone at the bottom of screen.

Focus Training: Teacher Seating Chart
FOCUS SCHOOL SOFTWARE 14
5. The items will be copied and can be moved by clicking in the area until a four-sided
arrow displays.
6. Drag items to new location.
7. Click Save.
Rotate Furniture
1. Go to the Attendance menu and select Seating Chart.
2. Click Furniture tab.
3. Click on the item and click on the yellow handle.
4. Click Save.
Change Size of Furniture
1. Go to the Attendance menu and select Seating Chart.
2. Click Furniture tab.
3. Click the item.
4. Use the points around the object to a enlarge/shrink
the size.
6. Click Save.
Seating Students
From the new or existing seating chart students can be placed. There are five ways of seating
students: Smart Shuffle, Last Name, First Name, Random and Manually.

Focus Training: Teacher Seating Chart
FOCUS SCHOOL SOFTWARE 15
Smart Shuffle Seating
1. Go to the Attendance menu and select Seating Chart.
2. Click Layout tab.
3. Click Students tab.
4. Click the Quick Seat drop-down.
5. Click Smart Shuffle, which takes into account the two optional student flags: Front of
Class and Talkative. These flags can be placed prior to the initial seating or at any time
during the school year.
o
Front of Class - Students with this flag will be placed in the front of the
classroom.
o
Talkative - Students with this flag will not be placed next to other students with
this same flag.

Focus Training: Teacher Seating Chart
FOCUS SCHOOL SOFTWARE 16
If a teacher has a student for more than one period, the system remembers if the
teacher has set either of the flags for the student in another class.
4. Click Quick Seat.
5. Click Save.
Last Name Seating
1. Go to the Attendance menu and select Seating Chart.
2. Click Layout tab.
3. Click Students tab.
4. Click the Quick Seat drop-down.
5. Click Last Name, which places the students by last name in ascending order. Adam is in
the front and Zimmerman is in the back of the room. This option does not take into
account the student flags.
6. Click Quick Seat.
7. Click Save.
First Name Seating
1. Go to the Attendance menu and select Seating Chart.
2. Click Layout tab.
3. Click Students tab.
4. Click the Quick Seat drop-down.
5. Click First Name, which places the students by first name in ascending order. Archie is in
the front and Wendy is in the back of the room. This option does not take into account
the student flags.
6. Click Quick Seat.
7. Click Save.

Focus Training: Teacher Seating Chart
FOCUS SCHOOL SOFTWARE 17
Random Seating
1. Go to the Attendance menu and select Seating Chart.
2. Click Layout tab.
3. Click Students tab.
4. Click the Quick Seat drop-down.
5. Click Random, which places the students randomly. This option does not take into
account the student flags.
6. Click Quick Seat.
7. Click Save.
Manual Seating
1. Go to the Attendance menu and select Seating Chart.
2. Click Layout tab.
3. Click Students tab.
4. Click the student to seat from the student list on the right.
5. Move the cursor to the desk or seat and left click.
6. The selected chair or desk “glows” prior to placement. This helps to place the student in
the correct seat.
Placing a student on a seat already occupied by a student will bump the seated
student back into the student list.

Focus Training: Teacher Seating Chart
FOCUS SCHOOL SOFTWARE 18
Create a new seat in the classroom grid by placing a student in an empty space. This
adds a student chair and seats the student all in one step.

Focus Training: Teacher Seating Chart
FOCUS SCHOOL SOFTWARE 19
This option does not take into account the student flags.
7. Once all students are seated, the Students tab displays the message: All students seated
in the chart.
Tip: To quickly swap two students’ seats, drag and place one student on
another student.
Take Attendance
Attendance can easily be taken from the Seating Chart view and by default all students are
marked as present.
1. Go to Attendance menu and select Seating Chart.
2. From the Seating Chart select Assign and click Attendance tab.
3. By default, all students can be marked as P - present. Districts have the ability to set
attendance codes and default codes.
4. To assign a different code, select the attendance code from the list on the left.
5. Move the cursor to the student to assign the code and click. Repeat the process until all
students needing that code have been assigned.
6. Select the next code to assign.
7. The student will “glow” with the color of the attendance code as the cursor hovers over
the student. Attendance codes may include: (districts can set their own codes)
a. Present codes (green) - P Present and PT Excused Tardy
b. Tardy codes (yellow) - T Unexcused Tardy

Focus Training: Teacher Seating Chart
FOCUS SCHOOL SOFTWARE 20
c. Absent codes (red) - U Unexcused Absence
8. Click Code to hide the students’ attendance codes from displaying in the seating chart.
The Code will be hidden when clicked but the code color will remain.
9. Click Save.
Tip: Easily switch to taking attendance in the List View by clicking on the List
Tab.
Awarding Positive Behavior
The seating chart area can be used by teachers to assign positive behavior badges to their
students if the school has chosen to enable the Positive Behavior feature. Schools can
determine the positive behaviors they want to recognize.
Info: Positive Behaviors can be awarded from the Seating Charts screen if first
setup via Discipline > Positive Behaviors by administration. Teachers can then
create badges via Discipline > Create Badge Awards, as long as they are associated
with an administrator-created badge type.
1. Go to Attendance and select Seating Chart.

Focus Training: Teacher Seating Chart
FOCUS SCHOOL SOFTWARE 21
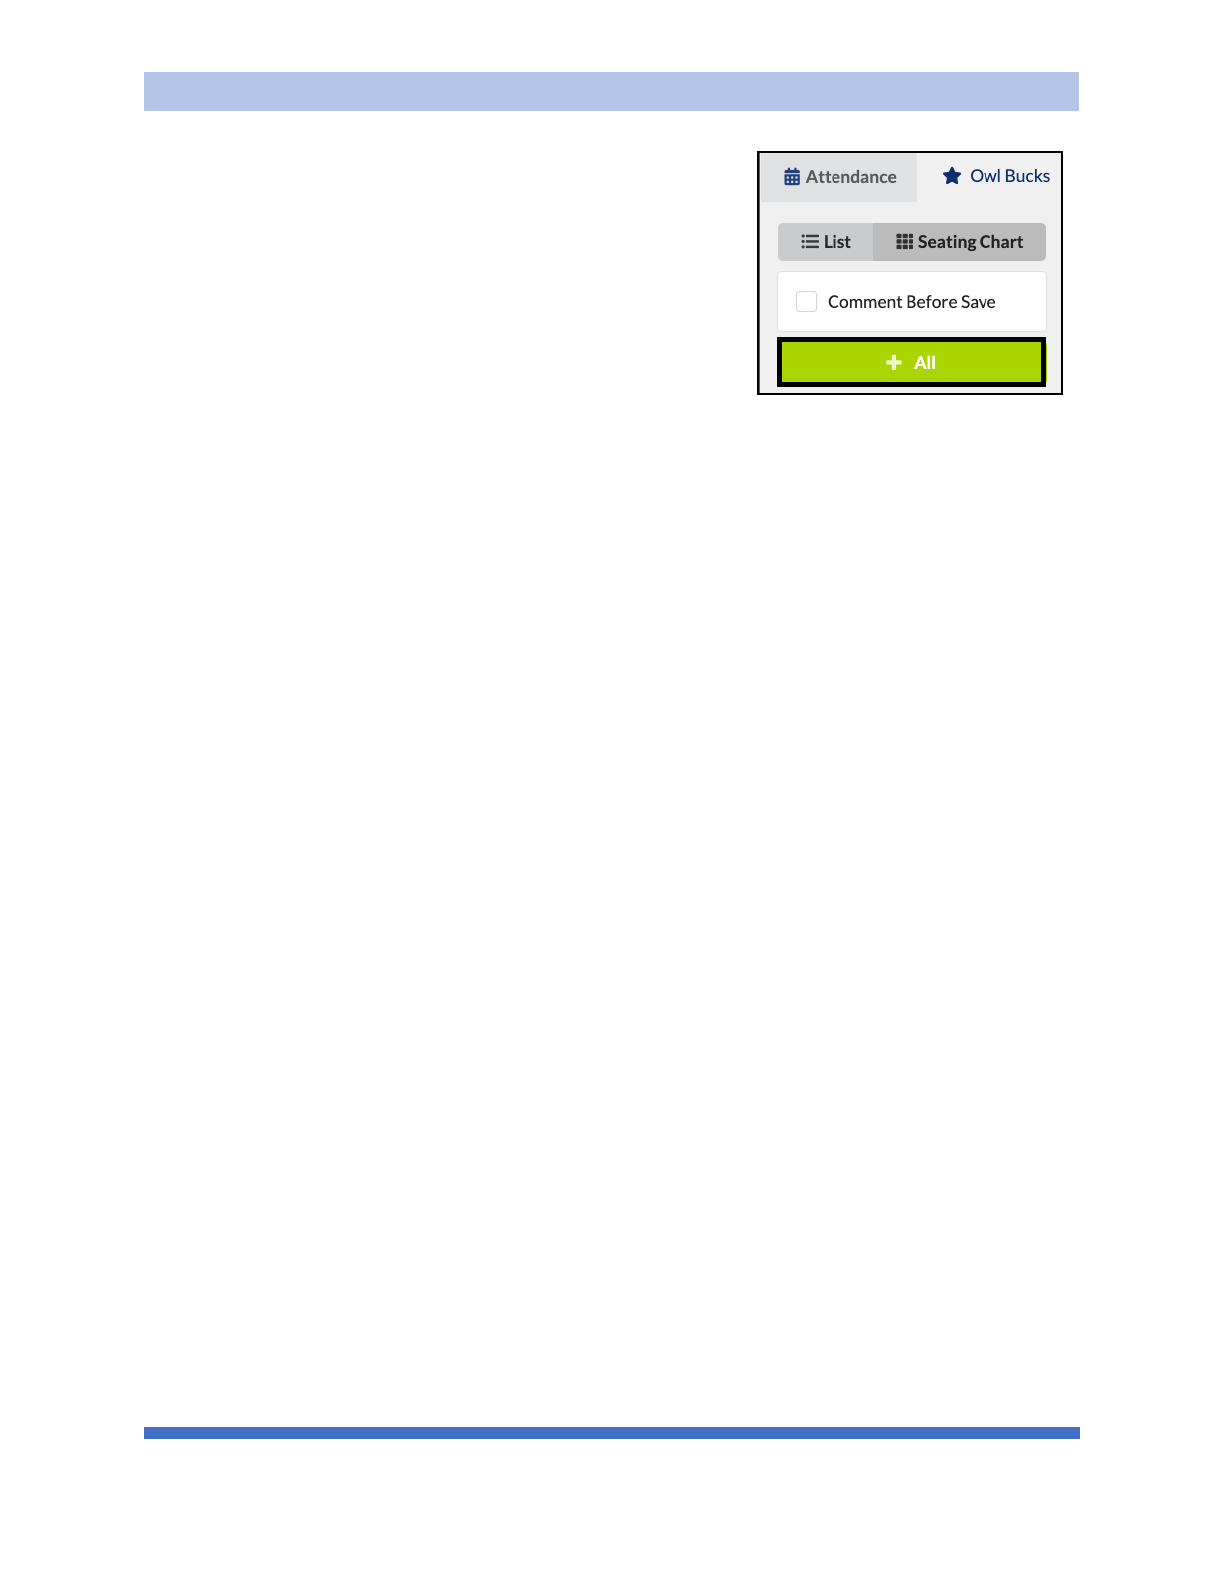
2. Click the Assign tab and then the Badge tab (Owl Bucks). The default title for Positive
Behaviors is Badges, but can be renamed by the district/school.
3. Select the badge to assign from the list on the right.
4. Click on a student to assign that badge.
Tip: Clicking on a student multiple times will assign the badge as many times as
the student is clicked but only one badge is displayed.
5. The student will “glow” and the behavior icon will display on the student indicating they
are selected to receive the badge when clicked. Click Save.
6. Once saved, the number of behaviors awarded displays next to the star icon.
Focus Training: Teacher Seating Chart
FOCUS SCHOOL SOFTWARE 22
Add a Badge to the Whole Class

Focus Training: Teacher Seating Chart
FOCUS SCHOOL SOFTWARE 23
1. Select the badge in the right panel.
2. Click +All. The button is green when a badge is selected.
3. The badge is added to each student.
4. Click Save.
Adding Comments
Comments can be added individually or en masse and are viewable to parents and students in
their portals. When checked, the teacher is prompted to add a comment to each student for
the badge they are receiving.
1. Select the Comment Before Save checkbox to ensure comments are made regarding the
behaviors awarded to students when clicking Save.
2. Enter a general comment in the popup text box and click Confirm. The comments and
positive behavior badges will be posted to the Parent and Student Portal.
3. To add a personalized comment, select the badge on a student and the badge
information displays in the side panel.
4. Enter the Comment in the text box provided.

Focus Training: Teacher Seating Chart
FOCUS SCHOOL SOFTWARE 24
5. Click the behavior icon to edit the awarded number of behaviors. Click and enter the
new Value in the provided text box.
Remove Badges
1. Before clicking Save, awards can be removed by clicking the icon and then click Remove.
2. Click Save.
Alert: Be sure no badges are selected in the panel when trying to Remove a
badge from a student because a new badge will be added every time you click.
3. To remove badges after they have been saved and view a more comprehensive list of a
student’s total badges, click List.
4. The totals for each student are the points awarded for that school year by that specific
teacher regardless of the course.
5. Click List to view a complete list of student badges.
A comment can be added
to an individual student.
The default value of 1
badge can be changed.
