

Square 9 Softworks Inc. · 127 Church Street · New Haven, CT 06510
(+1) 203-789-0889 email: education@square-9.com
Square 9 GlobalCapture
®
Guide
Version 2.0.1.0
Copyrights, Legal Notices, Trademarks, and Servicemarks
© Copyright 2016 Square 9
®
Softworks – All rights reserved. No part of this work may be reproduced or transmitted in any form or by any means
whatsoever, without written permission of Square 9 Softworks unless such copying is expressly permitted by Federal copyright law. For information
regarding permissions, contact: Square 9 Softworks Inc., 127 Church Street, New Haven, CT 06510, USA, info@square-9.com.
September, 2016 edition
Publication subject to change without notice, Square 9 Softworks assumes no liability for any damages incurred directly or indirectly from errors,
omissions, or discrepancies between the actual software you install and/or the contents of this publication or any other accompanying publication.
GlobalSearch, GlobalCapture, and GlobalAction are registered trademarks of Square 9 Softworks. All other products and devices listed in this
document are trademarks or registered trademarks of their respective companies and are hereby acknowledged.
Microsoft, Windows, Word, Excel, PowerPoint, SQL Server, and Exchange are trademarks and service marks of Microsoft, Inc., registered in the
United States and other countries, and are the property of Microsoft, Inc.
Google is a trademark of Alphabet, Inc., registered in the United States and other countries, and is the property of Alphabet, Inc.

GlobalCapture Guide Table of Contents i
Table of Contents
Getting Started with GlobalCapture ................................................................................................. 1
Introduction to GlobalCapture .................................................................................................................................... 3
Access GlobalCapture ......................................................................................................................................................................................... 3
GlobalCapture ........................................................................................................................................................................................................ 3
User Functions ..................................................................................................................................... 5
Scan Documents ........................................................................................................................................................... 7
Select and Configure Desktop Scanner ....................................................................................................................................................... 7
Scan into GlobalCapture.................................................................................................................................................................................... 7
View Documents ........................................................................................................................................................... 9
Open Validation Station .................................................................................................................................................................................... 9
Document Control and Navigation ............................................................................................................................................................. 10
View Thumbnails ................................................................................................................................................................................................ 10
Configure Indexing Data ................................................................................................................................................................................. 11
KeyFree User Settings ....................................................................................................................................................................................... 13
Save Data and Documents ............................................................................................................................................................................. 15
Validation Station Hot Keys ........................................................................................................................................................................... 16
Rapid Adapt Forms Learning ......................................................................................................................................................................... 16
Batch Manager............................................................................................................................................................ 19
Access Batch Manager ..................................................................................................................................................................................... 19
Batch Manager Interface ................................................................................................................................................................................. 20
Filter and Search Batches ................................................................................................................................................................................ 22
Select or Deselect Documents ...................................................................................................................................................................... 24
Sort Documents .................................................................................................................................................................................................. 24
Performance Reporting .................................................................................................................................................................................... 24
View, Edit, and Validate Documents ........................................................................................................................................................... 24
Remove Documents from Process .............................................................................................................................................................. 26
Delete Documents ............................................................................................................................................................................................. 27
User Settings ............................................................................................................................................................... 29
Change Language .............................................................................................................................................................................................. 29
Set KeyFree Options .......................................................................................................................................................................................... 29
Set Scanner Options .......................................................................................................................................................................................... 30
Administrator Functions ................................................................................................................... 31
Workflow Management ............................................................................................................................................. 33

ii Table of Contents GlobalCapture Guide
GlobalCapture Designer Terminology ....................................................................................................................................................... 33
GlobalCapture Designer Interface ............................................................................................................................................................... 34
Nodes Pane .......................................................................................................................................................................................................... 34
Process Fields Pane ........................................................................................................................................................................................... 35
Information Pane ............................................................................................................................................................................................... 35
Design Canvas ..................................................................................................................................................................................................... 35
Published Button ................................................................................................................................................................................................ 36
Layout Menu ........................................................................................................................................................................................................ 36
Workflow Menu .................................................................................................................................................................................................. 37
Manage Workflows ........................................................................................................................................................................................... 37
Workflow Node Configuration .................................................................................................................................. 43
Begin and End Nodes ....................................................................................................................................................................................... 43
Process Nodes ..................................................................................................................................................................................................... 50
Conditional Process Nodes ............................................................................................................................................................................ 67
Field and List Management ....................................................................................................................................... 73
Create, Edit, and Delete Field Lists .............................................................................................................................................................. 73
Create, Edit, and Delete Fields ...................................................................................................................................................................... 75
Data Types ............................................................................................................................................................................................................ 78
Field Properties ................................................................................................................................................................................................... 79
List Options .......................................................................................................................................................................................................... 80
Table Fields ........................................................................................................................................................................................................... 81
Template Management .............................................................................................................................................. 85
Open Template Designer ................................................................................................................................................................................ 85
Template Designer Controls .......................................................................................................................................................................... 86
Create Templates ............................................................................................................................................................................................... 88
Edit Templates ..................................................................................................................................................................................................... 89
Delete Templates ............................................................................................................................................................................................... 90
Create, Edit, and Delete Zones ..................................................................................................................................................................... 91
Zone Properties Panel ...................................................................................................................................................................................... 96
Create, Edit, and Delete Zone Groups ..................................................................................................................................................... 100
System Management ................................................................................................................................................ 103
Field Catalog Management .......................................................................................................................................................................... 103
Portal Management ........................................................................................................................................................................................ 103
License Management ..................................................................................................................................................................................... 107
Registration ........................................................................................................................................................................................................ 110

GlobalCapture Guide Table of Contents iii
Installation ....................................................................................................................................... 113
Installation ................................................................................................................................................................ 115
Server Prerequisite Configuration ............................................................................................................................................................ 115
Server Installation ............................................................................................................................................................................................ 121
Additional GlobalCapture Engine Instances ......................................................................................................................................... 129
Appendices ....................................................................................................................................... 131
Appendix A ............................................................................................................................................................... 133
Pattern Matching using Regular Expressions ....................................................................................................................................... 133
Appendix B ................................................................................................................................................................ 137
Values for Formatting an Index Field ...................................................................................................................................................... 137
Appendix C ................................................................................................................................................................ 143
S9 Notation ........................................................................................................................................................................................................ 143
Appendix D ............................................................................................................................................................... 147
Multiple Language Support ........................................................................................................................................................................ 147

GlobalCapture Guide How to Use this Guide v
How to Use This Guide
Purpose
The
GlobalCapture Guide
provides instructions for using your GlobalCapture
®
web-based applications.
It will help you understand their features and help you perform the following tasks:
• Capture and validate documents and data using GlobalCapture
• Monitor documents and data in capture workflows using Batch Manager
• Create document and data capture workflows using GlobalCapture
For further details on using GlobalCapture as part of the Square 9 Global Suite of Products, refer to the
GlobalSearch Configuration Guide
.
Audience
GlobalCapture end users should read this guide to learn how to make the most of their web-based capture
workflow application.
GlobalCapture administrators should read this guide to understand the GlobalCapture features they will
need to configure, implement, and support GlobalCapture Workflows.
Organization
This guide is organized into five sections as follows:
• Section I: Getting Started with GlobalCapture
An introduction to the Square 9 GlobalCapture user interface.
• Section II: User Functions
Using the GlobalCapture application, including capturing and validating files, monitoring
documents for validation, and setting end user preferences.
• Section III: Administrator Functions
Creating, managing, and deleting capture workflows, indexing fields, OCR/BCR templates, and
setting user permissions and licenses.
• Section IV: Installation
Installing GlobalCapture.
• Section V: Appendices
Understanding regular expressions in Templates, formatting for a Process Field, and S9 Notation.
vi How to Use this Guide GlobalCapture Guide
Conventions Used in this Guide
Icons
Name
Icon
Description
Behind the Scenes
Highlights technical information useful to administrators and installers
Business Case
Calls attention to specific examples which demonstrate how features can be used to address business needs
CAUTION
Highlights important information to know to avoid situations that could potentially cause a loss of data or
configuration, or could impact performance, functionality, or successful implementation
Example
Highlights examples of settings for typical business uses
Note
Highlights information of interest or important information needed to successfully accomplish a task or
understand a procedure
Tip
Highlights techniques, shortcuts, or productivity tips
Troubleshooting
Highlights information or references troubleshooting resources that might prove helpful in solving a problem
Typographic Conventions
Convention
Description
Bold
Highlights interface items such as menus, dialog boxes, settings, and options and highlights text that must be
entered exactly as shown.
Italics
Emphasizes text or indicates a placeholder variable which the user should replace with a specific word or symbol
Underlined Blue
Points out URL links to external web pages or documents
Fixed Width Font
Used for filenames, Windows folder paths, URLs, code samples, and system text
S
MALL
C
APITAL
L
ETTERS
Indicates keyboard keys, such as C
TRL
+C,
ENTER
,
DELETE
,
or
TAB
Writing Conventions
Convention
Description
<Username>
Angle brackets enclosing a word or phrase in italics indicates that information must be entered specific to the
installation, configuration, or system. For example,
<Username>
means to enter a specific username in the
indicated field
>
Indicates the need to select an item from a menu. For example, File > Save
Initial Caps
Indicates the item referenced is particular to GlobalSearch or a Square 9 product or feature. For example, the Index
Fields selected when creating an Archive
• Bullet
A dot-shaped bullet indicates an unordered list, which in a procedure indicates either a procedure which is only
one step long or a step or steps which may or may not need to be taken and in no particular order.
Bullet
An arrowhead bullet indicates information closely related to a step in a procedure.
Help and Support
Support
Other Resources
Phone: 203-890-0889, option 2
Forums: forums.square-9.com
Email: support@square-9.com
Square 9 classes: education@square-9.com

GlobalCapture Guide Getting Started with GlobalCapture 1
Getting Started with GlobalCapture
Section I introduces the GlobalCapture interface. As a web-based ECM application, GlobalCapture can be
used with modern browsers and across desktop platforms. Standard browser controls can be applied, such
as screen resizing, zoom view, navigate back and forth, and refresh, in addition to the application features.
The chapter in this section includes:
Introduction to GlobalCapture
This chapter introduces the GlobalCapture interface.

GlobalCapture Guide Introduction to GlobalCapture 3
Introduction to GlobalCapture
GlobalCapture from Square 9
®
is a powerful tool which delivers a complete, end-to-end process for your
data and document capture workflows. Optimize your office equipment and streamline your capture
automation by batch-processing scanned documents and, once captured, automatically archive them or use
them to begin a workflow process. GlobalCapture can capture documents with a variety of file formats
(including images, audio, and video) and extract high-value information from them as part of your electronic
document management system (DMS).
Designed as a stand-alone web-accessible application, it is also part of the Square 9 Global Suite of Products
for data and document management and therefore fully integrates with GlobalSearch
®
. Please refer to the
GlobalSearch Configuration Guide
for details on setting up and using GlobalSearch together with
GlobalCapture for an end-to-end, capture-to-completion business process.
The easy-to-use interface lets you design and deploy workflows with no complicated SQL scripting required.
With its graphical drag-and-drop approach, even complicated workflows can be seen at a glance.
GlobalCapture is highly scalable for advanced data and document capture and processing with multi-
threaded processing for high-volume throughput.
Access GlobalCapture
GlobalCapture is accessed from your web browser.
1. Access GlobalCapture via the URL provided by your IT department or by clicking on the GlobalSearch
desktop shortcut.
2. To launch GlobalCapture from the Square 9 GlobalSearch desktop client (if installed), on the
Workflow tab, in the Workflow Management group, click GlobalCapture.
Launch GlobalCapture from the GlobalSearch Desktop Client
The GlobalCapture login screen will appear.
3. Enter your user name and password to log into GlobalCapture.
GlobalCapture
The GlobalCapture home page will appear.

4 Introduction to Square 9 Workflows GlobalCapture User and Installation Guide
GlobalCapture Home Page
Validate Documents
When you need to review and validate your capture documents, click Validate to go to the
Batch Manager and Validation Station interfaces. From the Batch Manager you can filter through
and monitor documents in your GlobalCapture Workflows. Performance metrics can be seen at a glance on
a single graph for real-time process analysis. From the Batch Manager you can quickly locate and access
documents which may need further inspection and action in the Validation Station. For details, please refer
to the “Batch Manager
”
chapter.
Scan Documents
Click Scan to go to the Scanner interface, where you can configure options for your scanner and
select a destination Workflow for your documents. Please refer to the “Scan Documents
”
chapter for details.
Design Workflows
Click Design to go to the GlobalCapture Designer, Template Designer, and Field Catalog
interfaces. From here you can create indexing data fields, OCR templates, and document capture
workflows. Refer to the “Workflow Management,” “Template Management,” and “
Field and List
Management” chapters for details.
Manage Screen
Click Manage to go to the GlobalCapture Administration interface, where you can manage user
permissions, manage licenses, and scale out multiple instances. Details can be found in the
“System Management
” chapter.

GlobalCapture Guide User Functions 5
User Functions
Section II covers the features that end users need to make the best use of GlobalCapture. User activities
include validating documents and indexing data. The section also includes user preferences.
The chapters in this section include:
Scan Documents
This chapter explains the interface between your scanner and
GlobalCapture.
View Documents
This chapter explains the main document interface for viewing
and editing capture documents and data.
Batch Manager
This chapter explains the Batch Manager interface for monitoring
documents and data in the workflow process.
User Settings
This chapter explains how to set personal preferences for
the interface, scanner settings, and OCR performance.

GlobalCapture Guide Scan Documents 7
Scan Documents
You can scan documents, individually or in batches, directly into GlobalCapture into selected destination
Workflows from your local desktop TWAIN scanner. Once captured, the documents images can be improved
for OCR, broken out into separate documents, and indexed for future searches.
Select and Configure Desktop Scanner
1. Have a locally attached TWAIN scanning device connected and powered up, with the scanner drivers
installed and functioning properly.
2. Open GlobalCapture and on the GlobalCapture home page, click Scan.
3. In the Scan interface, click the User Settings icon and select the Scanner tab.
4. In the Active Scanner text box, select the appropriate driver.
If you have a single TWAIN driver, the available scanner will appear in the Active Scanner box.
5. To configure your scanner, click the Scanner Settings ( ) button found to the right of the Active
Scanner text box.
The dialog box which will appear is dependent upon the scanner you have selected. Refer to your
scanner documentation for details on setting your particular scanner.
6. To change the API port from the default, enter the port number in the Change API Port text box.
7. If your server implementation uses SSL, enable the Use SSL checkbox, which is enabled by default.
Consult your IT department for details.
8. If SSL is implemented, to change the SSL port from the default, enter the port number in the Change
SSL Port text box
9. Click Save to save your settings and close User Settings.
Scanner Settings
Scan into GlobalCapture
1. On the GlobalCapture home page, click Scan.
2. In the Select Destination dialog box, select a Workflow from the Workflow drop-down list.

8 View Documents GlobalCapture Guide
Select a Destination Workflow
3. Click Scan.
There will be a pause while the image is processed and then the scanned document appears in
the Scan interface.
4. To scan additional documents, on the GlobalCapture toolbar, click New Scan and repeat steps two
and three.
Scanner Station
The Scanner Station opens to display the first page of the scanned document. If there are more than one
page in the document, there are several ways to select and view additional pages, including scrolling. The
Scanner Station interface is very similar to the Validation Station interface. Please refer the following “
View
Documents” chapter for details on document and data control and navigation.
Scanner Station
Scanner
Station
Toolbar
Thumbnails
Pane
Document
View Area
GlobalCapture
Toolbar
Index Fields
Pane

GlobalCapture Guide View Documents 9
View Documents
If a GlobalCapture Workflow encounters a document and its data which needs to be manually validated,
you will need to use the Batch Manager and the Validation Station interfaces. The GlobalCapture Validation
Station has a number of options available for viewing, indexing, and editing documents. Please refer to the
“Batch Manager
” chapter for details.
Note that the number of documents waiting for validation will show in a small circle on the Validate button
on the GlobalCapture home page to alert you to documents needing user action.
The GlobalCapture Validation Station is where you view a captured document, add or modify data, modify
the document, and rearrange pages. It is where you interact with your business information. The Validation
Station will show an image of the selected document, the index data used to find and classify the document
(the Index Fields), and various ways to view, edit, and output the document.
Open Validation Station
1. To view and validate data and documents for capture in a Workflow, enable the checkbox on one or
more documents in the Batch Manager which has the status “Validation.”
2. In the Batch Manager toolbar, click GlobalCapture Validation.
Validation Station
The Validation Station opens to display the first page of the capture document. If there is more than one
page in the document, in addition to scrolling, there are several ways to select and view additional pages.
The Validation Station has specialized areas and menus for viewing your document. These areas include:
• Validation Station Toolbar – Use to access document viewing, editing, and navigation.
• Document Pane – Use to show an image of the document.
• Index Fields Pane – Use to show the data for indexing a document (the metadata).
• Thumbnails Pane – Use to manage and navigate the documents in the Validation Station.
Validation
Station
Toolbar
Thumbnails
Pane
Document
View Area
GlobalCapture
Toolbar
Index Fields
Pane

10 View Documents GlobalCapture Guide
Document Control and Navigation
Viewing a document in the Document View Area can be adjusted in a number of ways. Select one or more
options from the Validation Station toolbar:
• Document Scaling – Use Zoom In and Zoom Out to resize the document image, or use the Fit
Width, or Fit to Page.
• Rotate – Use to rotate the document image.
• Transform – Use to choose from the Despeckle, Deskew, and Color Dropout image enhancement
features to enhance PDF and TIF files.
• Document Position – To change the position of the document being viewed, select Pan and drag to
reposition the document.
• Full Screen – Click the Fullscreen icon to enlarge the Designer to the full width of your display
screen. Click it again to toggle back to normal size.
You can navigate to another page in the document in the Document View Area by selecting one or more
options from the Validation Station toolbar:
• Next (right arrow) – Move from one page to the next.
• Previous (left arrow) – Move back a page.
• Thumbnail View – Select a page in the Thumbnails Pane. You can navigate to more than one
document in the Pane.
You can manage page and document selection using the Page Actions Toolbar, located at the bottom of
interface. Choices include:
• Multiple Selection Mode – Use to provide checkboxes to select multiple pages in the Thumbnail
Pane. If this is enabled, use the Clear Selection (X) icon to unselect the checkboxes.
• Options – Use to view the following additional options:
o Select All – Use to select all of the pages in the Thumbnails Pane.
o Delete Page(s) – Use to delete all of the selected pages. The deleted pages will be removed
from the Thumbnails Pane.
o Burst Page(s) – Use to separate a document into two different ones within the Thumbnails
Pane. The selected pages will become the new document and move to the bottom of the Pane.
o Insert from Scanner – Use to add documents from your import scanner.
Use the Validation Station toolbar to perform various functions:
• Save – Use this to save changes to the current document and its data.
• Close – Use this to close the current document.
• User Settings – Use to set user preferences.
• Log Out – Use this to close out of the Validation Station interface.
View Thumbnails
Images of the document pages are displayed in the Thumbnails Pane, located on the left-hand side of the
Validation Station interface. This is particularly useful for navigation if there is more than one page to the
document. Thumbnails can be used for page navigation and for the “bursting” edit method.

GlobalCapture Guide View Documents 11
In the Thumbnails Pane you can select single or multiple pages at one time:
• To select a single page, double-click on the Thumbnail or enable the checkbox.
• To add pages to your selection, double-click on the additional pages.
• To select more than one Thumbnail at a time:
a. Click the More Options (three dots) icon found at the bottom of the Thumbnails Pane.
Checkboxes will appear next to the Thumbnails to indicate that the Multiple Selection mode
is activated.
b. To select Thumbnails, enable the Thumbnail checkboxes next to them.
c. To disable the Mode, click the More Options icon again and click Disable Multiple Selection.
• To select all of the Thumbnails in the Pane, click on the More Options icon and choose Select All.
• To clear your selection, choose one of the following:
o Uncheck the Thumbnails checkboxes.
o To clear all of your section, click the Clear Selection ( X ) icon.
Configure Indexing Data
The Fields Panes shows you the Fields for the current document, where indexing data is entered and stored.
You can type in indexing data and use your mouse pointer or keyboard T
AB key to move from Field to Field.
With KeyFree Indexing, you can add data with a click of your mouse button.
The circle icon to the right of the Field indicates confidence level in the data. If the circle is red, it indicates
a problem with confidence in the results. Place your mouse pointer over it to see a tooltip with the exact
confidence level. You can then click on that Field’s text box and enter or modify your data. That data is
considered to have 100% confidence once you have saved and approved the document.
KeyFree Indexing
Use KeyFree Indexing to rapidly extract high-value data with without having to do any typing, which can
take time and create opportunities for manual entry errors. With KeyFree Indexing activated, just click on
any text on the document to populate your Fields.
Example: Use KeyFree. KeyFree Indexing is especially useful in low-to-moderate volume, unstructured
document environments such as for sales order processing and accounts payable applications.
Use KeyFree Indexing in situations where there are:
• Volume of 50-100 documents per day
• Unstructured documents
• Typewritten data
• Several Fields to enter data into
• No handwriting recognition
• Vendor invoices, packing slips, orders, contracts (can be any format, not just scanned files)
1. To start indexing with KeyFree, select a document in Batch Manager and open it in the Validation
Station.
2. With the document open, click KeyFree ( ) icon on the toolbar.
The first Field text box in the Fields Pane becomes highlighted and the KeyFree icon turns yellow
to indicate that it is active.

12 View Documents GlobalCapture Guide
KeyFree Indexing
After a brief setup cycle, when you place your mouse pointer over the image of the document,
a small KeyFree tooltip appears which indicates the text which would go into the first Index Field
or Table Field.
3. Place the mouse pointer over the document to highlight your selected text and KeyFree
automatically adds to the tooltip.
The Field indicated in the tooltip indicates the Field highlighted in the Index Field or Table Field
Pane.
Select Text and Capture to Index Field or Table Field
4. Select the characters or words on the document to be extracted and the text will appear in the
corresponding Field. Selection can be done several ways:
• Click on a single word.
• Drag the mouse pointer across multiple words to highlight and select your text.
• To select multiple words that are not in sequence, use the S
HIFT key on your keyboard while
clicking or dragging selected text.
• Press the A
LT key on your keyboard while clicking or dragging on the text to generate an edit
box which allows you to make changes in the selection before putting into an active Field.
This is useful if document quality has reduced OCR accuracy.
Tip: KeyFree Indexing with Multiple Words. You can drag the mouse pointer to select data for a Table
Field. For example, to capture line items on an invoice, drag the mouse pointer down a single column of
data to populate a column of the Table Field, such as quantity or unit cost. The number of rows will
automatically expand to accommodate the rows of data being extracted.
The selected text populates the highlighted Field and then advances, highlighting the next Field.
5. Repeat the process for selecting Index Field text on the document to fill the additional Fields.
6. In addition to automatically advancing through the Fields as KeyFree data is entered, the active Field
can be selected:
• Click to select the Field in the Index Field or Table Field pane.

GlobalCapture Guide View Documents 13
• Press your keyboard TAB key to move to the next Field.
• Press S
HIFT+TAB on your keyboard to move to the previous Field.
7. Click the icon again to turn off KeyFree when done.
KeyFree Indexing will turn off automatically after entering data in the last Index Field.
KeyFree User Settings
Source documents can come in a variety of formats and levels of quality. KeyFree Indexing uses optical
character recognition (OCR) technology to pull data from the document image. OCR technology is not 100%
accurate and results are largely based on the quality of the scanned image. Fuzzy printing, wrinkles, or dirt
may affect the results. In general, the default settings work well, but some images may benefit from
customizing your OCR settings to match the document. KeyFree User Settings configure only the local user
settings in the web client and do not affect the settings in the desktop client.
1. To configure KeyFree settings, from the User Settings on the GlobalSearch toolbar, select the
KeyFree tab.
2. To restore the KeyFree Indexing to the factory default settings:
a. Click Set Defaults.
b. Click Save.
KeyFree Settings
1. On the KeyFree tab, in the General Text Extraction group:
• Move the Speed/Accuracy settings slider to the left for faster OCR and to the right for slower
but more accurate OCR processing.
• To select the text letter case for the extracted text, select the case from the Case Recognition
Mode drop-down list:
o Auto Case – Use for text to retain the capitalization seen in the original document.
o Small Case – Use to enter text in lowercase letters in a Process Field.
o Capital Case – Use to enter text in uppercase letters in a Process Field.
• From the Text Types drop-down list, select the type of text that will be recognized for OCR.
You can select more than one Text Type, but for best results keep the number of types selected
to a minimum. Text types include:
o Normal – The default selection for most serif or sans serif text from a modern printer.
o Typewriter – Use for text from a typewriter.
o Matrix – Use with text from a dot-matrix printer.
o OCR_A – Use for text set in OCR A monospaced font designed for OCR.
o OCR_B – Use for text set in OCR B monospaced font designed for OCR.
o MICR_E13B – Use when indexing a check or other banking documents which uses this MICR
(Magnetic Ink Character Recognition Code) font.
o MICR_CMC7 – Use when indexing a check or other banking documents that uses this font.
• Enable the Low Resolution Mode checkbox to specify whether text on an image with low
resolution is recognized. This is useful when recognizing documents such as faxes or ones with
poor print quality.

14 View Documents GlobalCapture Guide
KeyFree Indexing Settings
2. In the Image Detection group, select one or both checkboxes:
• Correct Inverted Image – Select this option to invert white text on a black background to the
more usual black text on a white background during the OCR process.
• Correct Orientation – Use this option if an image has been scanned in an upside-down or
sideways position to automatically reposition it. (In general, you will get better results using this
setting than using the Rotate button while in KeyFree mode.)
3. More text extraction options can be found in the Advanced Text Extraction group:
• Remove Garbage – Use to remove excess dots that are smaller than a certain size from the
image during objects extraction (despeckle).
• Remove Texture – Use to temporarily remove the background noise during OCR which might
interfere with text recognition.
• Detect Matrix Printer – If the source document was produced on a dot-matrix printer, use this
option to interpret the text more accurately.
• Detect Porous Text – Use to detect regions of the document with “porous” text.
• Detect Text On Pictures – If the document has text on an image or colored background, use
this selection to increase the contrast between the image and the text.
• Enable Aggressive Text Extraction – Use to enable the OCR engine to attempt to extract as
much text on the image as possible. This is useful when the image contains some low-quality
text. (Although it may still require manual correction.)
• Fast Objects Extraction – When speed is required more than a high level of OCR accuracy,
select this setting.
• Prohibit Color Image – Use to instruct the OCR engine to skip text laid over an image or colored
background and to only scan the black-and-white text.
4. In the PDF Layer Reuse Mode drop-down list, select a PDF layer to reuse to specify how to use the
text and image layers of the source PDF file.
Do not use this setting if the source file contains only raster-based data, such as image-only
PDFs.
• Auto – Use to have the OCR engine use both text and image layers. This is useful in most cases.
• Do Not Reuse – If you do not want to use the text layer which exists in the PDF file, choose this
option.
• Content Only – Use to have the OCR engine use only text layers in the PDF file, if they exist.
5. Click Save.

GlobalCapture Guide View Documents 15
Save Data and Documents
Saving data and documents in the Validation Station is context sensitive, depending upon their status in
a Workflow. Note that if you are working with several documents at one time, Save settings apply only to
the document in open in the Validation Station.
Save a Document after Validation
After viewing and validating a document, there are three states in which a document may be saved:
• Approve – Use to return the document to the Workflow to follow the “Approved” process.
• Deny – Use to return the document to the Workflow to follow the “Deny” process.
• Save without Action – Use to save changes made in the Validation Station without continuing the
document through the Workflow. The document remains with the Validation status in the Batch
Manager.
This is useful if you need to check something or take a break before continuing you’re your
approval process.
Save a Document after a Workflow Error
After reviewing a document which has previously errored out of or has completed a Workflow, choose from
the following:
• Save and Ready – Use to save any changes and drop the document back into the Workflow at the
point where it errored.
• Save and Move – Use to save changes and then return the document to the Workflow for further
processing. In the Select Destination dialog box, choose where in the process to place the
document (represented by a Workflow Node in the drop-down list), and then click Save.
This is very helpful for testing and troubleshooting a Workflow.
• Save Manually Completed – Use to save changes and remove the document from the Workflow,
but does not delete it from the Batch Manager.
This is helpful if you want someone else to review the document or if you do not have
permissions to the delete the entry.
• Save without Action – Use to save changes made in the Validation Station without returning the
document to the Workflow. The document remains with the Errored status in the Batch Manager.
• Delete Process – Use to delete the document from the Workflow and Batch Manager.
Save a Completed but not Deleted Document
If a document has completed a Workflow but is not deleted from GlobalCapture, choose from the following:
• Save and Move – Use to save changes and then return the document to the Workflow for further
processing. In the Select Destination dialog box, choose where in the process to place the
document (represented by a Workflow Node in the drop-down list), and then click Save.
This is very helpful for testing and troubleshooting a Workflow.
• Save Without Action – Use to save changes made in the Validation Station without returning the
document to the Workflow. The document remains with the Completed or Manually Completed
status in the Batch Manager
• Delete Process – Use to delete the document from the Workflow and Batch Manager.

16 View Documents GlobalCapture Guide
Validation Station Hot Keys
Hotkey support has been added to speed up validation processing actions. The following key combinations
are available:
• Save – CTRL+S.
• Approved – CTRL+UP ARROW.
• Deny – CTRL+DOWN ARROW.
• Discard Changes – CTRL+D.
Rapid Adapt Forms Learning
Workflows can be configured to automatically extract data from documents in standardized forms.
Occasionally the Workflow will process a document that does not match the current data extraction
configurations (called “Templates”). If a document does not match the current configurations, it will leave
the Classify Node in an “unclassified” state.
If the feature has been enabled for your Workflow, you can create a Template on-the-fly using the Rapid
Adapt forms tool accessed from the Validation Station interface.
For example, you have an invoice which has not been classified by an existing Template because it is from
a new vendor. You can quickly create a new Template for that vendor, if you expect to encounter additional
invoices which use this format.
In the Rapid Adapts tool, you will need to configure specific information about your document:
• Indicators which uniquely identified this document (called “Markers”).
• The areas of the document with the necessary data (called “Positional Zones”).
1. From the Validation Station toolbar, click the Rapid Adapt ( ) icon (if enabled).
The Index Fields Pane is replaced by the Rapid Adapt Pane, showing a Template Wizard.
Rapid Adapt Pane in the Validation Station
2. To create a Marker which identifies unique text in your document, click the Add Marker button.

GlobalCapture Guide View Documents 17
There will be a pause while the image is processed.
3. Click on several word which will uniquely identify this document format. (For example, mark the
company name and phone number.)
You may add as many Markers as needed to ensure that the document format is uniquely
identifiable.
All of your Required Markers are listed at the bottom of the Rapid Adapt Pane and can be
deleted by clicking on the Delete ( X ) icon next to the Marker.
Create a Marker with the Rapid Adapt Tool
4. Click Next.
5. Click the Add Zone button.
a. Drag your mouse across the data to be extracted for the Fields.
Make sure that the box your draw is large enough to fit data which may appear in other
documents of this format. (For example, a very long order number.)
b. In the Select Field dialog box, select the Field into which the extracted data should be placed
from the drop-down list.
c. Click OK.
d. Repeat these steps for each Field to be populated.
All of your data extraction Field Zones are listed below the Required Markers and can be
deleted by clicking on the Delete ( ) icon next to the Zone.
6. Click Next.
7. Enter a name in the Template Name text box.
8. Click Save Template.
9. Click the Validation Station Save button.
The Template is added to the Load Template list, where an administrator may edit or delete it
like any other Template.

GlobalCapture Guide Batch Manager 19
Batch Manager
The Batch Manager interface is where you monitor the progress and history of documents in your
GlobalCapture and GlobalAction Workflows.
You can view the full history of documents through the Workflow process, including which Workflow,
Nodes, and Process Fields have affected the document. Performance metrics can be seen at a glance on
a single graph, for real-time process analysis.
Within Batch Manager, you can easily filter your Workflow documents by status, or search for Batches by ID,
name, or date ranges to target the documents you need. From the Batch Manager you can quickly locate
and access documents which may need to be viewed, validated, or edited in either the GlobalCapture
Validation Station or the GlobalSearch Document Viewer. (Refer to the
GlobalSearch Configuration Guide
for
details on using the Document Viewer.)
Batch Manager
Access Batch Manager
• Access Batch Manager in one of the following ways:
• To access Batch Manger via your default web browser:
a. Use the URL provided by your IT department.
The GlobalCapture home page will appear. You may be asked to enter your credentials
and choose which Batch Portal you would like to look at.
b. Click the GlobalCapture Validate ( ) button to go to the Batch Manager.
The number of documents waiting for validation will show in a small circle on the Validate
button on the GlobalCapture home page to alert you to documents needing user action.
• To access Batch Manager from the GlobalSearch web client for GlobalAction, on the
GlobalSearch toolbar, click Batch Select (stack of hard drives) icon and select a Batch Portal.
• To access Batch Manager from the Square 9 GlobalSearch desktop client:
a. On the Workflow tab, in the Workflow Management group, click Batch Manager.
b. If prompted, enter your username and password in the Authentication Required dialog box
and click Log In.
c. Select a Batch Portal.
In order to use all of the Batch Manager features, make sure that the pop-up blocker feature in your
browser is disabled.

20 Batch Manager GlobalCapture Guide
Access Batch Manager from GlobalCapture, GlobalSearch, or SmartSearch
Batch Manager Interface
The Batch Manager interface is where you view Workflow documents, their history and settings, and
Workflow Batch analytics.
Batch Manager Interface
Batch Manager Toolbar
The Batch Manager toolbar provides navigation through Batch documents and to the GlobalCapture
Validation Station, Batch actions, and Batch documents searching. Features include:
• Refresh – Click to refresh the Batch List to update any changes that have been made.
• Batch Actions – Enable the checkboxes to select documents from the Batches pane and then
choose a menu item. Refer to the “Delete Documents” and “Remove Documents from Process
”
sections below for details on Batch Actions.
• Pages – Select from the menu how many documents will be shown at one time on per page
(the default is 50). You have the choice of 20, 50, 100, or 200 documents per page.
• GlobalCapture Validation – Click to launch documents one at a time out to the Validation
Station for validation actions.
• Filter Workflow – Search Batches by all or part of a Workflow name.
• Advanced – Click this to open the Advanced Searching dialog box to search for documents in
the Batch Manager. Refer to the “Advanced Searching and Filtering
” section below for details.
• Clear – Click to clear your search and filter parameters.
Validation
Station
Button
Batches
Pane
Batches
List
GlobalCapture
or GlobalAction
Toolbar
Clear Button
Advanced
Button
Filter Workflow
Search Box
Process Tabs

GlobalCapture Guide Batch Manager 21
Batches Pane
The Batches Pane lists Workflow documents with information about each entry. Errored entries are listed in
red to facilitate troubleshooting efforts and necessary manual completion tasks. Errored Batches can
indicate that a Workflow process may need to be modified for best results.
Enable the checkbox next to each document to select it. Click the List column headers to resort by that
column. Columns include:
• Date – The date and time that the document ran through the Workflow.
• Batch ID –The Workflow batch identification number. Refer to the “
Validate Captured
Documents” section below for details on GlobalCapture actions which may be performed from
this column.
• Process ID – The GlobalCapture or GlobalAction individual document Workflow identification
number.
• Type – The type of Workflow. “GC” indicates a GlobalCapture Workflow, “GA” indicates
a GlobalAction Workflow, and “CW” indicates a legacy Capture Workflow.
• Workflow – The name of the Workflow that the document is or has been processed through.
• Status – The status of the document in the Workflow process. Refer to the “Filter Batch List
”
section of the “Batch Management” chapter below for a details on the status.
Process Tabs
The Process Tabs shows you the status and history of a Workflow document. Select a document in the
Batches Pane to select it and Process information and actions become available to the right of the Batches
Pane. To close a tab, click on another tab or click the Close ( X ) icon to close all of the tabs. Tabs include:
• Document – The document location of a document in a Windows directory. If you have configured
a GlobalCapture Release Node to delete on release or a Delete Pages Node to delete all pages,
the Document tab will be empty, because the documents have been purged.
• History – Select to see the
step-by-step history of the selected document through the Node
processes of a Workflow.
Selected by default, this is a useful audit trail for analyzing documents and their Workflows.
It lists the type of Node, the title of the particular Node, and the action taken at that point in the
process.
• Process Fields – Select to see Process Fields and the data that was extracted as the document went
through a Workflow process, as well as the confidence level the extraction was assigned. If there is
no current value or if it is not applicable to that document, “No Value” appears in red for entry.
• Process Actions – Select from the menu of Workflow process actions for the document. The menu
choices will show depend upon whether the document is in a GlobalCapture or a GlobalAction
Workflow.
o GlobalCapture Workflow – Select from the following menu choices:
GlobalCapture Validation – Click to launch the selected document to the Validation Station
for viewing and validation actions.
Remove from Process – Click to release the selected document from a GlobalCapture
process.
Approve – Click to approve the document to proceed in the Workflow.
Deny – Click to deny the document to proceed in the Workflow.

22 Batch Manager GlobalCapture Guide
o GlobalAction Workflow – Select from the following menu choices:
Remove from Process – Click to release the selected document from a GlobalAction process.
Launch Document – Click to launch the selected document to the GlobalSearch Document
Viewer for viewing and index editing.
Queue Actions – Click to complete a Queue action in a Workflow without having to view the
document in the Document Viewer. Select from the list of any available Queue actions.
Filter and Search Batches
Quickly access entries in order to check status and performance, by using the Advanced Searching feature.
Filter Workflows
• To search for all documents in a specific Workflow, enter the name or part of the name of the
Workflow into the Filter Workflow search box.
Filter by Batch or Scan User
• To filter documents by Batch or by Scan User, right click to select a document in the Batches Pane
and open the context menu and choose one of the following:
• To filter your results to show documents only in the same Batch as the selected document, place
your mouse pointer over the Filter by option and select Batch.
• To filter your results to show to show only the documents scanned in by specific user as the
selected document, place your mouse pointer over the Filter by option and select Scan User.
Advanced Searching and Filtering
Quickly access batches of documents in order to check their status and performance using the Advanced
Searching feature.
• Click Advanced to open the Advanced Searching dialog box.
Batch Manager Searching and Filters
Filter Batch Lists
While searching is used to return a large list of results, filtering is used to edit that list to one which is
smaller and more targeted to the results you need. To give you the largest pool of documents to begin your
filter process, by default no filters are active. As you select a filter button, documents with the selected status
are removed from the search results. The filter button changes from a distinct color to gray when you turn
off a status.

GlobalCapture Guide Batch Manager 23
The status and its indicating color are also seen in the Status column of the Batch Pane.
1. In the Advanced Searching dialog box, click one or more of the filter buttons to filter entries by
status:
• Processing (darker blue) – Documents which are currently being processed in a Workflow.
• Processed (lighter blue) – Documents which have completed their legacy Capture Workflow
process but has not yet been picked up by the Import Engine.
• Completed or Manually Completed (green) – Documents whose process has been completed
(manually or automatically) and have exited the Workflow.
• Errored (red) – Documents which have been halted in the Workflow process due to a processing
error.
• Queued/Validation (orange) – Documents which are currently being processed in a Workflow
and are waiting for an action:
o In a GlobalAction Queue either waiting for a user to take action or completing a sub-process
system action.
o A GlobalCapture validation step waiting for a user to take action.
Behind the Scenes: A GlobalCapture document that was not deleted from the process can be found in
the getsmart/CaptureProcessing directory.
2. To filter the list by the type of Workflow, enable one or more of the GlobalCapture Workflow,
GlobalAction Workflow, and Capture Workflow checkboxes.
When you enter the Batch Manager interface from GlobalSearch, the Advanced Searching
selection defaults to GlobalAction. When you enter from GlobalCapture, it defaults to
GlobalCapture. If you have GlobalCapture and GlobalAction Workflows, you may select to view
both in the filter list.
3. Click Search.
Advanced Searching Settings
Search for Documents
You can search for documents using various search criteria. Search by the Process ID number (a unique
identifier that is assigned sequentially as each Batch is run), by the name assigned to a Workflow, or by
a date or date range.
1. To search in a Batch with a specific ID number, enter the Process ID the Process ID text box.

24 Batch Manager GlobalCapture Guide
2. To search by Workflow, enter the name or part of the name into the Workflow Name text box.
3. To restrict a search to a defined time period, enter a date in the From Date and/or Until Date text
boxes.
Select or Deselect Documents
1. To select a document, double-click on it in the Batch List or enable its checkbox.
2. To select all of the documents in the Batches Pane, on the top-left corner of the Pane, enable the
Select All checkbox.
3. To deselect all of the documents, uncheck the Select All checkbox.
Sort Documents
You can sort the documents in the Batches Pane by clicking any column heading:
1. Click once to sort in ascending order.
2. Click again to reverse to descending order.
Performance Reporting
Batch Manager reporting functionality presents administrators and user with important information on
Batch process performance. Delays in document processing can now be seen easily via a graphical interface,
allowing them to quickly identify bottlenecks, OCR performance degradation, or a possible need for load
balancing.
View History
Step-by-step history of a document through a Workflow can be viewed in the History Process Tab.
History Tab
View, Edit, and Validate Documents
Documents can error out of a Workflow due to inaccuracies while indexing or capturing, such as a low
confidence level in the OCR results, data truncation or mismatched data types. When this happens you can
manually correct the errors or delete the documents from the Workflow, provided you have the proper
permissions.

GlobalCapture Guide Batch Manager 25
To manually correct errored documents, you will need to edit them from either the GlobalCapture Validation
Station or the GlobalSearch Document Viewer, depending upon which Workflow the document is in.
The pop-up blocker feature in your designated browser will need to be off.
Edit GlobalCapture Documents
From the Batch Manager you can monitor for documents in a GlobalCapture Workflow which require
manually validation as part of the capture process (indicated by the yellow color in the Batches Pane).
If validation is needed for a document, you can open the Validation Station with a click of a button to view it
and make any necessary changes. For details on the Validation Station, refer to the
GlobalCapture Guide
.
1. To open documents in the GlobalCapture Validation Station for a closer inspection, select
documents the list in the Batches Pane, and choose one of the following:
• On the Process Actions tab, click GlobalCapture Validation.
• On the Batch Manager toolbar, click GlobalCapture Validation.
• Right-click on the document and in the Validate menu select Process.
2. To validate GlobalCapture documents that is at the Validation stage, choose one of the following:
• To validate documents by Batch ID number, select Validate > Batch.
• To validate the document by Process ID number, select Validate > Process.
Edit GlobalAction Documents
From the Batch Manager you can also monitor for documents in a GlobalAction Workflow which require
manually editing as part of the document workflow process (indicated by the yellow color in the Batches
Pane). If editing is needed for a document, you can open the Document Viewer with a click of a button to
view it and make any necessary changes. For details on the Document Viewer, refer to the
GlobalSearch
Configuration Guide
.
1. To open documents in the GlobalSearch Document Viewer for a closer inspection, select one or
more errored or in-process Batches from the list in the Batches Pane.
2. Select Launch Document.
Launch Document
Validate Documents
1. From Batch Manager, select one of the GlobalAction Batches from the list in the Batches Pane which
requires editing.
2. Click on the Documents tab. A list of documents which failed to import will be displayed.

26 Batch Manager GlobalCapture Guide
3. To open a document in the Document Viewer, double-click on the document or highlight
the document and click the Edit ( ) icon.
The problem Field is outlines in red.
4. Correct any erroneous data in the Index Field.
5. To save any changes, click Save.
The corrected document will be automatically removed from the Documents tab of the Errored
Batch.
Once all documents have been edited or accepted, the status of the Batch will change to
Manually Completed.
6. Repeat steps 2 through 5 to correct additional errored documents.
Remove Documents from Process
Documents may need to be taken out of the Workflow because were they either in the wrong Workflow or
because they need further work before processing.
1. Select one or more errored or in-process documents from the list in the Batches Pane.
2. To manually complete a Batch and then release all of the documents in that Batch from a Workflow,
choose one of the following:
• On the Batch Manager toolbar, in the Batch Actions menu, choose Remove from Process.
• Click the Process Actions tab, which appears when a selected GlobalAction document is in
a Queue, is processing, or is errored, and select Remove from Process.
Remove from the Workflow Process
Tip: Typical Reasons for Workflow Failure.
Workflow-based
errors can occur when something is wrong
with the Workflow, such as a source or output location has been moved, renamed, or the service account
doesn’t have access. Errors of this type will be seen on the History tab.
Document-based
errors occur when something is wrong with one or more documents that have entered
the Workflow. Errors of this type will be seen on the Documents tab.
Fix the issues, then, depending on where in the Workflow the error was encountered, you might need to
return to Batch Manager and manually process the documents that had entered the Workflow prior to
the error manifesting.

GlobalCapture Guide Batch Manager 27
Delete Documents
There are times when deleting document is required. This is especially true during initial testing of the
system, or when Batches of documents are complete and no longer relevant to the capture process.
CAUTION: Deleted documents
cannot
be recovered. Because of this a user must have permission to
delete an errored document and a message will appear to confirm the deletion.
1. To delete, select one or more documents from the list in the Batches Pane by enabling the checkbox
to the left of each document.
2. On the Batch Manager toolbar, click Batch Actions and select Delete from the drop-down menu.
3. Confirm your intention to delete the documents.

GlobalCapture Guide User Settings 29
User Settings
You can set preferences for your GlobalCapture interface from the User Settings tabbed dialog box, such as
the interface language, scanner settings, Data XChange, or tweaking OCR settings.
1. To access User Settings, on the GlobalCapture toolbar, click the User Settings (gears) button.
2. Select the Language, Data Xchange, KeyFree, or Scanner tab.
3. Choose the user settings (refer to the rest of this chapter for details on setting choices).
4. To reset the settings back to the default configuration, click Reset Defaults.
5. To cancel any unsaved changes to your settings, click Cancel.
6. To save changes to your settings, click Apply.
Change Language
The GlobalCapture has built in On Demand Localization to view it with different languages. Use Language
to change from the default language, English, to French, Spanish, Portuguese, German, Italian, Romanian,
or Dutch. Localization can also be extended to other languages with a fully documented translation kit.
Note that this will change the language of buttons and toolbar icons but not, of course, the language in
which any databases, Archives, Index Field, or documents you or your system administrator have created.
Language Settings
Set KeyFree Options
KeyFree Indexing allows you to enter indexing data without having to type it in. It is done using OCR (optical
character recognition) technology. While the default settings produce excellent results in most cases, you
can finesse the settings for each document or document type. The better the OCR results, the less data entry
you will need to do.


GlobalCapture Guide Administrator Functions 31
Administrator Functions
Section III covers administrator functions, with a focus on creating and customizing GlobalCapture
Workflows, Fields, and Templates and system management.
The chapters in this section include:
Workflow Management
This chapter explains how to create, manage, and delete Workflows
using the GlobalCapture Designer.
Workflow Node Configuration
This chapter explains how to set Workflow Node properties.
Field and List Management
This chapter explains how to create, manage, and delete Fields and
Lists using the GlobalCapture Field Catalog.
Template Management
This chapter explains how to create, manage, and delete capture
Templates using the Template Designer.
Track Documents in Workflows
This chapter explains how to track the history of documents in
Workflow processes.
System Management
This chapter explains system settings such as licensing and
registration, and how to create, manage, and delete Portals.

GlobalCapture Guide Workflow Management 33
Workflow Management
The GlobalCapture Designer is where Workflows are designed and stored. From the Designer menu,
a Workflow can be created, copied, deleted, or published. The GlobalCapture Designer Nodes, Connections,
and Process Fields components can be arranged and connected in a variety of ways to create both simple
and complex Workflows.
GlobalCapture Designer Terminology
GlobalCapture uses a set of concepts and terms to describe capture Workflows.
Nodes
Nodes are the individual elements that create the Workflow structure. Drag them from
the Nodes Pane onto the Design Canvas to in any order you want and positioned them
to create a Workflow. A Node Settings dialog box will appear automatically, ready for
your input, each time a Node is dragged to the Canvas. Nodes can be connected
together with either manual or automatic actions. They can contain a variety of
properties and perform Workflow actions such as waiting, moving a document, and
alerting a user via email. Conditional Nodes, indicated by their diamond shape, allow
you to make decisions in the Workflow.
Connections
Connections are the links between the different Nodes on the Design Canvas. By linking the
Nodes, the Connections create a path for your documents that follow your flow of business
information. They are represented by arrows pointing towards the direction of the Workflow
process, with labels explaining the action between Nodes. Reposition a Node and the Connection
follows. Hover over a Connection and it will change color to further indicate the direction of its
flow. An Out arrow turns green and an In arrows turns red. Connections can be either manual or
automatic.
Workflows
Workflows are a combination of steps which collectively represent the processing of a document or
business information. Workflows can be saved, published, copied, printed, and revised. Workflow processes
may vary from very basic to more complex.
Workflow Sets Invoice Status to Pending

34 Workflow Management GlobalCapture Guide
GlobalCapture Designer Interface
Click the Design button from the GlobalCapture home page to open the GlobalCapture Designer.
It defaults to an empty Design Canvas to begin a new Workflow.
GlobalCapture Designer
Nodes Pane
The Nodes Pane, located on the left-hand side of the GlobalCapture Designer, contains a list of design
Nodes available to be dragged onto and repositioned on the Design Canvas as elements in a Workflow.
Nodes can be dragged out onto the Design Canvas in any order and can be repositioned.
A Workflow cannot be saved and left unpublished as a draft without at least one Node on the Design
Canvas. A Workflow cannot be saved and published without a single Import Node at the beginning and
one or more End Nodes at the end. A Workflow can also have one or more of the other Nodes in between
the start and the finish of the design.
• Place your mouse pointer over a Node icon to see its label.
• Select a Node and a square blue box will appear around it to indicate that it is selected.
A Blue Box Indicates a Selected Node
• Use standard browser resizing methods to zoom the view of the Nodes in or out.
GlobalCapture
Menu
GlobalCapture
Designer
Menu Bar
Nodes Pane
Design
Canvas
Templates
Menu
Layout Menu
Process
Fields Pane
Information
Pane

GlobalCapture Guide Workflow Management 35
Resize the Nodes
1. Drag the Node onto the Design Canvas. A Node Settings dialog box will appear.
2. Enter the settings and click Save.
Settings fields which are required are indicated with a red asterisk.
Nodes refer to elements by object number, so changing the name of an Inbox, Archive, etc. will
not break the Workflow.
Process Fields Pane
GlobalCapture Workflow Process Fields are variables which can be created and
then used in the Set Process Fields Node. Use Process Fields for controlling
process flow, getting and setting data from external data sources (via the Call
Assembly Node), or for collecting relevant data to be used to communicate to
users downstream in a process.
Information Pane
The Information Pane displays context-sensitive details about a selected Node. If the
Node has settings, they appear here. To bring up the Node Settings dialog box, click
the Edit ( ) icon in the top right corner of the Information Pane.
Design Canvas
The Design Canvas is the area where the Nodes are arranged into a visual map of the
Workflow. Once Nodes are dropped on the Canvas, they can be selected and moved
around. An entire Workflow can be seen at a glance, even with detailed branching.
View Elements on the Design Canvas
To view more of the Canvas, you can click the arrow in the top left corner of a pane to collapse it. You can
use the Layout menu choices (see the “Layout Menu
” section below for details). You can also choose to
click on a blank area of the Design Canvas and drag to reposition elements.

36 Workflow Management GlobalCapture Guide
Nodes on the Design Canvas
To move a Node on the Design Canvas, hover over its graphic icon. When the icon graphic switches to text,
and the mouse pointer becomes a Move ( ) icon, drag the Node into a new position. To view or edit
Node settings, double-click on a Node icon or click the Edit icon in the Information Pane. To delete a Node,
select it and press the D
ELETE key on your keyboard.
Connections on the Design Canvas
With two or more Nodes on the Design Canvas, the individual actions which the Nodes represent (whether
manual or automatic) can be joined together with a Connection to form a Workflow.
To connect two Nodes, place your mouse pointer over the starting Node. When the mouse pointer
becomes a selection ( ) icon, drag a Connection line to another Node. The arrow indicates the direction
of the process from one Node to the other and a label identifies the Connection. To delete a Connection,
select it and press the D
ELETE key on your keyboard.
Connections can be reshaped to change the visual representation of the Workflow in several ways:
1. Drag one or both of the connected Nodes around the Design Canvas.
2. Click on one of the Connection grip handles and drag it to a new position, causing the line to bend.
3. In the Layout menu, in the Formatting group, select Auto Horizontal to line up the Connections
horizontally, or Auto Vertical to line them up vertically.
Published Button
To activate a Workflow, click to toggle the status to Published. Workflows may also be published or
unpublished using the Published Workflow checkbox in the Save Workflow dialog box.
Note that unpublishing a Workflow halts the Import Node, but not the rest of the Workflow. Documents
already in the process at the time it was unpublished will continue through the Workflow.
Layout Menu
Use the Layout menu in the toolbar to change the view of a Workflow on the Design Canvas.
In the Formatting group, you can choose the layout of the Workflow elements by: selecting
None to position Nodes and Connections freehand; selecting Auto Horizontal to line up
the elements horizontally; or selecting Auto Vertical to line up the elements vertically.
To show labels for Connections between Nodes, in the Link Labels group, select Show
Labels. Deselect this for a very dense Workflow and when you want to save space on the
Canvas. To change the size, the elements on the Design Canvas, in the Zoom group, select
either Zoom In or Zoom Out.

GlobalCapture Guide Workflow Management 37
Workflow Menu
From the Workflow menu found in the toolbar, you can save, reopen, copy, print, and delete
the Workflow design.
Manage Workflows
With the Nodes, Connections, and Process Fields in the GlobalCapture Designer, Workflows both simple
and complex can be created. GlobalCapture Designer components can be arranged and connected in
a variety of ways. The Nodes selected, their order in the Workflow, and the various Node Settings allow for
a great deal of design flexibility.
Create a Workflow
Create GlobalCapture Workflows in one of two ways:
• When the GlobalCapture Designer is first opened it defaults to an empty Design Canvas, ready
to begin a new Workflow.
• In the Workflow menu, in the Current group, select New to begin a new Workflow.
Assign an Import Node
Every GlobalCapture Workflow begins with one Import Node to obtain the documents to be processed.
1. Drag the Import Node onto the Design Canvas.
2. Configure the Import Node Settings. Refer to the “Import Node” section of the following “
Workflow
Node Configuration” chapter for details.
Tip: While Creating, Save and Test Workflows. It is recommended that the Workflow is unpublished
and frequently saved while you are designing it. The earliest that an unpublished Workflow can be saved
is after placing an Import Node on the Design Canvas.
It is a good idea to design a new Workflow using test source locations and test sample documents.
After finishing and testing the complete design, then create the production Import Node.

38 Workflow Management GlobalCapture Guide
Configure Workflow Process Fields
Process Fields are created in the GlobalCapture Field Catalog (or the GlobalSearch Field Catalog,
if available). They are then assigned to Workflows in the GlobalCapture Designer. Both GlobalCapture and
GlobalSearch Fields can be assigned to the same Workflow. Refer to the “Field and List Management
”
chapter and the
GlobalSearch Configuration Guide
or details on Fields.
While Process Fields can be created at any time during the design, they must be created before a Set
Process Fields Node can be used or before using them in any S9 Notation or Template design. It is a good
idea to plan the design of Workflow Process Fields early in the design process, if they will be used in the
Workflow, rather than as the Nodes are dragged out to the Design Canvas.
1. Create Fields in the GlobalCapture Field Catalog and/or the GlobalSearch Field Catalog.
You can quickly add a Process Field by clicking the GlobalCapture Field Catalog button in the
Workflow Process Field dialog box.
2. To add Fields to the Process Fields Pane:
a. Click the Edit ( ) icon to open the Workflow Process Field dialog box.
b. In the Import Process Field From group, select either GlobalCapture Fields or
GlobalSearch Fields.
c. In the Fields group, select and drag one or more Fields from the Available Fields list to the
Added Fields list.
d. To unselect a Field, drag it back to the Available Fields list.
In the Added Fields list, if the Field name is followed by “(Referenced),” it indicates that it is
assigned to the current Workflow. If it says “GlobalCapture Character,” it indicates
a GlobalCapture Field. If it says “GlobalSearch Character.” It is a GlobalSearch Field.
3. Click Update to save the settings and close the dialog box.
Workflow Process Field
4. To view the Nodes to which the Field is assigned in the Process Fields Pane, place your mouse
pointer over the Field and the border of the Nodes to which it is assigned will be highlighted.
5. To edit a Process Field, place the mouse pointer over it in the list in the Process Fields Pane and
click the Edit ( ) icon.

GlobalCapture Guide Workflow Management 39
Edits will affect any Set Process Fields Node to which the Process Field is assigned.
6. To delete a Process Field, select it from the list in the Process Fields Pane. Click the Delete ( ) icon.
If that Process Field has been assigned to a Node, a message will appear indicating that it
cannot be deleted, as it is in use. First delete the Process Field from all Nodes and then delete it
from the Process Fields Pane.
Add or Delete Additional Nodes
As long as there is one Import Node and one End Node in a Workflow, as many or few of the other Nodes
as desired can be added the Workflow. Nodes can be repositioned, connected, or deleted at any time.
Except for the single Import Node, there can be multiple numbers of the same Node type in a Workflow.
1. Drag the Node onto the Design Canvas.
2. Configure any Node Properties.
Nodes have unique settings. See the “Workflow Node Configuration
” chapter which follows
for details on the GlobalCapture Node settings.
3. Repeat steps one and two to add additional Nodes.
4. To delete a Node, click to select it and press D
ELETE on your keyboard (Fn+ DELETE for Mac users).
Add or Delete Connections
Draft Workflows can be saved in the unpublished state without Connections. To save and publish
a Workflow there must be at least one Connection between the Import Node and the End Node. The arrow
indicates the direction of the process from one Node to the other and the Connection label identifies the
link. Connections can be repositioned or deleted at any time.
1. Drag a Connection line from a Node to the next Node in the Workflow process.
2. To reposition a Connection, use your mouse to drag it to the new position.
3. To delete a Connection, click to select it and press D
ELETE on your keyboard.
Assign End Nodes
A GlobalCapture Workflow requires at least one End Node and can contain multiple End Nodes.
1. Drag an End Node onto the Design Canvas.
2. Drag a Connector from the last Node to the End Node.
Save a Workflow
1. To save a Workflow, in the Workflow menu, in the Current group, select Save.
2. In the Save Workflow dialog box, enter a title for the Workflow in the Title field.
3. Enter a description in the Description field.
4. Select Published Workflow to activate the Workflow.
5. Click Save.
6. Wait for “Workflow Saved” message to appear, and then proceed.

40 Workflow Management GlobalCapture Guide
Tip: Save Often. Hitting the browser Back button will erase any design work not previously saved.
As with any application, it is a good idea to click the Save button often while designing a Workflow.
Tip: Build Workflows for Less Than Ideal Conditions. There can be variety in documents, whether it is
a new vendor’s invoice form or a page wrinkled while scanned. Build Workflows “robust” enough to allow
for errors in the automated process. If a document errors out of a Workflow, a user can manually correct
the issue and use the Save and Move option in the Validation Station to place the document back in the
Workflow by choosing one of its Nodes. Configure (and name) Nodes to make it easier for users to place
documents back in a Workflow for a “do over.”
Tip: Always Create End Conditions. Exercise care to ensure that you have created a suitable end
condition for every action in the process to complete the Workflow and release the document from its
control. It is possible to create a Workflow which traps a document in an infinite loop, requiring that it be
manually removed from the Workflow process via Batch Manager.
Tip: Create Connections as You Design. Create Connections as you go, especially when designing
a complex Workflow with multiple pathways.
Publish a Workflow
1. Once the Workflow design is complete, click the Unpublished button to toggle the Workflow state
to Published.
Copy a Workflow
1. To copy an existing Workflow, in the Workflow menu, in the Current group, select Save As.
2. In the Save Workflow dialog box, enter a title for the Workflow in the Title text box.
3. Enter a description in the Description field.
4. Click Save.
Note: When selecting Save As the Published Workflow checkbox is not enabled until you have made
the desired changes to the new Workflow. Conflicts may arise when two identical Workflows compete for
the same document from the same capture location.
Open an Existing Workflow
1. To open an existing Workflow, in the Workflow menu, in the Management group, select Open.
2. From the Open Workflow dialog box, select a Workflow and click Open.

GlobalCapture Guide Workflow Management 41
Open an Existing Workflow
Print a Workflow
1. To print a copy of the Workflow on the Design Canvas to a printer or to a PDF file, in the Workflow
menu, in the Current group, select Print.
2. To choose a printer, click Destination and select from the list of available devices. The settings will
vary depending upon the printer.
Delete a Workflow
1. To delete a Workflow, in the Workflow menu, in the Management group, select Delete.
2. In the Delete Workflow dialog box, select the Workflow to be deleted and click Delete.
Delete a Workflow
Tip: Unpublish and Then Delete. When deleting a Workflow that has been published, it is a good idea
to first unpublish it to halt any new documents from entering the Workflow, and check Batch Manager to
confirm that any remaining documents have been processed through. Then delete the Workflow.

GlobalCapture Guide Workflow Node Configuration 43
Workflow Node Configuration
GlobalCapture Nodes are the building blocks of the Workflow. When you drag Nodes to the Design Canvas
their Settings dialog boxes appear for configuration.
Begin and End Nodes
In order to publish a Workflow, at its most basic, it must contain an Import Node connected to at least one
End Node. These beginning and ending Nodes are indicated by their round shapes.
Import Node
Use the Import Node to bring documents into the capture process. Files may be brought in directly from
a local file system, from a CSV or XML file, or directly from an email mailbox. Any POP or SMTP mail gateway
is addressable, in addition to a direct connection with Microsoft Exchange
®
via Exchange Web Services
(EWS).
1. Drag the Import Node from the Nodes Pane to the Design Canvas.
The Import Node Settings dialog box will appear.
2. Enter a unique name for the Node in the Title text box.
3. Enter a description in the Description text box.
Tip: Name and Describe Nodes Thoughtfully. For easier maintenance, use a Node’s Description field
to include details about its purpose in a Workflow, in case you need to modify it at a later date.
In a Workflow’s Description text box, add any additional information.
4. To specify how often the Workflow will check for new files, in the Frequency group, enter a number
in the Days, Hours, and/or Minutes text boxes.
The Import Node time will begin as soon as the Workflow is saved and published.
5. To create thumbnails of the document pages at time of capture, enable Generate Thumbnails for
Improved Validation.
This is enabled by default. If enabled, Thumbnails will be created at time of capture and remain
available with the document. If you delete pages the Thumbnails for those pages are also
removed. Thumbnails are updated as the document is updated.
Tip: Generate Thumbnails at Import. It is a good idea to generate Thumbnails at time of capture.
Otherwise, as Thumbnails are needed during the validation process, they will be generated on demand.
This process is quick, but in in high-volume situations a noticeable processing delay could occur. If the
Thumbnails have already been generated at time of capture, it is much faster for the server to simple
relay the resulting images.
6. To convert document at import, in the Convert Formats to PDF group, select a file format:

44 Workflow Node Configuration GlobalCapture Guide
• Word – Converts DOC, DOCX, TXT, ODS, RTF file formats.
• Excel – Converts XLS, XLSX, CSV, XML, OOXML file formats
• PowerPoint – Converts PPT, PPTX, ODP, PDF file formats
• Email – Converts PST, VCF, EML, EMLX file formats.
Note that converting files to text-searchable PDFs requires a Text Searchable PDF Converter
license.
Import Files from a Folder
1. To capture files from a watched folder, In the Import Type group, click File.
As you select Import Node settings, the contextual options appear at the bottom of the dialog
box.
2. Enter the path to the Windows directory to be monitored for import in the Source Path text box.
Files are removed from the source location.
Example: Import by File Type. Use the File Import Type to:
• Bring legacy records in bulk into GlobalSearch or other business applications.
• Scan records directly from a multifunctional device and name the image from the touch panel of
that device. The scanned documents will be automatically indexed upon scanning.
• Break out multiple Index Fields in a single document file with delimiters. For example, a record
named 10001_Square 9 Softworks_01012009.PDF could automatically have its names broken
down into three Index Fields; Invoice Number, Vendor Name, and Invoice Date.
3. To import files by file names:
a. Enable Import by File Name.
Contextual settings will appear.
Note: To use Import by File Name, you
must
add Process Fields to your Workflow first. If you do not,
the setting will be disabled.
b. Drag (or double-click on) one or more Fields from the Process Fields list to the Fields
Delimited By list in the order that the data is listed in the source file names.
c. Select a Field in the Fields Delimited By list and enter the field delimiter character (such as
a comma or underscore) that is used in the source file names in the text box.

GlobalCapture Guide Workflow Node Configuration 45
Import Node Settings for Importing by File Name
4. To process only one file (if multiple are present) each time the Workflow checks the import folder,
enable Single File per Batch.
This option may degrade processing performance, as only one file will be imported at each
iteration of the polling frequency. Use this option when you want only one file at a time to be
presented in a batch.
5. To delay the file import for two minutes before processing, enable Force Idle Wait.
When you scan multiple-page documents from some capture devices, they scan each page,
continuing to build the file (“job build” the file) directly in their destination location. This can
result in the Capture Engine importing the file before it has been completed, causing a variety of
issues ranging from incomplete to corrupted files. When you enable this option, the process will
pause for two minutes after the file has been written to. This ensure that a file is complete before
it is imported.
6. Click Save.
Import Node Settings for Importing Files

46 Workflow Node Configuration GlobalCapture Guide
Import Data and Documents
When you select Data & Documents as the Import Type, you can choose to import using either the CSV
(comma separated values) file format or the XML file format.
Distributing documents with a CSV or XML file is a common means for file-sharing between line-of-business
applications or for receiving records from a conversion services bureau. By setting up a script for automating
the import, a “hot folder” can be monitored using the Data & Documents Import Type for inbound
records being delivered by file transfer protocol (FTP). A valuable tool for bulk imports, users who share data
with external sources or rely on outsourced scanning services can now accept and directly import their
converted files automatically through FTP rather than upload from a CD or DVD.
With XML files, you can import data via a copier or MFP data directly from a GlobalCapture Connector.
A Workflow which uses Data & Documents can release to an Archive or to a directory. (You can’t release to
an Inbox as there’s no place to put data extracted from the source CSV or XML file.)
Tip: First Process Fields, Then Import Nodes. When creating a Workflow with Import by File Name,
you must, or with the import type Data & Documents, it is a good idea to create the necessary Process
Fields first and then set the Import Node.
Import CSV Files
1. To use a CSV data file, in the Import Type group, click Data & Documents.
2. In the File Format group, enable CSV.
3. Enter the path to the Windows directory to be monitored for import in the Source Path text box.
The files associated with the data do not need to be in the same path. File paths for each row in
the CSV are indicated in the data. The service account running the engine will need direct access
to the files, wherever they are located.
4. To specify the character used to denote a field in the CSV, enter the delimiter character in the Field
Delimiter text box.
The field delimiter default is a comma.
5. To specify the characters used to denote a string in the CSV, enter the delimiter character in the
String Delimiter text box.
The string delimiter default is quotation marks.
6. To include column headers in the CSV data being imported, enable Source File Includes Headers.
If selected, the column headers will be used to map the data within the columns to fields within
GlobalCapture and/or GlobalSearch (if installed). If not selected, the data columns within the CSV
file must be in the same order as the Fields to which you are importing. The string delimiter and
field delimiter tell GlobalCapture how the fields and strings are separated within the CSV file.
7. To preserve the image files specified in the CSV files in their source location, enable Preserve Image
Files.
If this option is selected, the original image files referenced in the CSV file will remain in their
source directory. If not selected, the Import Node will remove imported image files from their
source directory.
8. Click Save.

GlobalCapture Guide Workflow Node Configuration 47
Import Node Settings for Importing CSV Files
Import XML Files
1. To import XML files, in the in the Import Type group, click Data & Documents.
2. In the File Format group, enable XML.
3. Enter the path to the Windows directory to be monitored for import in the Source Path text box.
4. To preserve the original image files referenced in the XML files in their source location, enable
Preserve Image Files.
5. Click Save.
Import Node Settings for Importing XML Files
Import Emails
1. To monitor an email inbox and automatically capture documents and indexing data, in the Import
Type group, click Email.
2. To set the email protocol for the connection to a mail server, in the Protocol group, choose either
POP, IMAP, or Exchange.
The default setting is POP.
Note: For Exchange Web Services (EWS) you
must
use the Exchange connection type. POP or IMAP
connections are not reliable when working with some versions of Exchange servers.

48 Workflow Node Configuration GlobalCapture Guide
3. Enter the server address in the Server Address text box.
4. Enter the port number in the Port text box.
5. To use Secure Sockets Layers (SSL) encryption, click SSL.
a. To select your SSL type, in the Security Mode group, select None, Implicit or Explicit.
SSL may be required by your server, depending upon your installation. The default setting is
None.
6. Enter the account name of the mailbox to import email messages from in the User Account text box.
7. Enter the password for the account of the user who will receive the imported email messages in
the Password text box.
8. To remove emails after they are imported, enable Delete Emails on Import.
9. To process only one file (if multiple are present) each time the Workflow checks the mailbox, enable
Single File per Batch.
10. To test the connection to the email server, click Test.
11. To set whether and how email messages and attached documents are imported, in the Documents
group, select one of the following:
• Message and Attachments – Both the email message and its attachments are imported (the
default setting). If this is selected, then:
o To import the email message and any attachments separately, enable Separate Message
and Attachments.
• Attachments Only – Imports only the attached documents without the email message. If this is
selected, then:
o Enter file extensions in the Filter Attachments text box.
Separate filters with semicolon.
12. Click Save.
Import Node Settings for Importing Email Messages
Import GlobalForms Web Forms
You can import GlobalForms
®
forms into GlobalCapture. Data will be written to a PDF version of the form
and imported into GlobalCapture with indexing data based on GlobalForms settings. For details on

GlobalCapture Guide Workflow Node Configuration 49
GlobalForms, please refer to the
GlobalForms Guide
.
1. To monitor a GlobalForms form and automatically capture documents and indexing data, in
the Import Type group, click GlobalForms.
Import Node Settings for Importing GlobalForms Forms
2. Specify which instance of GlobalSearch the forms will be imported from by selecting from
the Square9 API drop-down list.
The default is Square9 API Portal. If you have added GlobalSearch instances in the Portals
interface, they will also appear in the list.
3. Click Save.
Import Node Settings
End Node
The End Node ends a Workflow. At least one End Node must be present before the Workflow will save and
run.

50 Workflow Node Configuration GlobalCapture Guide
• Drag the End Node from the Nodes Pane to the Design Canvas.
End has no properties and does not display a Node Settings dialog box when placed on the
Design Canvas.
Process Nodes
Use process Nodes for linear Workflows with automatic and manual changes to the data and documents.
For more complex Workflows, using branching TRUE/FALSE logic, see the “Conditional Process Nodes
”
section below.
Release Node
Use the Release Node to release documents and their data from a Workflow to GlobalSearch, the file
system, or to another line-of-business application. You can use multiple Release Nodes in a Workflow.
You can release documents from the Workflow directly to a Windows file directory, typically selected when
every document that is processed in a Workflow needs to be backed up to a different location. For example,
if you had invoices that a client wanted a copy of, you could have every document that is imported via an
“Invoice” Workflow for that customer backed up to an external location, where it could be distributed.
You can file documents away automatically by releasing them directly to a GlobalSearch Archive. Typically,
you would release to an Archive when you have used an automated method for extracting field data.
You can also choose to release to Inboxes in the GlobalSearch desktop client. Documents are most
commonly released to an Inbox post-processing, where no indexing has been automated but where
features like page separation or image enhancement are required. You then access the documents from the
Inbox, where they can be indexed into an Archive manually.
Tip: When to Delete at Release. The Delete at Release checkbox is enabled by default. As documents
are captured, validated, and exported to an application like GlobalSearch, they are usually no longer
useful in the GlobalCapture system, where they take up disk storage space.
However, sometimes it is a good idea to retain the files so that you have the option of returning them to
the Workflow, such as when you are configuring and testing the Workflow.
1. Drag a Release Node from the Nodes Pane to the Design Canvas.
The Release Node Settings dialog box will appear.
2. Enter a unique name for the Node in the Title text box.
3. Enter a description in the Description text box.

GlobalCapture Guide Workflow Node Configuration 51
Release Files to a Folder
1. To release documents directly to a Windows file directory, in the Release Type group, click File.
When you select the File release type, contextual options appear at the bottom of the dialog
box.
Example: Use S9 Notation Process Fields. When doing a File release, you
can use S9 Notation in a Release Node to get to properties of a document.
For example, you can name a file on release using S9 Notation:
To name files based on Invoice Number Field, the PO Number Field, and the
Batch ID number, in the File Naming Format text box, enter
{p_Invoice Number}_{p_PO Number}_{p_BatchID}.
Type a single brace ( { ) to view the list of S9 Notations to select from. Refer to “Appendix C
” to for details
on S9 Notation.
2. Enter the Windows directory path into the Export Path text box.
It is a good idea to out the export directory under a directory you know that the user who is
running the GlobalCapture service has rights to.
3. Enter the format for file names in the File Naming Format text box.
You can use S9 Notation to select from available Process and Systems Fields. Enter a brace ( { ) to
view and select a Field.
4. To replace captured files with new documents with duplicate file names, enable Overwrite Existing
Files.
5. To delete files from GlobalCapture upon release, enable Delete Files after Release.
Delete Files after Release is similar to the Delete All Pages setting in the Delete Pages Node.
6. Click Save.
Release Node Settings for Releasing to File Folder
Release to GlobalSearch Archives
You can release your GlobalCapture data and documents directly GlobalSearch, if you have it installed.
1. To release data and documents directly to a GlobalSearch Archive to file them away automatically,
in the Release Type group, click Archive.

52 Workflow Node Configuration GlobalCapture Guide
When you select the File release type, the File Type contextual options appear at the bottom of
the dialog box.
2. Specify which GlobalSearch instance the data and documents will be released to from the Square 9
API drop-down list.
The default is Square9 API Portal. If you have added GlobalSearch instances in the Portals
interface, they will also appear in the list.
3. Select which database in the selected GlobalSearch instance the data and documents will be released
to from the Database Destination drop-down list.
4. Select which Archive in the selected database the data and documents will be released to from the
Archive Destination drop-down list.
5. To automatically create a destination Archive based on Field data, enable Import to Automatically
Generate Child Archive.
a. If enabled, from the Process Field Value for Archive Name list, choose the Field for generation
of child Archives.
6. To delete data and documents from GlobalCapture upon release, enable Delete Files after Release.
7. Click Save.
Example: Release to Multiple Instances. It is possible to have a single capture instance which is
releasing to multiple GlobalSearch instances. If you run a service bureau, for example, you can capture
documents and then release them to various customer GlobalSearch instances. You will be able to define
the end points for each of those customers in your service bureau capture process.
Release Node Settings for Releasing to GlobalSearch Archive
Release to GlobalSearch Inboxes
You can release your GlobalCapture documents directly GlobalSearch, if you have it installed. Be aware,
however, that Index Field data is not retained in an Inbox. If you have extracted (from using the Process
Field Node, or the Validation Station, for instance) that data will not be retained in the Inbox. Release to
an Archive instead.
1. To release documents directly to a GlobalSearch Inbox, in the Release Type group, click Inbox.
2. Specify which GlobalSearch instance the documents will be released to from the Square 9 API drop-
down list.
3. Select which database in the selected GlobalSearch instance the documents will be released to from
the Database Destination drop-down list.

GlobalCapture Guide Workflow Node Configuration 53
4. Select which Inbox in the selected database the documents will be released to from the Inbox
Destination drop-down list.
Release Node Settings for Releasing to GlobalSearch Inbox
Release Node Settings
Separate Node
Use the Separate Node to split multi-page documents (“burst”) into documents based on the presence of
blank pages, barcodes, or the document page count. This is useful when, for example, all of the different
forms from a personnel folder are scanned together or all of a single day’s receipts. Use the designated
pages as separators to automatically “burst” the scanned multi-page file into two or more captured
documents. (You can also separate by Zone in a Template. Refer to “Zone Properties” in the “
Template
Management” chapter for details.)
When separation by blank pages is added to a Workflow, documents can be scanned or otherwise imported
in batches and wherever a blank page is encountered, automatically broken out into separate documents.
Using separation by barcodes is a highly efficient means for document separation when scanning records in
batches. It allows you to create Zones where barcodes are read and the data is used to index documents
automatically to a specific Field. The document can either have a barcode incorporated into its lead page or

54 Workflow Node Configuration GlobalCapture Guide
a cover page can be used which uses a barcode as the indicator for separation. The barcode can be place
horizontally or vertically on the page and may be run from left to right or top to bottom. GlobalCapture
supports virtually any 1-D barcode type including the most common Code 39 and Code 128.
You could also choose to use a predefined page count (starting from page one) which automatically
separates documents coming into Workflows. Use this for batch-scanning documents if you know that the
first document in a batch is two pages long, for example, set a separation to occur at page three.
1. Drag the Separate Node from the Nodes Pane to the Design Canvas.
The Separate Node Settings dialog box will appear.
2. Enter a unique name for the Node in the Title text box.
3. Enter a description in the Description text box.
Separate by Blank Page
1. To split documents at blank pages, in the Separation Type group, click Blank Page.
2. To increase the threshold of sensitivity for determining if a page is blank or not, move the Blank
Threshold slider to the right. To decrease the threshold of sensitivity for determining if a page is
blank or not, move the slider to the left.
When you select the slider, a percentage indicator will appear. The default setting is 99 percent.
Tip: Try 85% and 99%Threshold Level. If there is any “noise” on the scanned image (often as
a result of dust and other artifacts on a scanner or paper), there may be speckling or other
pixilation on the scanned image. A threshold level at which the blank page separation feature
will activate of 100% white pixels would throw an error. Setting a lower percentage could
correct that. The optimum threshold level will vary, but a start value between 85% and 99% is
often a good starting point for adjustment.
3. To capture documents scanned in duplex mode, enable Documents Scanned in Duplex Mode.
1. Enabling the Documents Scanned in Duplex Mode option will enforce a rule where separation
will only occur when both sides of a page are blank (i.e., odd page and even page).
4. Click Save.
Separate Node Settings for Blank Page Separation
Separate by Barcode
1. To split documents at barcodes on the pages, in the Separation Type group, click Barcode
Recognition.

GlobalCapture Guide Workflow Node Configuration 55
2. Select a barcode setting from the list in the Barcode Formats group.
The default format is Code 39.
3. From the Orientation group, select the Left to Right, Top to Bottom, Right to Left, or Bottom to
Top barcode orientation.
The default orientation is Left to Right.
4. To increase the threshold percentage for determining the presence of a barcode, move the Scan
Sensitivity slider to the right for more sensitivity and to the left for less sensitivity.
When you select the slider, a level indicator will appear. The default level of 5 is sufficient for
most applications but may be adjusted to optimize results for your specific application. Level 1 is
the least sensitive with level 10 being the most sensitive.
5. To set a custom prefix for recognizing your barcodes, enable Detect Prefix and enter a prefix in the
Prefix text box.
You want to document to separate at the beginning of a document, not somewhere in the
middle. Use Detect Prefix if there are other barcodes are on the documents. Document
separation will only occur on records containing a barcode with your custom prefix.
6. To enhance the document image temporarily before scanning the barcode, enable Enhance
Document Prior to Recognition.
7. Click Save.
Separate Node Settings for Barcode Separation
Separate by Page Count
1. To separate documents at a predefined page count, in the Separation Type group, click Page
Count.
2. Type a number in the text box to indicate the specified number of pages where the separation
should take place.
Separate Node Settings for Page Count Separation

56 Workflow Node Configuration GlobalCapture Guide
3. Click Save.
Separate Node Settings
Image Cleanup Node
The Image Cleanup Node can enhance the image quality of a TIF or PDF file automatically, including the
ability to deskew, despeckle, rotate, and crop images as they are being captured. This Node is useful when
documents have been imported with papers scanned crookedly, or where there may have been dust on
the scanner or the paper, which may cause less accurate OCR results.
Tip: Use Multiple Cores in High Volume Situations. Image Cleanup Node is a multi-threaded feature.
If you have a large number of pages in your documents or a number of people scanning simultaneously,
then add more Core licenses to speed up the process.
1. Drag the Image Cleanup Node from the Nodes Pane to the Design Canvas.
The Image Cleanup Node Settings dialog box will appear.
2. Enter a unique name for the Node in the Title text box.
3. Enter a description in the Description text box.
4. In the Page Options group, choose from the list of options to perform on inbound images:
• Color Dropout – Use to convert a color or grayscale image to black and white
.
• Remove Noise – Use to reduce chroma and luminance noise in an image.
• Despeckle – Use to reduce banding or visual noise often appears in a scanned image.
• Crop Black – Use to remove black borders around an image.
• Crop White – Use to remove white borders around an image.
• Deskew – Use to straighten a skewed image.
• Rotate – Use to automatically rotate an image. Leave the default setting of 0° or select to rotate
by 90°, 180°, or 270°.
5. Click Save.

GlobalCapture Guide Workflow Node Configuration 57
Image Cleanup Node Settings
Convert Node
As part of your digital asset management system, use the Convert Node to automatically transform your
office documents into multi-page TIF or text-searchable PDF files prior to release. (Note that converting
documents to text-searchable PDFs requires a Text Searchable PDF Creator license.)
Tip: Choose TIF for Speed and PDF for File Sharing. Depending on the target and application, one file
format may be more desirable than another. Using the TIF file format tends to be faster and more
efficient for general image-processing applications. Using the PDF file format tends to be more broadly
accepted as a file-sharing standard.
Tip: Use PDF/A for Long-term File Storage. Use the Text Searchable PDF Creator module to
automatically convert records in the TIF or non-text-based PDF file formats into a text-based PDF/A
format as they are imported during a Workflow. When you convert your records into the PDF/A file
format, you gain the benefit of using a format recognized by government and business as the standard
for long-term document retention.
Documents in the PDF/A file format are designed to be self-contained to ensure that records can be
reproduced in exactly the same way for years. All information necessary for displaying the document in
the exact manner every time is embedded within the file. This information includes, but is not limited to,
all content (text, raster images and vector graphics), fonts, and color information. By using the PDF/A file
format, GlobalCapture and Text Searchable PDF Creator becomes an integral component of your overall
compliance strategy for records retention.
1. Drag the Convert Node from the Nodes Pane to the Design Canvas.
The Convert Node Settings dialog box will appear.
2. Enter a unique name for the Node in the Title text box.
3. Enter a description in the Description text box.
4. Select the file format which the document will be converted to. Choices include:
• TIF – Use to convert documents to a multi-page TIF file format used for images.

58 Workflow Node Configuration GlobalCapture Guide
• RTF – Use to convert documents to the RTF (rich text format) file format used in word processing
applications.
• XLS – Use to convert documents to the XLS file format used in spreadsheet applications.
• DOCX – Use to convert documents to the DOCX file format used in word processing
applications.
• XLSX – Use to convert documents to the XLSX file format used in spreadsheet applications.
• PPTX – Use to convert documents to the PPTX file format used in presentation applications.
• EPUB – Use to convert documents to the EPUB file format used in e-books.
• ODT – Use to convert documents to the ODT file format used in word processing applications.
• Text Searchable PDF – Convert documents to a text-searchable PDF file format.
5. Click Save.
Convert Node Settings
Delete Pages Node
Use the Delete Pages Node in conjunction with the Separate Node to delete designated separating pages
from a document after use, such blank pages or pages with a barcode. Files which were retained from the
Release Node for testing or revalidation can be eventually deleted using the Delete Pages Node.
When you set the Node to delete at barcodes, the barcode can be place horizontally or vertically on the
page and may be run from left to right or top to bottom. GlobalCapture supports virtually any 1-D barcode
type including the most common Code 39 and Code 128.
The Delete All Pages feature allows you to delete files from the GlobalCapture system, thus freeing up disk
space on your machine.
Tip: Pause Before Deleting. While deleting pages frees up space, you can add an “are you sure?” step
by adding a Validate Node just before the Delete Pages Node where Approve is configured to approve
the document to be deleted and Deny is configured to not delete at this time, but instead put it back
into the process.
1. Drag the Delete Pages Node from the Nodes Pane to the Design Canvas.

GlobalCapture Guide Workflow Node Configuration 59
The Delete Pages Node Settings dialog box will appear.
2. Enter a unique name for the Node in the Title text box.
3. Enter a description in the Description text box.
Delete Blank Pages
1. To delete blank pages from a document, in the Deletion Type group, select Blank Page.
Blank Page is the default setting.
2. To increase the threshold of sensitivity for determining if a page is blank or not, move the Blank
Threshold slider to the right. To decrease the threshold of sensitivity for determining if a page is
blank or not, move the slider to the left.
When you select the slider, a percentage indicator will appear. The default setting is 99 percent.
As with the Separate Node, 85 to 99 percent are recommended settings.
Delete Pages Node Settings for Blank Page Deletion
Delete Pages with Barcodes
1. To delete pages with barcodes from a document, in the Deletion Type group, select Barcode
Recognition.
Contextual settings appear.
2. Select a barcode setting from the list in the Barcode Formats group.
The default setting is Code 39.
3. From the Orientation group, select the Left to Right, Top to Bottom, Right to Left, or Bottom to
Top barcode orientation.
The default orientation is Left to Right.
4. To increase the threshold percentage for determining the presence of a barcode, move the Scan
Sensitivity slider to the right for more sensitivity and to the left for less sensitivity.
When you select the slider, a level indicator will appear. The default level of 5 is sufficient for
most applications but may be adjusted to optimize results for your specific application. Level 1 is
the most sensitive and level 10 the least sensitive.
5. To set a custom prefix for recognizing your barcodes, enable Detect Prefix and enter a prefix in the
Prefix text box.
This is useful if there are other barcodes on the documents. Document separation will only occur
on records containing a barcode with your custom prefix.
6. To enhance the document image before scanning the barcode, enable Enhance Document Prior to
Recognition.
7. Click Save.

60 Workflow Node Configuration GlobalCapture Guide
Delete Pages Node Settings for Barcode Recognition
Delete All Pages
1. To delete all of the pages, enable Delete All Pages.
Delete Pages Node Settings for Deleting All Pages
2. Click Save.
Delete Pages Node Settings
Data Lookup Node
Replace custom SQL scripts by using the Data Lookup Node to map data from a SQL Server
®
data source
into a Workflow for real-time data lookup in the capture process. When you use this Node, for example, it is

GlobalCapture Guide Workflow Node Configuration 61
possible to extract data from an invoice and backfill additional details (vendor name, etc.) that already exists
somewhere else (possibly even from documents that have previously been indexed to the target data
source).
Using a connection string, you can map your lookup table to the GlobalCapture Workflow. You can specify
the Process Fields and table columns to draw from. Any columns that you have data in, the Node can look
up in the data source and backfill the columns that you have mapped.
You can set the amount of “confidence” you have in the accuracy of the data in the Process Field. By default,
data in all Fields have a confidence level setting of zero. When you manually enter or validate a Field data in
the Validation Station, then that Field will be assign 100 percent confidence in its accuracy. When the Data
Lookup Node is executed, any Fields with confidence greater than the percentage which you have set as the
Trusted Confidence level in the Node will be used to look up data in the data source.
For example, if you create a Template that extracts an invoice number at a high level of confidence and has
Fields for PO Number, Invoice Date, and Invoice Amount as well, you can create a lookup that will pull the
data for those other Fields exclusively from your accounting system.
1. Drag the Data Lookup Node from the Nodes Pane to the Design Canvas. The Data Lookup
Settings dialog box will appear.
2. Enter a unique name for the Node in the Title text box.
3. Enter a description in the Description text box.
4. Enter a connection string in the Connection String text box.
The service account running the capture service will require access to the database unless you
have provided credentials in the connection string.
5. To adjust the level of confidence in the accuracy of Process Field data used for the data lookup,
move the Trusted Confidence slider to the right for more confidence and to the left for less
confidence.
The default setting is 75 percent. Note that this works with regular Fields, not with Table Fields.
6. Enter the name of the lookup table in the Table Name text box.
7. To specify the Process Field, in the Field Mapping group, select a property from the Process Field
drop-down list.
8. To specify the column from the lookup table which will be mapped to the Field, in the Field
Mapping group, enter a column name in the Column text box.
a. To map additional columns, click the Add (plus sign) button and enter the additional column
name.
b. To delete a column from the list of columns to be mapped, select the column name and click the
Delete ( X ) button.
9. Click Save.

62 Workflow Node Configuration GlobalCapture Guide
Data Lookup Node Settings
Call Assembly Node
The Call Assembly Node is a “wild card” activity that allows you to call custom programs into GlobalCapture
Workflows. This could be a SQL script or integration with another application. The Call Assembly Node
allows for process execution to be paused and control handed off to an external application. Data can be
passed to this external application and then received back from it. It is implemented as a .NET assembly
callout.
1. Drag a Call Assembly Node from the Nodes Pane to the Design Canvas.
The Call Assembly Node Settings dialog box will appear.
2. Enter a unique name for the Node in the Title text box.
3. Enter a description in the Description text box.
4. Enter a server relative path location to the Assembly being loaded in the Server Path text box.
5. To merge documents, enable Merge Documents.
Merge Documents is enabled by default.
6. Click Save.
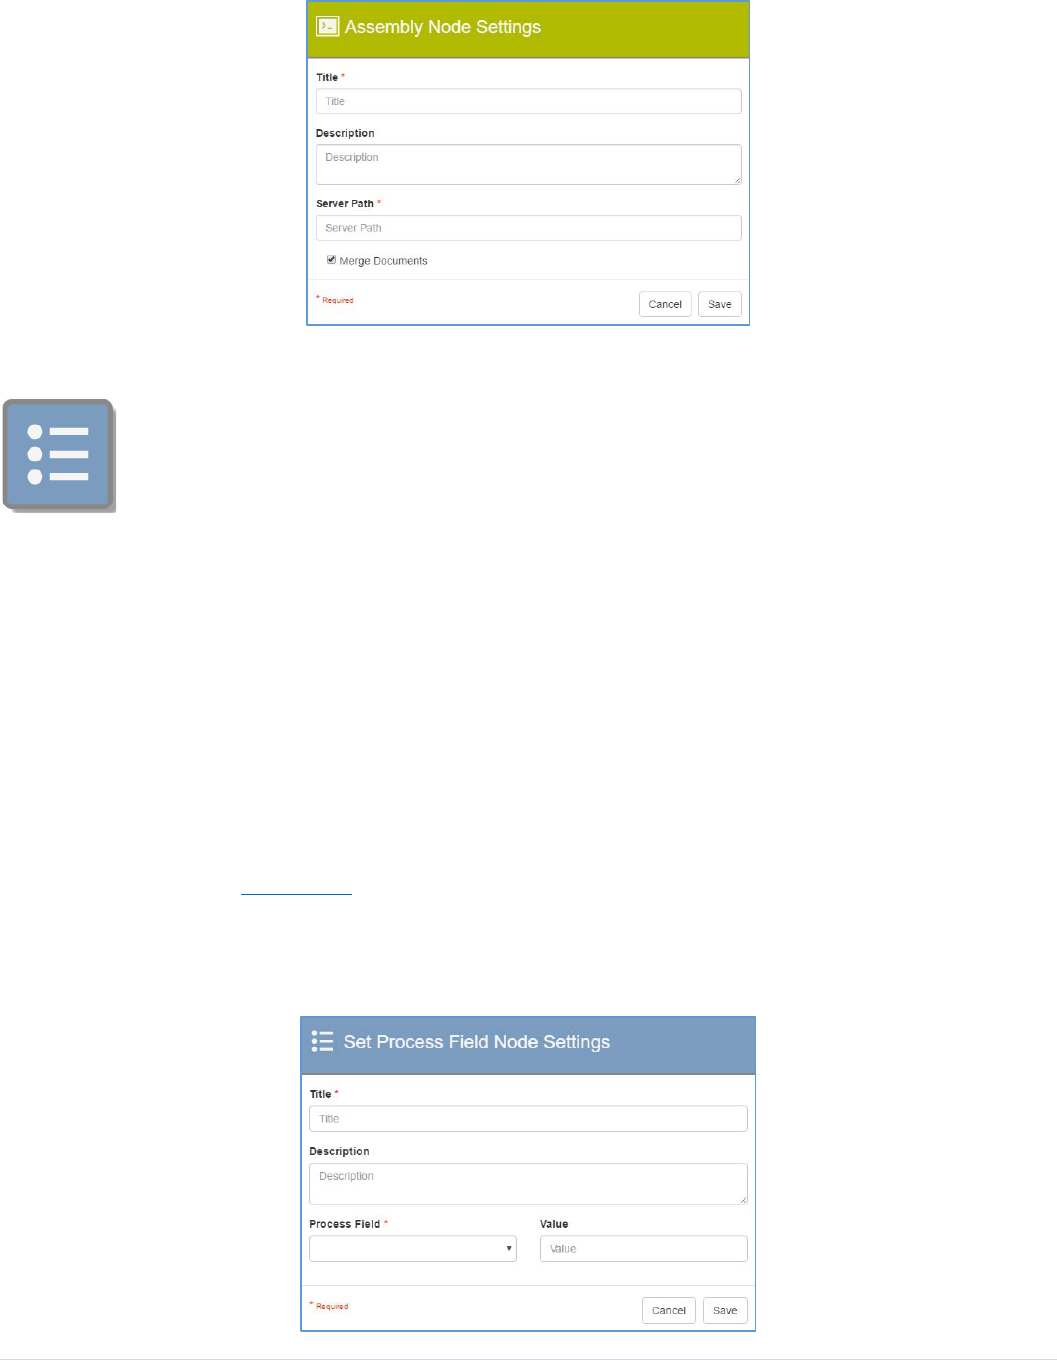
GlobalCapture Guide Workflow Node Configuration 63
Call Assembly Node Settings
Set Process Field Node
GlobalCapture Process Fields are variables used for control in a process. Process Fields need to be defined in
the Process Fields Pane before they can be assigned to Set Process Field Nodes. To simplify capturing and
indexing your documents to GlobalSearch, you can map GlobalCapture Process Fields to GlobalSearch Index
Fields simply by giving them the same name.
1. Drag a Set Process Field Node from the Nodes Pane to the Design Canvas.
The Set Process Field Node Settings dialog box will appear.
2. Enter a unique name for the Node in the Title text box.
3. Enter a description in the Description text box.
4. In the Process Field drop-down list of all Fields in the Process Field Pane, select a Process Field.
5. Enter a value in the Value text box which matches the Field’s data type.
To access S9 Notations for field variables, type in a single brace, then select from the drop-down
list. Refer to “Appendix C
” to for details on S9 Notation.
An error message will appear if the value type does not match the type specified for that Index
Field.
6. Click Save.
Set Process Field Node Settings

64 Workflow Node Configuration GlobalCapture Guide
Email Node
Set the Email Node to automatically send an email message to defined recipients about the document.
The email can include HTML formatting, a link to the document, and/or the document can be attached.
1. Drag an Email Node from the Nodes Pane to the Design Canvas.
The Email Node Settings dialog box will appear.
2. Enter a unique name for the Node in the Title text box.
3. Enter a description in the Description text box.
4. Configure the email message header and body fields (see below for details).
To access S9 Notations for field variables, type in a single brace, then select from the list. Refer to
“Appendix C
” to for details on S9 Notation.
5. Click Save.
Example: Use S9 Notation in Email Fields. Like the Release Node, the Email Node features S9
Notation. For example, use the S9 Notation {TODAY} to automatically enter the current date into
the email.
Configure Email Message Headers
1. Enter the email address of the message recipient in the To text box.
The field can support multiple email addresses. Simply separate the email addresses with
a comma or semicolon.
2. Enter the email address of the message sender in the From text box.
3. Enter the email address of the message “CC” recipient in the CC text box.
Additional recipients may be added, with semicolons delimiting the addresses.
4. Enter an email subject in the Subject text box.
Configure Email Message Body
1. Enter the email message in the Message text box.
2. The message can be formatted by clicking the formatting buttons directly above the Message box,
or use HTML formatting.
3. Alternately, to specify an external HTML file:
a. Click the Link (chain) button.
b. In the Insert Link dialog box, enter the email message in the Text to display text box.
c. Enter a URL in the To what URL should this link go text box.
d. To open the URL in a new window, enable Open in new window.
The checkbox is enabled by default.
e. Click Insert Link.
4. Place the mouse pointer over the bottom of the Message box, when the mouse pointer becomes
a Move ( ) icon, drag the bottom of the box to adjust its height.

GlobalCapture Guide Workflow Node Configuration 65
5. To include a copy of a document with an email notification, enable Attach Document.
Email Node Settings
Export Data Node
Use the Export Data Node to export document data from a GlobalCapture Workflow and send it either to
a CSV file or SQL database. This allows you to export document data (including Table Field Data), which
could then be shared with third-party line-of
-business applications.
1. Drag an Export Data Node from the Nodes Pane to the Design Canvas.
The Export Data Node Settings dialog box will appear.
2. Enter a unique name for the Node in the Title text box.
3. Enter a description in the Description text box.
4. To select the format for exporting data, in the Export Type group, select a type:
• To select the CSV type, click CSV.
• Specify server UNC or local path for the directory that will receive the CSV data in the Export
Path text box.
• To include column headers, enable Include Column Headers.
• To append the document to an existing one, enable Append to Existing.
If this is disabled, each document processed will cause the creation of a new CSV file.

66 Workflow Node Configuration GlobalCapture Guide
Export Data Node Settings for Exporting to CSV Files
• To select the SQL type, click SQL.
• Enter the connection string for the SQL instance that will receive the document data in the
Connection String text box.
The SQL release will create a table for header data and a table for line-item detail.
The service account running the capture service will require access to the database unless
you have provided credentials in the connection string.
5. Click Save.
Export Data Node Settings
Note: If the document record includes a Table Field, the document’s header index data will be repeated
once for each row it contains, then again for each Table Field row. This allows all rows of data for
a document to be seen in a CSV Export.
Note Node
You can add notes about the Workflow to the Design Canvas using the Note Node. It is a simple text-based
element with no properties.
1. Drag a Note Node to the Design Canvas.
2. Select the Note and type in text.
Once you begin typing, you can drag and resize the text box within the Node border.

GlobalCapture Guide Workflow Node Configuration 67
When you click off of the Note, the Node border resizes automatically.
3. To edit a Note, click on the text and begin typing.
Tip: Use Notes to Comment Your Workflow. It is a good idea to create detailed descriptions for
Workflows and each of the Nodes in the Workflow, and to add additional Notes to the Design Canvas.
This is very helpful while designing Workflows, which often represent complex business processes.
Detailed documentation would prove very useful for explaining the design when revisiting the Workflow
for maintenance at a later time.
Conditional Process Nodes
You can create Workflows which are very simple and linear. You can also create Workflows with very fluid
decision routing using one or more conditional process Nodes. Recognizable by their flowchart diamond
shape in the Designer, the conditional process Nodes are used for TRUE/FALSE logic decisions about the
document in the Workflow.
While creating or editing a Workflow with a conditional process Node, the Node path does not have to be
set when it is dragged onto the Design Canvas. Only when the Node is linked to a Workflow by dragging
a Connector does a second settings dialog box appear. There you must determine the document’s path by
making a decision about the next action taken against the document. The Workflow cannot be run without
specifying
both
conditions.
Condition Node
Use the Condition Node to make a TRUE or FALSE Boolean check, which allows for decisions to be made
about a document. Use one or multiple conditions in a Workflow for intricate document routing in
a business process. Conditions are bound to a Workflow Process Field.
1. Drag a Condition Node from the Nodes Pane to the Design Canvas.
The Conditional Node Settings dialog box will appear.
2. Enter a unique name for the Node in the Title text box.
3. Enter a description in the Description text box.
4. Select a Process Field from the Based on Process Field drop-down list.
5. Select a condition from the choices in Condition drop-down list.
6. Enter a value for the Process Field in Value.
You can use S9 Notations for Value variables. Refer to “Appendix C
” to for details on S9
Notation.
7. Click Save.
Use a Condition Node to create an IF/THEN statement in your Workflow. Use more Condition
Nodes to create an IF/THEN/ELSE statement.

68 Workflow Node Configuration GlobalCapture Guide
Condition Node Settings
Select Condition
1. To configure the first set condition, drag a Connector from the Condition Node to the next Node in
the Workflow and in the Conditional Select dialog box, click condition
<A>
.
2. To configure the second set condition, drag a Connector from the Condition Node to another Node
in the Workflow.
The Conditional Select dialog box will appear with condition
<B>
selected.
Condition Node Conditional Select
Classify Node
Use the Classify Node to perform OCR text-based extraction on the pages of your documents and then
attempt to match the extracted data to your GlobalCapture Templates. (Refer to the “
Template
Management” chapter for details on creating Templates.) Documents can be compared to one, several, or all
of the available Templates and use the first Template which matches the document to classify it. With the
status “Classified,” the document can continue in the Workflow. If no existing Template matches closely
enough, the document would be given the status “Unclassified” and follow a different route through the
Workflow.

GlobalCapture Guide Workflow Node Configuration 69
Tip: Plan for Improperly Classified or Unclassified Documents. The Node does an excellent job of
automatically matching documents to Templates. Sometimes, however, documents are not successfully
classified, such as when a vendor changes billing forms or a crumbled page did not scan well.
Create Templates. Using the Template Designer, edit or create Templates for your specific documents,
such as invoices, packing slips, checks, and purchase orders.
Optimize Template Order. If the classification results are not optimal, the order in which the Templates
are presented for a match can be changed in the Applied OCR Templates list in the Classify Node.
Manually Classify. If a document fails to be classified by matching a Template, use an Email Node to
send an alert, or view the document status in the Batch Manager. Using a Validate Node, unclassified
documents could be opened into the Validation Station, edited, classified, and continue to the Workflow.
1. Drag the Classify Node from the Nodes Pane to the Design Canvas.
The Classify Node Settings dialog box will appear.
2. Enter a unique name for the Node in the Title text box.
3. Enter a description in the Description text box.
4. To use specific OCR Templates to perform extraction against, enable Apply Only Selected OCR
Templates.
This is off by default. If it is not enabled, then the document is checked against
all
of the available
Templates.
5. To restrict the process step to specific OCR Templates, in the Apply Only Selected OCR Templates
group, drag one or more OCR Templates from the Available OCR Templates list to the Applied
OCR Templates list.
6. Click Save.
Classify Node Settings

70 Workflow Node Configuration GlobalCapture Guide
Select Condition
1. To classify a document, drag a Connector from the Classify Node to the next Node in the Workflow
and, in the Conditional Select dialog box, click Classified.
Use this when the document has been identified and a Template that matches the document has
been selected.
2. For unclassified documents, drag a Connector from the Classify Node to another Node in the
Workflow.
The Conditional Select dialog box will appear with Unclassified selected by default. Use this
when no matching Template was found for the document.
Classify Node Conditional Select
Validate Node
Use the Validate Node whenever you need manual control over a document or its data in the capture
process. With it you can make Approve/Deny decisions about a document and more than one Validate
Node may be used in a Workflow.
This Node is useful following the Classify Node, with the decision Unclassified. You can import, view and
validate, and
then
process a document
before even the opportunity for capture error could occur. When
errors do occur, you can quickly view and correct documents in the Validation Station.
Tip: Add Validation Points to Catch Issues Early. As much as possible, the GlobalCapture Workflow is
automated. If confidence in the capture is high, then a document could be automatically validated.
However, there can be times in the process when you must stop and use human labor. Add the Validate
Node to a Workflow to handle specific scenarios.
Add a Validate Node immediately after the Import Node so that you may visually inspect and validate
all of the documents entering the system, before they continue in the process. Pages which are flipped
over, stained, or folded may need to be rescanned before the OCR process is completely successful.
Validate Image Quality. Scan in 100 pages of invoices. Before using OCR, use the Validate Node and
use the Validation Station to visually validate that each of those 100 pages is legible and is useable.
When validated the document can continue in the capture process.

GlobalCapture Guide Workflow Node Configuration 71
Validate Separation. If the 100 pages of invoices have no standard Zones, barcodes, or blank pages (or
low blank page confidence), use the Validate Node and the Validation Station to manually divide the
scan into individual invoice documents.
Validate Status. From the Batch Manager, manually validate whether the invoices are approved for
processing or use the Email Node to send them for further attention.
1. Drag the Validate Node from the Nodes Pane to the Design Canvas.
The Validate dialog box will appear.
2. Enter a unique name for the Node in the Title text box.
3. Enter a description in the Description text box.
4. After an OCR step which uses a Confidence Threshold, enable Automatic Approval on Confidence
Threshold to only require validation for documents that have Fields falling below their confidence
threshold.
Those that are above the threshold (configured per Field) would be automatically validated.
This feature is turned off by default. When enabled, the confidence setting defaults to 75 percent.
5. To allow all users of the Workflow to create a Rapid Adapt Template from the Validation Station,
enable Rapid Adapt.
If enabled, then any user with permissions to the Workflow will be able to create Rapid Adapt
Templates.
If users have the ability to create Rapid Adapt Templates, the Classify Node that proceeds the
Rapid Adapt enabled Validate Node must have the Apply Only Selected OCR Templates
disabled in order to allow the new Template to be available for use.
6. Click Save.
Validate Node Settings
Select Condition
1. To validate a document, drag a Connector from the Validate Node to the next Node in the
Workflow and, in the Conditional Select dialog box, click Approve.
Use this when the document has been approved to continue in the process.
2. For deny validation, drag a Connector from the Validate Node to another Node in the Workflow.
The Conditional Select dialog box will appear with Deny selected by default. Use the document
has been denied approval and will continue on another process path or be released, depending
upon the Workflow design.

72 Workflow Node Configuration GlobalCapture Guide
Validate Node Conditional Select

GlobalCapture Guide Field and List Management 73
Field and List Management
The Field Catalog is like a library of all of the Process Fields created within a particular database. These Fields
are created in the Field Catalog and then are available be used or reused in any of the Workflows created in
the database. One GlobalCapture Field Catalog supports all of your capture processes, per instance of
GlobalCapture.
Similar to the GlobalSearch Field Catalog, the GlobalCapture Field Catalog includes Fields, Table Fields, and
Field Lists. Use Fields to store identifying information about a document, such as vendor names. Use Table
Fields to group multiple Index Fields together and add multiple entries into each Field, effectively creating
a spreadsheet-like table. Field Lists let you quickly choose indexing information from a pre-configured list of
values. (Note that while you can create Table Fields in the Field Catalog, you must have the Line Item Data
Extraction option to extract data from those Table Fields.) One GlobalCapture Field Catalog supports all of
your capture processes, per instance of GlobalCapture.
You can map your Process Fields to GlobalSearch Index Fields by matching the Field name. As it is name
mapped, not data-type or ID-number mapped, it is important that the Process Field data type and the Index
Field data type be the same.
Access the Field Catalog in one of the following ways:
• Click the Manage button on the GlobalCapture home page, and then choose Field Catalog from
the menu.
• In the Workflow Process Field dialog box, click the Workflow Field Catalog button.
GlobalCapture Field Catalog
Create, Edit, and Delete Field Lists
Process Fields can draw their data from a pre-configured pick list of values, greatly reducing the number of
keystrokes needed to validate documents. Create the set of List values, then a Process Field, and then assign
it to a Workflow. The set of List values can be typed into the List Editor or be added via assembly binding.
Refer to the “List Options” section below for details on the List types.

74 Field and List Management GlobalCapture Guide
Create Standard Field Lists
1. To create Standard Field Lists, on the GlobalCapture toolbar, in the vertical Administration menu,
select Field Catalog.
2. On the Field Catalog toolbar, click Lists.
A list of any existing Lists in the database will appear.
Field Catalog Lists
3. To create a new List, click the Add ( ) button found in the bottom right corner of the screen.
4. Enter a name for the new List in the List Name text box.
5. Click the Add Value button and enter a value in the New Item text box.
a. To add more values to the List, click Add Value again and enter a value.
b. To delete a value, click the Delete (minus sign) button to the left of the value.
6. To draw the List data from an assembly bound list, with real time binding to a source, like vendor list
in your accounting application, do the following:
a. Click the Assembly Binding button.
b. Enter the local path in the Assembly Path box.
c. Enter the assembly parameters in the Assembly Parameters box.
d. Click Load Data to test the List.
7. Click Save.
List Editor
Tip: Arrange Values in the List with the End User in Mind. List the values in a particular order (by
frequency of use, for instance) can make the list more useable. However, when using the Type Ahead
feature this is not necessary. Typing a character will return values starting with that character no matter
where they are located in the list.

GlobalCapture Guide Field and List Management 75
Edit Standard Field Lists
1. On the Field Catalog toolbar, click Lists.
2. Click the More Options (three dots) icon in the selected List box and click Edit.
3. Make changes in the List Editor as described in the previous section.
4. Click Save.
Tip: Update List Values Thoughtfully. If you edit a value on a List, any records currently using that value
are not automatically updated and can no longer be found with that value. Also, if you edit a value on
a List and then open a record that has the obsolete value in the Field, the record cannot be saved until
some other value in the List is selected
.
When editing a List value, it is a good idea to first add a new, updated value to the List, then find all of
the documents with the incorrect value and, in the Document Viewer, replace the incorrect value with
the new value. Then return to the Field Catalog and remove the incorrect value from the List.
Delete Standard Field Lists
CAUTION: Deleting a List removes it
permanentl
y. When you delete the List, the document records
which already exist will retain their values. Future document indexing data will not have this List available.
1. On the Field Catalog toolbar, click Lists.
2. Click the More Options button in the selected List box and click Delete.
Create, Edit, and Delete Fields
Create Fields
1. To create Standard Field Lists, on the GlobalCapture toolbar, in the vertical Administration menu,
select Field Catalog.
Field Catalog Fields
2. On the Field Catalog toolbar, click Fields.
A list of any existing Fields in the database will appear.
3. Click the Add ( ) button found in the bottom right corner of the screen.

76 Field and List Management GlobalCapture Guide
Field Editor
4. Enter a name for the new List in the Field Name text box.
5. Select a data type from the Data Type drop-down list. Refer to the “Data Types
” section below for
details.
6. To display the Field with a certain format or layout (for example, a date with a two-digit year), enter
the format type in the Format text box.
The text entered is not freeform; it must adhere to one of the standard Microsoft SQL Server
®
format patterns. Refer to the “Appendix B
” for a list of format patterns.
7. Enter the maximum number of characters in a Character Field into the Length text box, up to 8000
characters.
8. To set a regular expression (RegEx), enter the RegEx text string into the Regular Expression text box.
Refer to Appendix A
for information on regular expressions.
9. To set Field Properties or system values, in the Field Properties group, enable one or more of the
Required, Multi-value, or System Field checkboxes. Refer to the “Field Properties
” section below
for details.
Before creating a Dynamic Pick List, create any Standard Pick Lists needed for the Dynamic
Pick List. Refer to the “Create, Edit, and Delete Field Lists
” section above for details on Field Lists.
There are two level of dependency that you can specify for a Dynamic Pick List. The primary level
is required and contains a list of standard Fields List values. The secondary level is optional and
may have conditional Fields besides regular Field List values. Refer to the “
Dynamic Pick Lists”
section below for more information on Dynamic Pick Lists.
Tip: Plan Fields and Values First. Creating Dynamic Pick Lists goes a lot faster when you plan out all of
the Fields, Lists, and values ahead of time. First, you can check to see if you have noted all of the possible
variables. Second, you can plan your naming conventions.
The names of the Field Lists are only visible to you as an administrator. Names that are descriptive and
which allow for future Lists work best. For example, instead of naming a Field List “Size” and then
discovering that you need several different Lists for different size selections, consider using “Paper Size”
and “Hard Drive Size.”
10. To assign, or create and assign, a Standard Pick List to a Process Field:
a. Click List Options.

GlobalCapture Guide Field and List Management 77
b. In the List Options dialog box, add a List by changing the default of Normal Field to Standard
Pick List.
c. Select a List from the Select a list drop-down list. Refer to the “Create Standard Field Lists
”
section above for details on creating a List.
11. To assign, or create and assign a Dynamic Pick List to a Field:
a. Click List Options.
b. In the List Options dialog box, add a List by changing the default of Normal Field to Dynamic
Pick List.
c. Select a Field with a Standard Pick List from the Select a list drop-down list.
For a single level of dependency, skip step d and proceed to building your List.
d. To select controlling Fields for an optional second-level Dynamic Pick List, enable Secondary
Dependency and select a second Field with a Standard Pick List from the Select a field list.
e. To map the relationship between the List and the Field, click Build List.
f. In the Edit List Mapping dialog box, in the Select filter 1 drop-down list, select a value for the
first row.
g. If creating a two-level Dynamic Pick List, from the Select filter 2 drop-down list, select a value
from the List associated with the dependent Field.
This column will not appear in the Edit List Mapping dialog box for a single-level Dynamic
Pick List.
h. Select a Field List in the Select a List column for each row.
i. Repeat steps f through h for each keyword associated with the dependent Field. Map all possible
combination that you wish to offer so that the Dynamic List Field can be displayed correctly.
You will see an error message in the Document Viewer for an unmapped combination.
j. Click Save to return to the List Options dialog box.
k. In the List Type group, select Drop Down or Type Ahead. Refer to the “List Options
” section
below for details on Drop-Down and Type-Ahead Lists.
l. Click OK and return to the Edit dialog box
12. Click Save.
List Options

78 Field and List Management GlobalCapture Guide
Edit Fields
1. To edit a Field, on the GlobalCapture toolbar, in the vertical Administration menu, select Field
Catalog.
2. Click the More Options icon in the selected Field box and click Edit.
3. Make changes in the List Editor.
4. Click Save.
Delete Fields
CAUTION: Deleting a Field from the Field Catalog removes it
permanentl
y and will result in a loss of any
data in that Field.
1. To delete a Field, on the GlobalCapture toolbar, in the vertical Administration menu, select Field
Catalog.
2. Click the More Options button in the selected Field box and click Delete.
3. Because this will
permanently
delete
the Field, enter the displayed text in the Confirm Action
prompt.
Data Types
Character
The Character data type includes letters, numbers, and characters. Use this data type for alphanumeric data
entry, such as names or for numbers which are a “string of digits,” such as a PO number or Social Security
Number. You can change
from
any other data type
to
Character. You cannot change
from
Character
to
another data type.
Keep in mind that changing the data type will likely affect how the data sorts. For example, numbers that
use the Character data type sort differently than with a numeric sort. 1, 2, 10, 11, 12, 2, 20, 21, 22 will sort
into 1, 10, 11, 12, 2, 20, 21. For a Character Field, use the pound sign ( # ) to restrict the entry to digits,
although it does not control the number of digits entered.
The length of a Character Field defaults to 50 characters. You can increase the maximum length up to 8000
characters.
CAUTION: You can possibly edit a Character Field to make it shorter, but if you make the Field shorter
than any current data in the Field you will risk losing data.
GlobalSearch allows you to enter in a length shorter than any current data and then when you open up
existing documents with values longer than the new length it will not let you save the document with any
new data until you have altered the field and made the data the minimum number of characters specified
in the Index Field Length.

GlobalCapture Guide Field and List Management 79
Numeric
Numeric data types can only be integers (whole numbers, no fractions). If a decimal is entered into a Field
with the Numeric data type, it will be rounded up or rounded down, depending upon the value.
The appearance of Numeric Fields can be controlled with the Format box. (Refer to “Appendix B
” for details.)
The Numeric data type supports values from -2^31 (-2,147,483,648) to _2^31-1 (2,147,483,647).
Date
Use the Date data type for date, time, or both date and time Fields. You can enter a date in many different
formats, such as words (month and day spelled out), abbreviations (month and day abbreviated), one-digit
or two-digit months and dates, two- or four-digit years, slashers or dashes, etc. The appearance of Date
Fields can be controlled with Formats. (Refer to “Appendix B
” for details.) Date has a precision capacity of
.00333 seconds (precision set to 3).
Decimal
The Decimal data type can only include integers or decimals. Use for this data type for Fields denoting
money. This Data Type has a precision of two. The appearance of Decimal Fields can be controlled with
Formats. (Refer to “Appendix B
” for details.)
You can enter as many decimal places as you like and they are stored. However, a Format setting will control
how many decimal places will display. The actual value will display rounded up or down if the Format
supports fewer decimal places than the data that was entered. The Decimal data type supports values from -
1.79E+308 to -2.23E-308, 0 and 2.23E-308 to 1.79E+308.
Field Properties
Required Fields
With Required enabled, the record cannot be saved if there is no data in the Field, with the exception of
when you drag a document from one Archive to another or from an Inbox in the desktop client to
an Archive.
Tip: Naming Required Fields. Required Fields are used for Fields containing critical data that is most
often searched on for sorting or most often used in decision making, or for data that is used in Workflow.
If you discover that a Field would be Required some of the time, but other times not (depending on the
Archive it’s used in), consider having two fields, such as “Status” and “StatusR,” where the “R” indicating
the Status Field that has the Required Property.
Tip: Workflow Considerations. If you have a Workflow moving documents into an Archive that has
a Required Field, that Field
must
be populated by a Workflow action. Otherwise, the documents will fail
to complete the Workflow and will have to be manually completed and processed via Batch Manager.

80 Field and List Management GlobalCapture Guide
Multi-Value Fields
A Multi-Value Field is one where a list of data values can be entered into the Field, on a separate line. Use
this data type any time you require multiple pieces of similar data to apply to a single document. While you
can use this with any data type, it cannot be used in conjunction with a Dynamic List or Table Field.
System Fields
System Fields are Fields whose value is entered automatically for the user. The System Fields settings are
available or grayed out, depending on the data type selected. For example, a Field called “Last Modified By”
configured with the Last Modified System Field would automatically display the username of the last
person to modify the document in the Validation Station. Choices include:
• Indexed By – Captures the current user name. This is available when the Character data type is
selected, this records the username or Service Logon identity that created the record.
• Last Modified – Captures the date or the user when the record was last saved. When the Character
data type is selected, this records the username or Service Logon identity for last saved changes to
the document. When the Date/Time data type is selected, this records the date and/or time when
the document was last changed and saved.
• Date Entered – Records the date and/or time when the record was created in the database. It is
available when the Date/Time data type is selected.
• Page Count – Records the number of pages in the document when the record was last saved.
Available when the Numeric data type is selected.
• File Type – Available when the Character data type is selected, this records the extension of the
source file stored in the Windows folder.
• Read Only – The default setting, available for any data type, this prevents a user from entering data
into the Field, or modifying existing data in the Field. The Field is therefore reserved for use by
Workflows.
Example: Using a System Field in a Workflow. Create a System Field which automatically captures who
indexed the document. Then create a Search which that will return only documents indexed by the
current user.
List Options
Use Field Lists, also known as “pick lists” to help users by grouping together multiple indexing values.
There are three types; Normal, Standard, and Dynamic. Normal Field is a Process Field without a List and is
the default setting.
Standard Pick Lists
A Standard Pick List is a list of choices for the Field where users may select a value. It can be set as either
a drop-down type of list or a type-ahead type of list.
A Drop Down List provides a set list of Index Field values to choose from and is indicated by a drop-down
button to the right if the Index Field. Access the drop-down list by clicking the drop-down button. A Drop-

GlobalCapture Guide Field and List Management 81
Down List confines the value a user can enter to one chosen from the List. This keeps Index Field data values
consistent.
A Type Ahead List provides a suggested list of values as data is typed into a particular Field. Place your
mouse cursor in the Index Field, click the mouse button and begin typing the first letter or so of the desired
indexing value. A type-ahead pick list field is particularly useful for data values which are frequently
misspelled, long, complex, or otherwise time-consuming to type.
Example: Drop Down Pick List Search. Drop-down pick lists are usually used when there is a finite
number of values to be used for a key field, such as document type or department name. Type Ahead is
recommended when a large number of values for a particular key field are needed, such as customer
name.
Example: Type Ahead Pick List Search. If you were to type an “A,”
Application would appear in the box. If you typed an “N” the first value on
the list would appear and in this case the value would be “NDA.” If you
continue to type and added an “E” to make it “NE,” NECL would appear.
(This is behavior similar to a web search engine).
Dynamic Pick Lists
A Dynamic Pick List is a conditional pick list, which allow you to filter drop-down fields in a pick list based on
information selected in a related field. (The pick lists used to build Dynamic Pick Lists must be drop-down
lists and the Dynamic Pick List cannot be a Multi-Value List.) For example, if you shop for a car on a website
it does not show you all models, it shows only models based on the make of car you select. You can create
the related List as you create the Dynamic Pick List, or create it first and then create the Dynamic Pick List.
Generally, it is generally better to create it first.
There are two levels of dependency that can be specified for a Dynamic Pick List. The primary level is
required and contains a list of only regular Field List values. The secondary is optional and may have
conditional Fields besides regular Field List values. The Lists and their values used can be different (like car
models from different dealers) or can be reused (like the same colors for this dealer’s cars and also that
dealer’s cars). You can use Dynamic Pick Lists in Process Fields and in Table Fields.
Table Fields
Included with the GlobalSearch Corporate Edition, and optional in the Professional Edition, the Tabular Data
feature supports multi-column, multi-row, spreadsheet-style indexing as a separate field control in the
Validation Station. Each row is an individual line of data where you can enter information manually, through
dragging or import, or through KeyFree Indexing. GlobalSearch supports Tabular Data for both line-item
coding and editing. Dynamic Pick Lists can be included in the Table Field data, which is very useful for
accounts payable invoice processing. Table Field data can only be entered by opening the Validation Station
and manually entering the data, using KeyFree Indexing, or by a combination of the two methods.

82 Field and List Management GlobalCapture Guide
Create Table Fields
Create the component Index Fields first, then create the Table Field by selecting from the list of available
Index Fields. Fields can be added to or removed from Table Fields as needed.
Note that while you can create Table Fields in the Field Catalog, you must have the Line Item Data Extraction
option to extract data to those Table Fields.
Field Catalog Table Fields
1. To bind individual Fields to create the table, in the vertical Administration menu, select Field
Catalog.
2. On the Field Catalog toolbar, click Table Fields.
3. Click the Add ( ) button to add a new Table Field.
Add Fields to the Table
4. Enter a name for the Table Field in the Table Field Name box.
5. If not already in the Field Catalog, create the individual Fields to be used in the table. Refer to the
“Create Fields
” section above for details.
6. Click the Add button to the left of the Index Fields in the Available Fields list to add them to the
Included Fields list.
7. Repeat step 6 to add additional Fields.
8. Click Save and the Table Field will be added to the Field Catalog.
Edit Table Fields
1. To edit a Table Field, in the vertical Administration menu, select Field Catalog.
2. On the Field Catalog toolbar, click Table Fields.
3. Click the More Options icon in the selected Table Field box and click Edit.
4. Make changes in the
<Table Field>
Table Field editor.
5. Click Save.

GlobalCapture Guide Field and List Management 83
Delete Table Fields
CAUTION: Deleting a Table Field from the Field Catalog removes it
permanently
and will result in a loss
of any data in that Field.
1. To delete a Table Field or Fields, in the vertical Administration menu, select Field Catalog
2. Click the More Options button in the selected Table Field box and click Delete.
3. Because this will
permanently
delete
the Table Field, enter the displayed text in the Confirm Action
prompt.

GlobalCapture Guide Template Management 85
Template Management
Using GlobalCapture, you can automatically extract information from images for indexing. Areas on a form,
such as invoices or packing lists, can be designated as Zones in a data extraction Template. The Template
Designer is the GlobalCapture interface is where you import sample documents on which to base
a Template, and then assign one or more Zones to that Template. Use the Template Designer to build
Templates for automatic data extraction.
There are three levels of OCR licensing available:
• Structured OCR – Includes the Marker and Positional Zones and are core features in
GlobalCapture.
• Unstructured OCR – For when you need more powerful capture, built on your Structured OCR with
advanced capture.
• Line Item Data Extraction – For repeated data extraction, built on your Unstructured OCR license.
Similar to the Document Viewer in GlobalSearch from Square 9, the Template Designer has a Thumbnails
Pane for navigating and editing document pages. It includes document viewing and navigation features
familiar in the GlobalSearch Document Viewer, such as Pan, Zoom, Rotate, and Next. You can toggle full
screen mode on and off. You can also resize, can swipe left/right to minimize/restore on mobile devices.
Open Template Designer
1. To set the Template Designer properties, on the GlobalCapture home page, click Design ( ).
2. In the GlobalCapture Designer menu, click Templates.
The Template Designer will open on another tab in the browser, and the Load Template dialog
box will appear. From here you can create a Template or select one to edit or delete.
Create, Open, or Delete Templates
3. Click on a Template to open it in the Designer.

86 Template Management GlobalCapture Guide
Template Designer
The Template Designer opens to display the first page of the capture document. If there are more than one
page in the document, there are several ways to select and view additional pages, including scrolling.
Viewing a document image can also be adjusted in a number of ways.
You can resize the Template Designer window by dragging the edges of a Designer window using the usual
Windows methods. To resize the space allotted for the Zones List and Template Tools Panes, place your
mouse pointer on the pane border and when the mouse pointer becomes a double-headed arrow, drag the
double-headed arrow to move the split line.
The Template Designer has specialized areas and menus configuring your Templates. These areas include:
• Template Designer Toolbar – Use to access Template viewing, editing, and navigation.
• Template Design Canvas – Use to show in image of the sample document and to configure Zones.
• Zones List Pane – Use to show the Zones for the Template.
• Template Tools Pane – Use to configure Zones.
• Properties Panel – Use to display the properties of the selected Zone.
Template Designer Controls
Template Control and Navigation
When the Template Designer is open, you can select and control Templates from the GlobalCapture toolbar
using the following:
• Notification – Use to list a history of Template Designer activities.
• Save – Saves any changes to the document.
• Load – Use to open the Load Template dialog box.
o Select a Template from the Load Template list.
o To close the menu, click Cancel or the Close ( X ) icon.
• Samples – Use to open new sample documents in the PDF or TIF file format.
o Select a sample from the Samples list.
o To close the menu, click Close or the Close ( X ) icon.
o To delete a sample, select it from the Samples list and click the Delete ( ) icon.
• More Options – Displays the submenu to access Save As and Discard Changes commands.
Template
Designer
Toolbar
Thumbnails
Pane
Template
Design Canvas
GlobalCapture
Toolbar
Zones List
Pane
Template Tools
Pane
Properties
Panel

GlobalCapture Guide Template Management 87
Document Control and Navigation
Viewing a document in the Design Canvas can be adjusted in a number of ways. Select one or more options
from the Template Designer toolbar:
• Previous Page – Use to move back a page.
• Next Page – Use to move from one page to the next.
• Zoom In – Use to resize the document image.
• Zoom Out – Use to resize the document image.
• Zoom – Use to Fit to width, or Fit to page.
• Document Position – Used to change the position of the document being viewed, select Pan and
drag to reposition the document.
• Fullscreen – Use to enlarge the Designer to the full width of your display screen. Click the icon again
to toggle back to normal size.
View Thumbnails
Images of the sample document pages are displayed in the Thumbnails Pane, located on the left-hand side
of the Template Designer interface. Simply click on a Thumbnail to select a page. This is particularly useful
for navigation if there are more than one page to the document. Thumbnails can be used for page
navigation.
Zone Control and Navigation
Once created, Zones can be measured and tested on the Design Canvas and organized and sorted in the
Zones List Pane. See the “Create, Edit, and Delete Zones,” “Create, Edit, and Delete Zone Groups
” sections
below for more information on Zones and Zone Groups.
Configure Zones
Select tools for configuring Zones from the Template Designer toolbar:
• Measure – Click the Measure ( ) icon, then drag your mouse pointer on the Design Canvas from
one point to another to measure the distance. The Measurement dialog box will appear to display
the line’s
X
and
Y
coordinates.
• Test OCR – Click the Test OCR ( ) icon to run the OCR engine to test the sample documents loaded
for the Template.
Organize Zones and Zone Groups
Zones and Zone Groups appear in the Zones List Pane in the order in which they were created. Zones can be
reordered and gathered into Groups and Zone Groups can be nested in a folder hierarchy.
Organize Zones
• To sort Zones in the Zone List Pane, on the Template Designer Toolbar, click the Sort ( ) icon and
choose one of the following:

88 Template Management GlobalCapture Guide
• To sort Zones alphabetically. in the drop-down menu, click A->Z).
• To sort Zones by type, and in the drop-down menu, click Type.
If Zones are in Zone Groups, they will reorder within their Group.
Types are listed in the order in which they appear in the Zone Type drop-down list.
• To organize Zones in Zone Groups:
• To add them to a Group, drag them into the Group folder.
• To remove them to a Group, drag them out from the Group.
Hide and Show Zones
When you add several Zones to a Template, the Design Canvas can become cluttered with Zones, making it
more difficult to see the ones you are currently creating or editing. You can hide and show Zones on your
sample documents to make easier to view your design without affect Zone settings or functionality.
• To hide or show a Zone:
a. To hide a Zone in the Design Canvas, click the Hide/Show ( ) icon next to a Zone.
b. To show a Zone, click the icon again.
Organize Zone Groups
• Zones can be organized into Zone Groups in the Zone List Pane in the following manner:
a. To nest a Group as a child Group of another Zone Group, select the Group folder icon and drag it
into the parent Group folder icon.
You can create multiple layers of nested Groups.
b. To un-nest the child Group, select its Group folder icon and drag it out of the parent Group.
Hide and Show Zone Groups
• To hide or show the Zones and Sub-Groups in a Zone Group:
• To expand a parent Group folder and show the Zones and Groups within, click on its folder icon.
The icon is empty when the folder is expanded and filled when it is collapsed.
• To collapse a parent Group folder and hide the Zones and Groups, click on the icon again.
Create Templates
Templates can be created from the Template Designer Load Templates dialog box or from the Validation
Station Rapid Adapt tool. Refer to the “Rapid Adapt Forms Learning” section in the “View Documents
”
chapter for details on the simple, user-friendly Template creation method.
1. To create a new Template:
a. In the toolbar, click the Load Template button.
b. In the Load Template dialog box, click New Template.
2. In the Enter a name for the new template dialog box, enter a name in the New Template Name
text box.
3. Click Create.
The Load Template dialog box will return, with the new Template in the list.

GlobalCapture Guide Template Management 89
You can rapidly create new Templates for your Workflows and then go back to them later to load
sample documents and define Zones.
Name New Templates
Create Copies of Templates
1. To create a new copy of an existing Template:
a. Click the Options (three dots) icon in the Designer menu and in the Test Template dialog box,
click Save As.
b. In the Enter a name for the new template dialog box, enter a name the New Template Name
text box.
c. Click Create.
Edit Templates
Open a Template in the Template Designer to either complete a new Template or to modify one.
Each Template should have a dedicated folder for sample documents. This is where you store a set of
documents used to create or modify the Template.
Tip: Test Templates Against Different Images. For best results, work with a large sampling of
documents. This allows the Template to be tested against a variety of factors that may impact Zone
accuracy on some documents and not others.
1. To edit a Template, in the Load Template dialog box, click on the selected Template.
The Template Design canvas displays.
If it is a new Template, the No samples loaded message will appear and the Template Design
Canvas will be blank, awaiting your document samples.
2. To load sample documents into the Template:
a. In the Designer menu, click Samples.
b. In the Samples dialog box, click Upload.
c. Browse in a local or network directory to the sample PDF or TIF file to be imported, select it, and
click Open.
Multiple samples can be used with one Template, but they must be loaded one at a time.
d. Click Open.
As GlobalCapture processes the OCR for each page of the document, the Uploading
message may appear for a moment, followed by the return of the Samples dialog box, listing
the uploaded files.
3. To add additional sample documents, repeat steps b through d above.

90 Template Management GlobalCapture Guide
4. To delete a sample file, in the Samples dialog box, click the Delete ( ) icon.
5. To delete changes to the Template since the last time it was saved, click the Options (three dots)
icon in the Designer menu and in the Test Template dialog box, and then click Discard Changes.
6. Click Close to save and close the Samples dialog box.
7. In the Designer menu, click Save to save the Template.
New sample documents will not be available in the Template Designer until the Template has
been saved.
The first sample file will appear in the Document Template Design Canvas.
Document Samples
8. Create your Zone. Refer to the “Create, Edit, and Delete Zones“ section below for details on Zones.
9. To save all of your changes to the Template, in the Designer menu, click Save.
Once Zones are completed, the Template can be saved for use by the Classify Node within
GlobalCapture Workflows.
Tip: Plan Your Documents for OCR. Just as the Template Zones should be optimized for OCR, it helps if
the documents themselves have been optimized for the best OCR results.
• Use clear, simple fonts for your documents and avoid smaller font sizes.
• Make sure that the characters and words have proper spacing (do not use “compressed” fonts).
• Allow plenty of space between text and borders or line separators on the page.
• Include a company name in plain text, not just in the company logo.
• For more reliable automated data extraction, use barcodes rather than text.
• Remove color whenever possible, particularly behind the text.
Copy Templates
1. Open the Template to be copied in the Template Designer.
2. Click the Options icon.
3. Select Save As.
4. In the Enter a name for the new Template dialog box, enter a name for the new Template.
5. Click Create to return to the Template Designer with the new Template ready for editing.
Delete Templates
1. To delete a Template, in the Load Template dialog box, click the Delete ( ) icon to the right of the
selected Template.
2. To return to the Template Designer, click the Close ( X ) icon.

GlobalCapture Guide Template Management 91
Create, Edit, and Delete Zones
Templates use areas, or “Zones” to extract data from the document to automate the indexing process.
There are a variety of Zone types, from a structured, simple area drawn with your mouse to more complex,
unstructured multi-Zone parent/child configurations, using regular expressions, locations, or an external
lookup table. Each Template can have more than one Zone and Zones can be applied to one or more pages.
Choose whether to map a Zone to a Process Field or not. If you do not need to track the data from a Zone
(such as a found Marker for a second Zone), then do not set that Zone to extract data to a Field. If you do
choose to extract data to a Field (such as vendor name or invoice number), then create Process Fields in the
Field Catalog. Then, in the Workflow Designer, assign them to a Workflow and map Zones.
You can use a single Zone in a Template, or multiple Zones. Zones can be bound to parent Zones, for as
many nested levels as you need. For example, you could set a “parent” Zone to find the text “PO Number”
and a “child” Zone to look to the right of that text and extract the number in that location.
The position of Zone coordinates or the start of a search string match begins in the top-left corner of the
document image or parent Zone and move to the bottom-right corner of the page or Zone.
Tip: Name Zones for Future Use. When you name each Zone you should clearly indicate what it is for,
especially if using several Zones in the Template. Indicate the Type and possibly the parent/child
relationship. For example, you could begin all of you Marker Zones with “M_” to make it easy to select
a Marker Zone when you are building a parent/child relationship with a Zone.
Create Zones
1. To create a Zone, in the Template Tools Pane, click the Add (plus sign) icon and in the drop-down
menu, click the Zone ( ) icon.
2. Configure the settings for the new Zone.
The Zone parameters are contextual, depending upon which Zone type you have selected.
After applying Zone Properties, a validation message displays in red under the Zone in the Zone
Pane if a configuration error exists.
For details on configuring the different types of Zones, refer to the following sections.
3. Click the Apply (checkmark) icon.
Edit Zones
1. To edit a Zone, in the Template Tools Pane, in the Zone List panel, select the Zone.
As you select a Zone, its properties will display in the Template Tools Pane.
2. Reconfigure the settings for the Zone.
3. Click the Apply (checkmark) icon.
Delete Zones
1. To delete a Zone, in the Template Tools Pane, in the Zone List panel, select the Zone.

92 Template Management GlobalCapture Guide
2. In the Properties panel for that Zone, click the Delete ( ) icon.
Configure Structured OCR Zones
Structured Data Extraction Zones include the Marker Zone and the Positional Zone.
Configure Marker Zones
GlobalCapture can register the location of a Zone on a Template according to the position of the Marker
Zone on the page. A Template can have multiple Marker Zones. These are indicated by a salmon-colored
box on the document image around the extracted search string. They are also listed in the Zones list to the
right of the document image.
The marker is a match of a string of characters in order to find specific text on a page. It is not case sensitive
(unless you use a RegEx to set the search string.) You can specify part of a word, one word, or more than
word. Use part of a word for “contains” matching. For example, specify “appl” to return both “application”
and “applied.”
Use Marker Zones to detect any shifts in the image position and automatically registers the Template to the
proper location. You can also use Marker Zones to classify a document’s layout. Using an exact string match
of characters, this introduces a high level of accuracy, allowing tighter Zones to be drawn for text-heavy
documents.
Tip: Choose and Test Marker Text Carefully. When selecting text for your Marker, choose text which is
most likely to return accurate OCR results. For example, while the Marker text is not case sensitive, the
text you select should be clear and without attributes. Try to avoid characters that can be suspect during
OCR, such as l’s, ones, o’s, zeros, and so on.
Tip: Required Markers for Classify Node. If you are using Marker Zones in Templates which will be
listed in a Classify Node, be sure that the Marker Zones are “Required.” If all required markers are not
found on a document, then that Template will not be a match for classifying that document.
1. In the Properties panel, enter a name for the new Zone in the Name text box.
2. From the Type drop-down list, select Marker.
The default Zone is the Marker Zone.
For details on configuring the Properties of a Zone, refer to the “Zone Properties
” section below.
3. Enter a search string in the Search String text box.
4. Optionally, additional Zone Properties can be configured.
5. To designate an area of the page to search for a match, click the Locator ( ) icon, and then use
your mouse to drag a box over the area to be searched.
6. Click the Apply (checkmark) icon.
The Zone will be added to the Zone List and the matching text will be highlighted.

GlobalCapture Guide Template Management 93
Marker Zone
Configure Positional Zones
The Positional Zone is used to describe a rectangular extraction area (the Search Region) on a document
based on coordinates, starting from the top-left corner of the document or the parent Zone, if there is one.
Position is based in pixels. In order to have consistent results from sample document to sample document,
they must be captured with consistent image resolutions.
A Positional Zone can be set as a child of a Marker Zone, where the position was always relative to specific
data. For example, find the Marker “Date” then look in the Positional Zone for the data. Create the parent
first, then the child. Assign the Zone to the parent by selecting it from the Parent drop-down list.
The Zone area which you have selected is indicated by a light blue box on the document image and within
that box another box indicates the data within the area which is extracted.
1. In the Properties panel, enter a name for the new Zone in the Name text box.
2. From the Type drop-down list, select Positional.
3. Click the Locator ( ) icon.
Your mouse pointer will change to a Move cursor.
4. Drag your mouse cursor around the selected data extraction area on the sample document to create
a Search Region for the Zone.
The area should encompass the entire data available on all of the sample documents.
Draw a Zone large enough to accommodate variations in data length on different documents
(for example, a very long company name) or for shifting during scanning.
The exact position of the Zone is indicated in the Position group in the Properties panel, which
are the coordinates set by pixels from the top-left corner of the document image.
5. To edit the data extraction area, in the Position group, modify the number of pixels the Left, Top,
Right, and/or Bottom text boxes.
6. To position a Zone relative to a Marker, rather than a specific set of coordinates on the page, from
the Parent drop-down list, select a Marker Zone.
7. Optionally, additional Zone Properties can be configured.
8. Click the Apply (checkmark) icon.

94 Template Management GlobalCapture Guide
Configure Unstructured OCR Zones
Use the Unstructured Data Extraction option for advanced capture technology, including directional or
pattern-matching data extraction. Unstructured Data Extraction Zones include Pattern Match, Directional,
and Data Lookup.
Configure Pattern Match Zones
A Pattern Match Zone is used to extract data which exactly matches your search string. This can include
.NET-based regular expression (RegEx) pattern matching. Examples of Pattern Match Zones could be Social
Security Numbers, Telephone Numbers or Credit Card Numbers, to name just a few. Please refer to
“Appendix A
” for information on regular expressions and how to use them with Pattern Match Zones.
The Zone area which you have selected is indicated by a green box on the document image.
1. Enter a name for the new Zone in the Name text box.
2. From the Type drop-down list, select Pattern Match.
3. Enter a RegEx in the Search String text box.
An alternate for entering a RegEx is to enter an exact pattern to be matched, such as the word
“Invoice.”
You can make a Pattern Match Zone the parent of a Positional or Directional Zone.
4. To designate an area of the page to search for a match, click the Locator ( ) icon, and then use
your mouse to drag a Search Region over the area to be searched.
5. Optionally, additional Zone Properties can be configured.
6. Click the Apply (checkmark) icon.
Configure Directional Zones
A Directional Zone allows you to first locate specific data using a parent Zone, and from there look in
a specific place relative to the parent Zone’s location. In the Directional Zone settings, you can specify one
or more directions from the parent to the Search Region. You can configure the Region to continue in that
direction to the edge of the page or restrict its minimum and maximum distances from the parent Zone for
pixel-precise control.
You can use repeated Directional Zones for extracting Table Field and Multi-Value Field data, which is
useful for line item entries on an invoice, for example.
1. In the Properties panel, enter a name for the new Zone in the Name text box.
2. From the Type drop-down list, select Directional.
3. To assign the required parent Zone, select it from the Parent drop-down list.
4. To choose the portal which determines which Fields to extract the data to, in the Field group, choose
one of the following:
a. Choose a portal from the Portal list.
b. If the selected portal is a standalone GlobalCapture portal, from the Field list, choose the Process
Field into which the extracted data will be placed.

GlobalCapture Guide Template Management 95
c. If the selected portal is a Square 9 portal (if GlobalSearch is installed), choose a database from
the Database drop-down list and then from the Field drop-down list, choose an Index Field in
that database into which the extracted data will be places.
5. To set the direction to look for data in relation to the parent Zone, in the Direction group, choose
one or more directions from the selection of Left, Up, Right, Down.
6. To set corresponding limits to the Zone, in the Positions group, enter the number of pixels within
which data must be found in the Left, Top, Right, or Bottom text boxes.
By default, the Directional Zone is set to the confines of the parent Zone that was found.
For example, if your parent Zone is 40 pixels wide and the Directional Zone is configured to
move down from its parent, by default the Directional Zone will be 40 pixels wide. This can be
adjusted using the Position settings to make the Directional Zone wider than the parent Zone.
Note that if the Zone is based on being, for example, to the left of another Zone and that Zone
contains no data to extract, the next Zone to the left of it will
also
not extract any data. There
might be data there, but you have broken the link to that next Zone.
7. Optionally, additional Zone Properties can be configured.
8. Click the Apply (checkmark) icon.
Configure Data Lookup Zones
A Data Lookup Zone is extremely useful if you need to match you capture data to data in an existing
source. For example, you can check to see if a purchase order found in your accounting system can be
found on the document being classified.
A Data Lookup Zone is configured with a connection string to an external data source, as well as the table
in that source, and the column where your data resides. GlobalCapture will go through every row in the
indicated column, to match a value found in the designated area of the document, and extract it from the
table.
1. In the Properties panel, enter a name for the new Zone in the Name text box.
2. From the Type drop-down list, select Data Lookup.
3. To choose the portal which determines which Fields to extract the data to, in the Field group, choose
a portal from the Portal list and then choose one of the following:
• If the selected portal is a standalone GlobalCapture portal, from the Field list, choose Process
Field into which the extracted data will be placed.
• If the selected portal is a Square 9 portal (if GlobalSearch is installed), choose a database from
the Database drop-down list and then from the Field drop-down list, choose an Index Field in
that database into which the extracted data will be places.
4. To define the connection string to the external data source, in the Data Lookup group, enter it into
the Connection String text box.
For information on creating connection strings, you can refer to connectionstrings.com.
5. To indicate which table in the data source in which to do your lookup, in the Data Lookup group,
enter the table in the Table Name text box.
6. To indicate which column in specified table, in the Data Lookup group, enter the column name in
the Column Name text box.
7. To designate an area of the page to search for a match, click the Locator ( ) icon, and then use
your mouse to drag a Search Region over the area to be searched.

96 Template Management GlobalCapture Guide
8. Optionally, additional Zone Properties can be configured.
9. Click the Apply (checkmark) icon.
Create Line Item Data Extraction Data
To extract data, use the optional Line Item Data Extraction module, you must have both the Structured Data
Extraction Zones and the Unstructured Data Extraction Zones available.
1. Create a Directional Zone (see the “Configure Directional Zones
” section above for details.
2. In the Repetitions group, enable the Repeating checkbox.
A Repeating Zone cannot be the child of another Repeating Zone.
You can have a Repeating Zone stop before it reaches the footer on the page, for example.
3. Optionally, additional Zone Properties can be configured.
4. Click the Apply (checkmark) icon.
Zone Properties Panel
Zones can be saved, deleted, or assigned a variety of properties from the Properties panel.
Zone Actions Icons
At the top of the Properties panel are the Zone actions icons:
• Properties – To jump to a particular property for the selected Zone, click the Properties (gear) icon
and select from the list.
• Location – Click the Locator ( ) icon to change your mouse pointer into the Precision Select
(crosshairs) pointer. With your Precision Select pointer, drag across a part of the document to select
the area for a Zone. To reposition a Zone, once again click the Locator icon and drag you mouse
pointer to create a Zone area.
Use the Measure ( ) tool for precise positioning.
• Save Zone – Click the Apply ( ) icon to save the Zone and its properties settings.
• Delete Zone – Click the Delete ( ) icon to delete the Zone.
Zone Properties
Zone properties vary depending upon the type of Zone selected. Choices include:
• Name – Enter a name for the Zone. This property is required for all Zones and should be used to
describe the Zone in a meaningful way. For example, a Marker Zone for an Invoice Number
Zone might be named “Invoice Number Marker.”
• Type – Select the type of Zone. Type is required for all Zones. The choices include: Positional,
Marker, Pattern Match, Directional, and Data Lookup. The default Zone type is always Marker.
• Search String – Enter a search string which appears in the sample document in the Search
String text box for the data to be searched for when using a Marker or Pattern Match Zone.
Enter a word or phrase for the Marker Zone and a regular expression for the Pattern Match
Zone. Note that a regular expression may just be text, but markers and regular expressions work
differently. Markers are case insensitive, and only a single string may be entered. The Search
String for Pattern Match Zones are by default case sensitive, represent a true regular expression

GlobalCapture Guide Template Management 97
pattern, and multiple lines of expressions may be entered for the Zone. Expressions are evaluated
in the order they are entered, and processing stops at the first found match of a pattern in the
Zone.
• Parent – To establish a hierarchy of two or more Zones, select a parent Zone from the list of
existing Zones. None is also a selection choice. A parent can be assigned to any type of Zone,
but must be assigned to a Directional Zone. A Repeating Zone cannot be the parent of another
Repeating Zone.
• Field – To choose a Field to map a Zone (which may be configured for any Zone type), in the
Field group:
o Portal – Specify the database from the list of GlobalCapture and GlobalSearch (if available)
portals which will be the destination for data extracted from the Zone.
o Field – Specify the Field in the database from the list of those available from the selected
portal. This can be mapped to the destination for data extracted from the Zone.
o Table Field – Specify the Table Field in the database from the list of those available for the
portal selected which will be the destination for data extracted from the Zone. Assign a Table
Field to the parent/header Zone of a table. You cannot assign a Table Field and a Field
simultaneously, so your Header Zone should not be used for extracting data that feeds
a Field.
Note that with the Line Item OCR Extraction license, you can extract Table Field data from
a single page (such as invoice line items) or from across multiple pages (such as document
headers and footers). The repeating Zone can be set per document, per page, or per
document region. Use this setting in Directional Zones.
• Data Lookup – To specify the data source for Data Lookup Zones, in the Data Lookup group:
o Connection String – Enter the connection string for the SQL Server data source in the text
box.
o Table Name – Enter the name of the table in the data source in the text box.
o Column Name – Enter the name of the column in the table in the text box.
• General – Choose settings in the General group:
o Required – Enable the checkbox to require that data be extracted from the Zone in order for
the document to be assigned the active Template. This may be assigned to any Zone type.
However, a Required Field must be selected on your Workflow Classify Node for a match to
be attempted.
o Separator – Enable the checkbox to make the Zone a page separator. Separators dictate
page breaks, whether at the beginning of a document type with headers or at the end with
footers. GlobalCapture will burst documents based on these defined Zones. When a Zone is
marked as a Separator, it will trigger a separation of the document when this Zone is found.
On Change – Separator On Change triggers a document separation and the time zone
value changes. For example, extracting an Invoice Number on page one and not finding
any invoice number on page two would be considered a change.
o Confidence – Set the threshold of acceptability for confidence in the data extraction accuracy
estimated by the OCR engine. To increase the threshold confidence, move the slider to the
right and to decrease it, move the slider to the left. Note that data will only extract if the
average confidence for the words within the extracted data are above the set confidence
threshold. If the remaining text does not meet all of the Zone’s other requirements, then the
search for the Zone will continue on subsequent specified pages. Note that setting Zone
confidence too high is a common cause of batch errors.

98 Template Management GlobalCapture Guide
o Priority –In some situations two or more Zones could extract data for the same Field.
To resolve any extraction conflicts, the data extracted from the Zone which has the higher
Priority setting value will be retained. If the Zones have the same Priority setting, then the
data extracted with the higher Confidence setting will be retained. This can be optionally
configured for any Zone type. Enter a number in the Priority text box or use the scrollbar
arrows to adjust the number. Priority is assigned by numerical value; whichever number is
highest is of highest priority.
o Header – Enable the checkbox to assign the Zone as a header for a Repeating or Separator
Zone. This can be assigned to go across multiple pages. Use headers to indicate the start of
a document, thus allowing for separation on the start of a new document. Headers may also
be used to trigger the start of a table of data, and are particularly relevant when attempting
to extract tables of data across multiple pages.
o Footer – Enable the checkbox to assign the Zone as a footer for a Repeating or Separator
Zone. This can be assigned to go across multiple pages. Use a footer to indicate the last page
of a document when separating, or to indicate the stop point for table extraction using
Repeating Zones.
• Position – Enter coordinates in the Position group to specify the region of the document to
search for data. Coordinates are required for a Positional or Directional Zone. If no coordinates
are specified, the entire document image is searched for data. For a child Zones coordinates are
assigned in relationship to the location of assigned parent Zone. The Directional Zone extends
the concept of position by enabling designers to configure what edge of the parent Zone the
coordinates are based off of. While coordinates can be manually set, use the Locator icon on the
Zone’s toolbar to draw coordinates. It’s recommended to set a Zone’s parent before you set its
coordinates when a parent Zone is relevant. You may also use the Measure tool to aid in
manually position Zones.
o Left – To indicate the placement of the child Zone, enter the number of pixels to the left of
the left side of the parent Zone’s Search Region in the text box.
o Top – Enter the number of pixels above the top of the parent Zone search region to place the
child Zone in the text box.
o Right – Enter the number of pixels to the right of the right side of the parent Zone’s s Search
Region in the text box.
o Bottom – Enter the number of pixels below the bottom of the parent Zone Search Region in
the text box.
o Clear Coordinates– Click the button to reset the Position coordinates to zero.
o Overlap – To set the directions outside of the drawn Zone area to look for data to extract,
enable one or more of the Left, Top, Right, Bottom checkboxes. All checkboxes are enabled
by default. All words must at least reside a pixel within the drawn box for the overlap to pick
it up, regardless of the direction.
o Orientation – To set the direction in which data is read for extraction, move the slider. Move
the slider to the right to set the orientation to 90°, 180°, or 270°.
o Pages – Use Pages to specify which page to search for data to extract which meets a Zone’s
requirements. (Note that settings are unavailable for Separator Zones.) In the Page
subgroup, select one of the following:
o First – Select this to search only the first page of the document.
o Last – Select this to search only the last page of the document.
o All – Select this to search all of the pages of the document.

GlobalCapture Guide Template Management 99
o Specific – To extract from specified pages of the document, enter a page number or
numbers in the text box. For more than one page, use a comma to delimit the page
numbers or a hyphen to indicate a range of pages.
• Limits – Use to specify the minimum and maximum elements of data to extract. If the Zone on
the current page contains too few or too many characters, words or lines then subsequent
specified pages will be searched. Enter a number in the text box or use the scrollbar to adjust
the number. In the Limits group, select one of the following:
o Characters – To specify limits by character, in the Characters subgroup, select:
o Min – To specify the minimum number of characters. The Zone must contain at least this
many characters to be valid.
o Max – To specify the maximum number of characters. The Zone will not extract more
than this many characters.
o Words – To specify limits by word, in the Words subgroup, select:
o Min – To specify the minimum number of words. The Zone must contain at least this
many words to be valid.
o Max – To specify the maximum number of words. The Zone will not extract more than
this many words.
o Lines – To specify limits by lines of text, in the Lines subgroup, select:
o Min – To specify the minimum number of lines. The Zone must contain at least this many
lines to be valid.
o Max – To specify the maximum number of lines. The Zone will not extract more than this
many lines.
o Repetitions – To specify limits of the number of Zone repetitions for Repeating Zone types,
in the Repetitions subgroup, select:
o Min – To specify the minimum number of repetitions. The Zone must contain at least this
many repetitions to be valid.
o Max – To specify the maximum number of repetitions. The Zone will not extract more
than this many repetitions.
• From Parent Edge – Used only for and required by a Directional Zone, choose the direction
relative to the parent Zone to locate the child Directional Zone. Enable one of the following:
o Left – To specify that the Zone is located to the left of the parent Zone.
o Top – To specify that the Zone is located above the parent Zone.
o Right – To specify that the Zone is located to the right of the parent Zone.
o Bottom – To specify that the Zone is located below the parent Zone.
• Barcode – To specify Zone for a BCR (Barcode Character Recognition) instead of the default
OCR, in the Barcode group:
o Barcode – To select BCR, enable the checkbox.
o Enhance – To enhance the barcode image temporarily to improve extraction results, enable
the checkbox.
o Orientation – To set the direction in which the barcode will be read, enable one of the
following checkboxes:
East – Read the barcode from left to right.
South – Read the barcode from top to bottom.
North – Read the barcode from bottom to top.
West – Read the barcode from right to left.
o Symbology – In the Symbology group, select one or more barcode symbologies.

100 Template Management GlobalCapture Guide
o Scan Interval – To set the scanning intervals, enter a number in the text box or use the
scrollbar arrows to adjust the number. A greater interval value means faster performance, but
a lower recognition confidence level, and vice versa.
Create, Edit, and Delete Zone Groups
You can organize your Zones into Zone Groups, in a folder hierarchy. This is particularly useful when you
have lots of Zones in your Template.
Create Zone Groups
1. To create a Zone Group, in the Template Tools Pane, click the Add (plus sign) icon.
2. In the drop-down menu, click Group ( ) icon.
Add Zone or Group Menu
3. In the New Group Name dialog box, enter a name for the Group.
Group names cannot be duplicated (this is case-insensitive).
4. Click Create and the Group will appear in the Zones List Pane.
Edit Zone Groups
• To change the name of a Zone Group:
a. In the Template Tools Pane, in the Zones List panel, click the Options (three dots) icon to the
right of the Group.
b. In the drop-down menu, click the Rename ( ) icon.
c. Enter a new name in the New Group Name text box.
d. Click Rename.
Delete Zone Groups
CAUTION: Deleting a Zone Group removes it, any Zones in the Group, any nested child Groups, and any
of their Zones
permanentl
y after you have saved the changes your Template.
1. To delete a Zone Group (and any Groups of Zones nested in it), in the Template Tools Pane, in the
Zones List panel, click the Options icon to the right of the Group.
2. In the drop-down menu, click the Delete ( ) icon.
3. In the confirmation dialog box, click Delete.

GlobalCapture Guide Template Management 101
Delete a Zone Group

GlobalCapture Guide System Management 103
System Management
Click the Manage button from the GlobalCapture home page to access the system management interface.
With administrator permissions, from here you can manage Fields and Field Lists, portals, licenses, and
product registration.
Field Catalog Management
The GlobalCapture Field Catalog is accessed from the administration menu or from Workflow Process Field
Settings dialing box in the GlobalCapture Designer. To create, edit, and delete Process Fields in your
GlobalCapture Workflow, click Field Catalog to open the Field Catalog. For details on managing Fields and
Field Lists refer to the “Field and List Management
” chapter above.
Field Catalog Management
Portal Management
Portals are centralized entry points to your Square 9 software. Portals are used to organize how users access
Workflows for security and ease of management. You must be a member of the Square 9 Administrators
(members of the ssAdmin group) to configure Portals. Users must be granted permissions to a Portal and by
default when they are created, security is set for no secured users or groups.
There are three types of Square 9 Portals, which are created, modified, and deleted in a similar way:
• Batch Portal – Use Batch Portals to organize and secure Batches of documents in GlobalCapture or
GlobalAction.
• Analytics Portal – Use Analytics Portals in GlobalAction to organize and secure Workflow metrics in
GlobalAnalytics.
• Square9 API Portal – If GlobalCapture is installed with GlobalSearch, a default S9API is created
and with it the Square9 API Portal. If you have multiple instances of GlobalCapture, create multiple
Square9 API Portals. You can configure Import and Release Nodes in Workflows to work with these
different Portals. Users who are assigned to a Portal should carry full access rights to GlobalSearch or
it will limit the functionality of this Portal.

104 System Management GlobalCapture Guide
Tip: Use Portals to Organize and Secure. Creating a new Portal is an excellent way
to secure Workflows and Batches to a particular user or group. For example, a Portal
specifically for a Human Resources department.
Create Portals
1. To create a new Portal, click the Manage button from the GlobalCapture home page to open the
Administration interface.
2. Click Portals.
The default Portals will appear in the interface.
Portal Management
3. Click the Add ( ) button found in the bottom right corner of the screen.
A new Portal Connections Settings screen will appear.
Create a Portal
4. Enter a name for the new Portal in the Portal Name text box.
5. Specify the URL of the server to manage the new Portal in URL text box.
Use the same URL as the Default Portal unless you have installed separate services, in which case
enter the URL for whichever server will host the new Portal.
The URL is based on the application server, but the port used by the ssBatchPortal service
for the Batch Portal is always 6457.
6. Enter your administrator username in the Username text box.

GlobalCapture Guide System Management 105
7. Enter your administrator password in the Password text box.
8. Select either Batch Portal, Analytics Portal, or Square9 API Portal to assign a Portal type.
When you select Square9 API, the Portal Permissions and Workflow Security settings are
grayed out because this Portal type is exclusively to connect with to GlobalSearch, which already
has its own security settings configured.
9. Click Save.
Note: Default Batch Portal and Workflow Security:
• The default Batch Portal is created at installation and can be deleted, even if it is the only
Portal.
• New Workflows are automatically managed by the Default Batch Portal unless you edit the
Secured Workflow list.
• Once the list is altered, new Workflows are no longer automatically added to the Secured
Workflow list, but are instead added to the Available Workflow list. You must now use the
Batch Portal settings to manually add the Workflows to the Secured list.
• You can add or remove Workflows from a Portal, but there must be at least one Workflow in
the Secured Workflow list for each Portal.
• When you create a new Batch Portal, all Workflows that are published and saved will end up
in the new Batch Portal’s Secured Workflow list. New Workflows are automatically added to
this new Batch Portal until you start to manually manage the Secured Workflow list.
• The Default Batch Portal is created at installation and by default the ssAdmin group is
granted access to this Portal. Other users can be granted access to the Default Portal as well
by adding them to the Portal’s Secured Users & Groups list.
• You must manually grant users access, including the ssAdmin group, to new Batch Portals by
adding them to the new Batch Portals’ Secured Users & Groups list.
The new Portal will appear at the bottom of the list of Portals. Portals appear in the order in
which they were created.
10. Click Test Connection (circle) icon to test the Portal link.
Clicking this icon will change its color, depending on the connections status:
• Green – Indicates a connection.
• Yellow – Indicates a connection is in progress.
• Red – Indicates a failed connection.
11. If the URL or credentials are not correct, make corrections and click Save.
Secure Users and Groups
1. To configure which user has permissions to the Portal (and therefore the documents in the Portal),
in the Portal interface, click Portal Permissions.
2. On the Users & Groups Security tab, from the Available Users & Groups list, using standard
Windows selection methods, select users that will have access to the Portal.
3. Click the Move Right (right arrow) button to move the selected users to the Secured Users &
Groups list.
4. To rescind permissions, select users from the Secured Users & Groups list and click the Remove
(left-arrow) button to return them to the Available Users & Groups list.
5. Click OK to save the settings and close the dialog box.
6. Click Save.

106 System Management GlobalCapture Guide
Troubleshooting: Secure ssAdmin to Portals. For maintenance and troubleshooting, it is a good idea
to secure members of the ssAdmin group to a Portal. Be careful when assigning User and Workflow
Security, as the ssAdmin group can be removed from a Portal, including the Default Portal.
Portal Permissions
Secure Workflows
1. To configure security on Workflows, in the Portal interface, click Workflow Security.
2. In the Workflow Security dialog box, select Workflows from the Available Workflows list and click
the Move Right (right-arrow) button to add them to the Secured Workflows list.
3. To rescind permissions, select users and/or groups from the Secured Workflows list and click the
Move Left (left-arrow) button to return them to the Available Workflows list.
4. Click OK to save the settings and close the dialog box.
5. Click Save.
Workflow Security
Edit Portals
1. To edit a Portal, in the Portals interface, select the Portal.
2. Click the More Options (thee dots) icon for the selected Portal and click Edit
3. Make changes to the Portal settings.
4. Click Save.

GlobalCapture Guide System Management 107
Delete Portals
CAUTION: Deleting a Portal removes it
permanentl
y.
1. To edit a Portal, in the Portals interface, select the Portal.
2. Click the More Options (thee dots) icon for the selected Portal and click Delete.
3. Because this will
permanently
delete
the Inbox, enter the displayed text in the Confirm Action
prompt.
4. Click Delete.
License Management
With system administrator permissions, you can manage GlobalCapture licenses and their allocation. In
order for a service, user, or group to be granted permissions to specific license type, you need to create
an allocation.
When a license is consumed, the username and IP address for the user displays, along with the license
expiration time. The numbers divided by a slash indicates the number of available licenses of that type that
are available and how many are currently in use.
License Management
Allocate License Seats
1. To allocate license seats, click the Manage button from the GlobalCapture home page to open the
Administration interface.
2. Click License Management.
3. To allocate a new license seat, click the Add ( ) button.
4. Select the type of license from the License Type drop-down list.

108 System Management GlobalCapture Guide
Core License Types
5. To assign a user or group for a Designer, Validation, Scanner, Administrator, or Analytics license
type:
a. Select a user or group from the User or Group drop-down list of available Windows
®
and
Square 9 User users or groups.
b. To configure how long the license may go unused before expiring, enter the number of seconds
before the license expires in the Duration (seconds) text box.
The default is no time limit.
c. To set priority for allocating the license seat, enter a number in the Priority text box.
d. To set the number of licenses to be allocated to the user or group, enter a number in the
Allocation Count text box.
Priority is assigned by numerical value; whichever number is highest is of highest priority.
e. Click OK.
6. To configure a Core license:
a. Select a GlobalCapture instance from the Engine Name drop-down list.
b. To set the number of licenses to be allotted, enter a number in the Allocation Count text box.
c. Click OK.
By default, the installation will create a four-license allocation for the default capture engine
service, however additional engines will need to be added. There is no duration or priority for
Core licenses, only the allocation count, which represents the maximum number of concurrent
cores being spun up by that particular engine.
The number of licenses allocated from the total number available is indicated by the numbers on
the right-hand side of each License bar.
CAUTION: Allowing an engine to spin up multiple cores can be taxing to system resources and can cause
performance issues if not allocated properly.
License Allocation
Click the Refresh button to update the License ID list.

GlobalCapture Guide System Management 109
Edit License Seats
1. Click the Manage button from the GlobalCapture home page to open the Administration interface.
2. Click License Management.
3. To edit a license seat, click the More Options icon in the selected License ID box and click Edit.
4. Make changes to the license seat settings.
5. Click Save.
Delete License Seats
CAUTION: Deleting a Portal removes it
permanentl
y.
1. Click the Manage button from the GlobalCapture home page to open the Administration interface.
2. Click License Management.
3. To delete license seats and choose one of the following methods:
a. Click the More Options button in the selected license seat box and click Delete.
b. To delete one or more selected license seats, enable the checkbox in the selected license seat
box and click Remove.
c. To delete all license seats, click Remove All.
4. Because this will
permanently
delete
the license seat, enter the displayed text in the Confirm Action
prompt.
5. Click Delete.
License Types
There are several types of GlobalCapture licenses:
• Designer – License to access the Field Catalog, Template Designer and GlobalCapture Designer
to create, edit, and delete Fields, Lists, Template, and Workflows.
• Validation – License to access the Batch Manager and the Validation Station to view and validate
captured documents and their data.
• Scanner – License used by scanning devices to scan documents into a Workflow. Different
scanners can be assigned to different licenses.
• Core – License used by the GlobalCapture Engine when spinning up a core to make use of the
multi-threaded features in GlobalCapture. Adding additional Core licenses in high-volume
situations can improve processing capabilities.
• Administrator –License used to access the system management and user permissions features.
• Analytics – License to access the Analytics Portal used for GlobalAction (if you have GlobalSearch
with GlobalAction installed). It is not used for GlobalCapture.
Tip: Add Cores in High-Volume Situations. Increase your Core licenses if you need faster processing.
You must have the processor cores free on your machine (minus at least one for your OS). You can
allocate and reallocate your Core licenses. Please contact your Square 9 Softworks reseller for details.

110 System Management GlobalCapture Guide
Registration
Use the Customer Serial Number and Unique Identifier Number sent at installation from Square 9 Fulfillment
when registering your software. Using the software without registration will allow only limited product
functionality. For further details on registering your Square 9 software, please contact info@square-9.com
or
call 203-789-0889. Please have your Customer Serial Number and Unique Identifier Number available.
Continuing without Registration will allow only limited functionality in the use of this product.
GlobalCapture Registration
1. To configure registration settings, click the Manage button from the GlobalCapture home page to
open the Administration interface.
2. Click Registration.
Features and registration serial numbers are found within the Square9CaptureAPI/bin.
3. Click View License Agreement to go to the EULA (End User License Agreement) page on the
square-9.com website to review the license agreement.
4. If needed, to manually register:
a. Click Manual Registration.
b. Enter the number provided by Square 9.
c. Click Register.
Manual Registration
5. To register via the internet:
d. Click Web Registration.
e. Enter the number provided by Square 9.
f. Click Register.
Web Registration
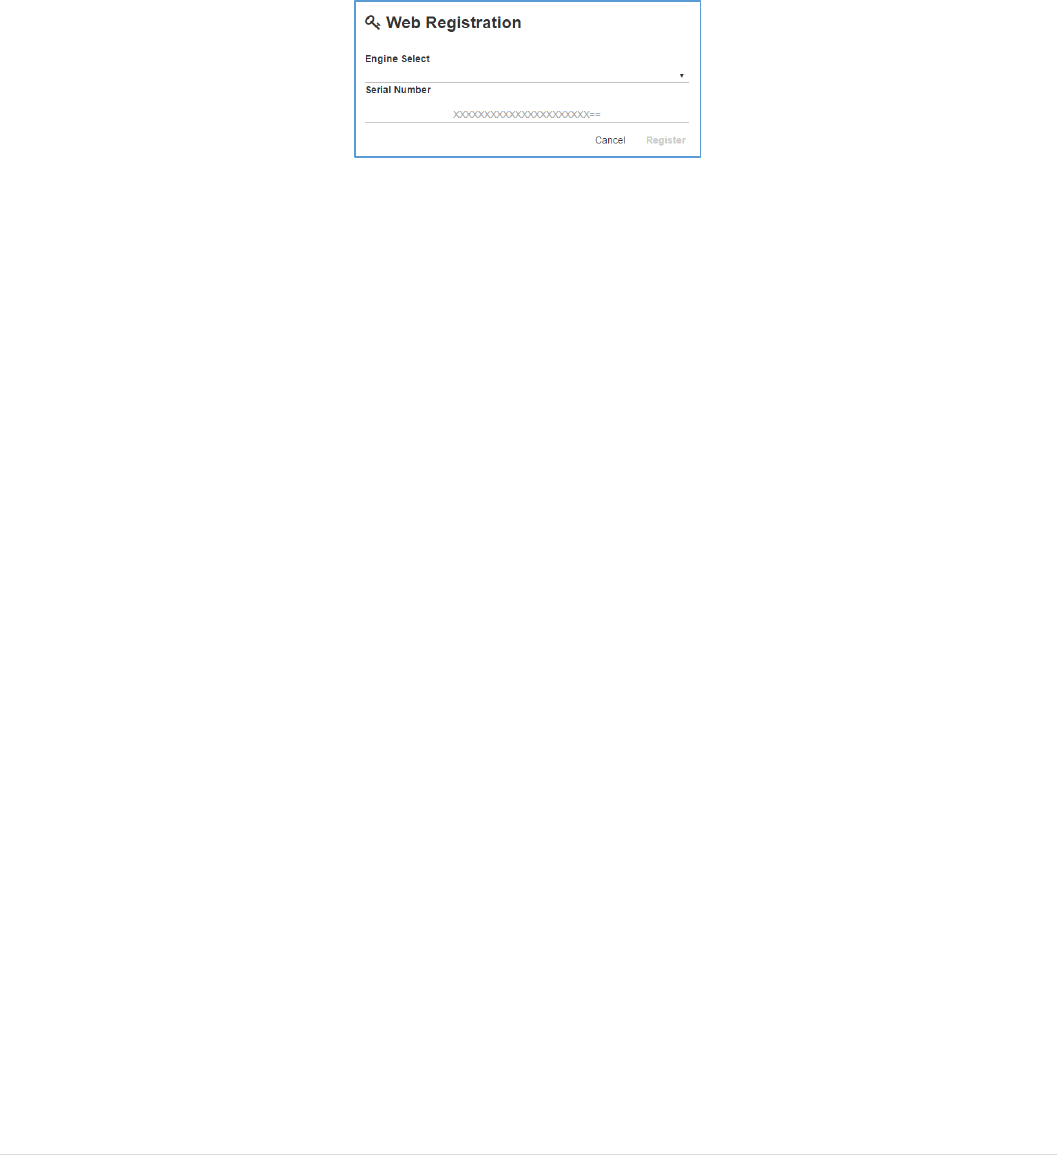
GlobalCapture Guide System Management 111
6. To register additional GlobalCapture features at a later date:
g. Click Engine Web Registration.
h. In the Engine Web Registration dialog box, select the GlobalCapture instance for the new
feature.
i. Enter the number provided by Square 9.
j. Click Register.
Engine Web Registration


GlobalCapture Guide Installation 115
Installation
As a core feature, GlobalCapture is installed as part of the SmartSearch/GlobalSearch installation process.
For details, please refer to the
SmartSearch Server and Client Installation Guide
. For software requirements,
please refer to the Square 9 website. This chapter address how to install GlobalCapture as a standalone
application. You must have system administrator permissions to perform the installation.
Server Prerequisite Configuration
Before installing GlobalCapture, install both Microsoft Internet Information Server (IIS) and Message
Queuing on your system. Also install an instance of Microsoft SQL Server
®
. Although the instance may be
called anything, for ease of use it is a good idea to call it “GetSmart.”
Windows 7/8/8.1/10 Pro Prerequisites Installation
To install IIS and Message Queueing on a compatible Windows operating system, you will need to follow
the steps below:
1. To configure IIS and Messaging Queueing on a compatible Windows operating system, open the
Control Panel.
You may be prompted to insert the Windows Installation CD to install these features.
2. Select Programs.
3. In Programs, in the Programs and Features group, select Turn Windows Features on or off.
4. In the Windows Features window, enable the following system prerequisites:
• Microsoft .NET Framework (3.5 and higher).
Microsoft .NET 4.5.2 or higher is required to install GlobalCapture v2.0. Windows 10 should
already have .NET 4.6 installed; there is no need to install .NET 4.5.2 in that case.
• In Internet Information Services > World Wide Web Services:
• Expand Application Development Features and enable the following:
o .NET Extensibility
o ASP.NET
• Expand Common HTTP Features and enable the following:
o Default Document
o Directory Browsing
o Static Content
• Expand Security and enable the following
o Basic Authentication
o Windows Authentication
5. To begin installing or enabling the prerequisites, click OK.
This may require you to reboot the computer to complete the process.

116 Installation GlobalCapture Guide
Windows Server 2008/2008 R2/2012/2012 R2 Prerequisites
Installation
1. To enable IIS and Message Queuing on a compatible Windows server operating system, open the
Control Panel.
2. Select Programs.
3. In Programs, in the Programs and Features group, select Turn Windows Features on or off.
Once selected, Server Manager will launch, then after a moment, Add Windows Features will
launch.
Server Manager
4. If the Add Roles and Features Wizard doesn’t appear, click Manage.
5. Click Add Roles and Features.
Server Manager Mange Menu
6. When the Add Roles and Features Wizard opens, click Next.

GlobalCapture Guide Installation 117
Add Roles and Features
7. In Installation Type, select Role-based or feature-based Installation in Installation Type to
configuring a single server by adding roles or features to it.
Role-Based or Feature-Based Installation
8. In Server Selection, select the server (this should be the local machine).

118 Installation GlobalCapture Guide
Server Selection
9. Click Next.
10. In the Server Roles window, select Web Server (IIS).
11. Once that is selected there is a chance that a window will open with a message about installing other
required features. Click OK to return to the Installation Wizard.
Server Roles
12. With Web Server (IIS) selected, click Next.

GlobalCapture Guide Installation 119
Web Server IIS
13. If they are not already selected, In the Features window, select the following features:
• .NET Framework (3.5 and higher)
• Message Queueing Triggers
• If you have selected a checkbox and another window appears, select Add Features.
14. Click Next.
Add Features
15. In the Role Services window, install the IIS Role Services and install the following:
• Expand Common HTTP Features and enable the following:
• Default Document

120 Installation GlobalCapture Guide
• Directory Browsing
• Static Content
• Expand Security and enable the following:
• Basic Authentication
• Windows Authentication
• Expand Application Development and enable the following:
• .NET Extensibility (3.5 and higher)
• ASP.NET (3.5 and higher)
IIS Role Services
16. Once the Services are selected, click Next.
17. In Confirmation, make sure that all the SmartSearch prerequisites have been selected, and then
click Install.
Confirmation of Installation

GlobalCapture Guide Installation 121
Server Installation
GlobalCapture is distributed through download links. These links can be obtained from the
Square 9 Softworks Fulfillment department by contacting them at:
Phone – 203.789.0889 Option 1
Email – fulfillment@square-9.com
Once the link is sent, it is valid for seven days. Download the self-extracting installation media to a folder of
your choice.
Prior to the installation of GlobalCapture, the logged in account that will perform the installation must have
the correct network permissions.
• If you’re installing onto a domain, you will need to ensure that the user you are logged into the
system as has the ability to create users on the Active Directory and to create databases within your
instance of SQL Server. It is recommended that you use a “Domain Admin” during the initial install.
• If you’re doing a local installation, you must be logged into the system as an administrator.
GlobalCapture Media Extraction
1. Once the installation media has been downloaded, double-click on it to run the self-extractor.
2. In the Self-Extractor window, select the location you want the files to go in Select extraction path.
3. Click OK to proceed with the extraction.
This may take some time. If the extraction errors out, it is possible that the download has been
corrupted. If so, it will need to be downloaded again.
4. Once it has been extracted, proceed to the installation.
GlobalCapture Standalone Installation
GlobalCapture Server Installation
1. From your installation media, navigate to the GCW directory, expand this directory, right-click on
setup.exe and select Run as Administrator.
2. Click Next to start the GlobalCapture installation process using the Installation Wizard.
There will be a pause while the installation is processing.
GlobalCapture Installation Wizard

122 Installation GlobalCapture Guide
File and Web Service Location
1. To use the default GetSmart and web services location and the default website port and continue the
installation, in File and Web Service Location click Next.
2. To change the installation location in which GetSmart will be installed, in Please enter the location
you want to place the GetSmart:
• Click Change.
• In the Change Current Destination Folder window, enter the new location path in the text
box.
• Click OK.
3. To change the installation location in which web services will be installed, in Please enter the
location you want to place the web services:
• Click Change.
• In the Change Current Destination Folder window, enter the new location path in the text
box.
• Click OK.
4. The website port defaults to Port 80. To change the port that SmartSearch will be installed to, enter
a port number in the Enter your desired web port text box.
5. Click Next to continue.
Note: By default, GlobalCapture is installed onto port 80. GlobalCapture must be the only application
running on a specified port. The availability of the specified port is not validated by the installer;
you must ensure the port’s availability prior to beginning the installation.
File and Web Service Location
GlobalCapture Server Customer Information
1. In Customer Information, enter a name in the User Name text box.
2. Enter name in the Organization text box.
3. Enter your license number provided by Square 9 in the Serial Number text box.
4. Click Next.
5. If prompted with an error message, click OK or Yes and proceed with corrections.
If no serial number is entered, a reminder message will appear. Click OK to proceed.

GlobalCapture Guide Installation 123
Customer Information
GlobalCapture License Agreement
1. Click Read License Agreement to read the agreement.
2. Click I accept the terms in the license agreement to accept the terms.
3. Click Next.
License Agreement
Authentication Configuration
1. In Authentication Configuration, in the Please select Authentication Server group, choose one of
the following:
• Active Directory – Enable to indicate GlobalCapture is to be installed using Active Directory
users and groups.
• Local Server – Enable to indicate GlobalCapture is to be installed using Workgroup users and
groups (users and groups that are local to the server).
Note that if the machine on which the installation is occurring is not on a domain, Local
Server is selected and the choices are grayed out.
2. Enter a password for the ssAdministrator account in the Enter SmartSearch Admin Password text
box and confirm the password by typing it again in the Confirm text box.
This password must meet the password guidelines set on the domain or local machine.
3. Click Next to continue.

124 Installation GlobalCapture Guide
Authentication Configuration
Tip: Meet System Requirements for Passwords. The password
must
meet the system requirements for
the operating system on which the installation is being performed. The Installation Wizard will let you
enter a non-compliant password, but GlobalCapture will not run properly if the password does not meet
the system requirements.
Tip: Change ssAdministrator Password. The ssAdministrator password can be changed at a later point,
if you want. If you do so:
• It must comply with the password requirements for your machine.
• The password must be updated in the Application Pool in the IIS Manager and the Service
Console.
Database Server
1. In Database Server, in Database server that you are installing to, click the Browse button to
display a list of your SQL Server instances available on the network and select one.
2. Choose the login credentials in the Connect Using section:
• Select Windows Authentication credentials of current user to use the login credentials of
the currently logged in user to create databases in the specified SQL instance.
• Select Server authentication using the Login ID and password below to enter the System
Administrator (SA) user credentials.
3. Click Next to continue the installation.
Select Database Server and Authentication
Web Service and GetSmart Location
1. To use the default GetSmart and web services location and the default website port and continue the
installation, in Web Service Location click Next.

GlobalCapture Guide Installation 125
2. To change the installation location in which GetSmart will be installed, in Please enter the location
you want to place the GetSmart:
• Click Change.
• In the Change Current Destination Folder window, enter the new location path in the text box.
• Click OK.
3. To change the installation location in which web services will be installed, in Please enter the
location you want to place the web services:
• Click Change.
• In the Change Current Destination Folder window, enter the new location path in the text box.
• Click OK.
4. The website port defaults to Port 80. To change the port that SmartSearch will be installed to, enter
a port number in the Enter your desired web port text box.
5. Click Next to continue.
Note: By default, GlobalCapture is installed onto port 80. GlobalCapture must be the only application
running on a specified port. The availability of the specified port is not validated by the installer;
you must ensure the port’s availability prior to beginning the installation.
GetSmart and Web Service Location
GlobalCapture Server Installation
Once preparation is done, you are ready to install GlobalCapture. The GlobalCapture Server installation
window will pause while the GlobalCapture Engine installs and then it finishes the installation process.
1. To install GlobalCapture, in Ready to Install the Program, click Install.
There will be a pause while the installation is processing.
2. If necessary, click Back to return to previous dialog boxes and make adjustments to the installation.
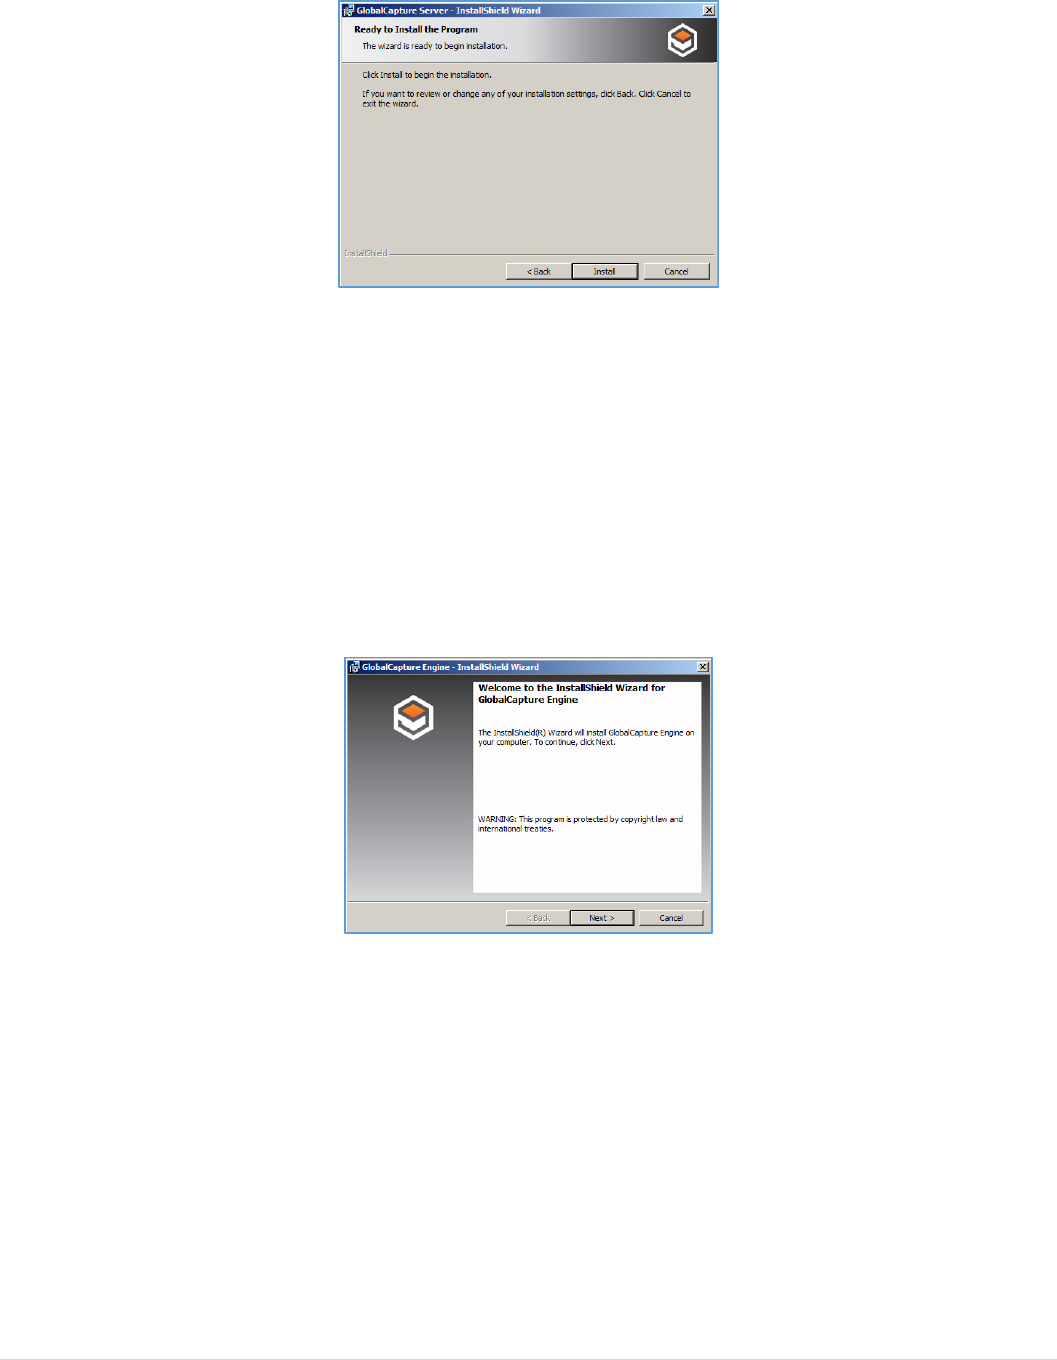
126 Installation GlobalCapture Guide
Begin GlobalCapture Server Installation
GlobalCapture Engine Installation
When GlobalCapture Server is done installing, the GlobalCapture Engine for GlobalCapture installation
begins. The GlobalCapture Engine installation process is very similar to the GlobalCapture Server process.
If the GlobalCapture Engine InstallShield Wizard appears behind the GlobalCapture Server installer, drag
it into view.
1. In Welcome to the InstallShield Wizard for GlobalCapture Engine, click Next.
There will be a pause while the installation is processing.
GlobalCapture Engine Installation Wizard
GlobalCapture Engine Customer Information
1. In Customer Information, enter a name in the User Name text box.
2. Enter name in the organization in the Organization text box.
3. Enter your license number provided by Square 9 in the Serial Number text box.
4. Click Next.
If no serial number is entered, a reminder message will appear. Click OK to proceed.

GlobalCapture Guide Installation 127
GlobalCapture Engine Customer Information
GlobalCapture Engine Installation
1. Once preparation is done, in Ready to Install the Program, click Install to install the GlobalCapture
Engine.
There will be a pause while the installation is processing.
2. If necessary, click Back to return to previous windows and make adjustments to the installation.
Begin GlobalCapture Engine Installation
3. In InstallShield Wizard Completed, click Finish.
a. If you prefer, enable the Show the Windows Installer log checkbox to see actions and times
related to the installation and then click Finish.
b. To keep the log for future reference:
i. In Notepad, select File > Save As.
ii. If you prefer, select a different filename and/or storage location.
iii. Click Save.
iv. Close Notepad when done reviewing the log file.
You are returned to the GlobalCapture Engine installer.
4. In Capture Engine Installer Information, choose one of the following:
• At the prompt, click Yes to reboot the server, so that the GlobalCapture Engine is operational.
• Or, click No if you will manually reboot later.

128 Installation GlobalCapture Guide
GlobalCapture Engine Installation Completed
Complete GlobalCapture Engine Installation
Once the GlobalCapture Engine installation is finished, the GlobalCapture Server installation will finish.
1. In the GlobalCapture Wizard Completed window, click Finish.
2. At the prompt, reboot the system.
A reboot must be done before GlobalCapture can be launched and run properly.
GlobalCapture Installation Completed
Complete GlobalCapture Installation
1. In InstallShield Wizard Completed, click Finish.
a. If you prefer, enable the Show the Windows Installer log checkbox to see actions and times
related to the GlobalCapture installation and then click Finish.
b. To keep the log for future reference:
1. In Notepad, select File > Save As.
2. If you prefer, select a different filename and/or storage location.
3. Click Save.
4. Close Notepad when done reviewing the log file.

GlobalCapture Guide Installation 129
GlobalCapture Server Installation Completed
2. In GlobalCapture Installer Information, choose one of the following:
• At the prompt, click Yes to reboot the server, so that GlobalCapture is operational.
• Or, click No if you will manually reboot later.
There will be a pause while the installation is processing.
With the GlobalCapture installation complete, the GlobalSearch web client desktop shortcuts will appear on
your Windows desktop.
Additional GlobalCapture Engine Instances
You can stand up to seven additional GlobalCapture Engine instances for GlobalCapture per machine which
is running GlobalCapture.
1. Return to the location of your installation media, navigate to the
GlobalCaptureEngineStandaloneInstaller directory, expand this directory, right-click on setup.exe
and select Run as Administrator.
2. Select Install a new instance and click Next to start the next GlobalCapture Engine installation
process.
There will be a pause while the installation is processing.
Install a New GlobalCapture Engine Instance
The Installation Wizard will appear. The instructions for adding GlobalCapture Engine instances
are similar to those in the “GlobalCapture Engine Installation
” section above.
3. To begin the installation, in Welcome to the InstallShield Wizard for GlobalCapture Engine 2,
click Next to proceed to the next window.

130 Installation GlobalCapture Guide
There will be a pause while the installation is processing.
4. In Customer Information:
a. Enter a name in the User Name text box.
b. Enter name in the organization in the Organization text box.
c. Enter your license number provided by Square 9 in the Serial Number text box.
d. Click Next to continue the installation.
If no serial number is entered, a reminder message will appear. Click OK to proceed.
5. In Database Server:
e. In Database server that you are installing to, click the expansion arrow to and select from a list
of the SQL Server instances available to you or click the Browse button and browse to a SQL
Server instance.
f. Choose login credentials in the Connect Using section:
• Select Windows Authentication credentials of current user to use the login credentials of
the currently logged in user to create databases in the specified SQL instance.
• Select Server authentication using the Login ID and password below to enter the System
Administrator (SA) user credentials.
g. Click Next to continue.
6. Once preparation is done, in Ready to Install the Program, click Install to install the GlobalCapture
Engine.
There will be a pause while the installation is processing.
7. In InstallShield Wizard Completed, click Finish.
a. If you prefer, enable the Show the Windows Installer log checkbox to see actions and times
related to the installation and then click Finish.
b. To keep the log for future reference:
i. In Notepad, select File > Save As.
ii. If you prefer, select a different filename and/or storage location.
iii. Click Save.
iv. Close Notepad when done reviewing the log file.
You are returned to the GlobalCapture Engine installer.
8. In GlobalCapture Installer Information, choose one of the following:
• At the prompt, click Yes to reboot the server, so that GlobalCapture is operational.
• Or, click No if you will manually reboot later
There will be a pause while the installation is processing.
Once installation is complete, you will see the additional Engines listed in the GlobalCapture License
Management interface.

GlobalCapture Guide Appendix 131
Appendices
Section V includes helpful supplemental information.
The appendix in this section include:
Appendix A
This appendix includes information about using regular expressions
with the Pattern Match Zone.
Appendix B
This appendix lists the values for formatting a Process Field.
Appendix C
This appendix includes information about using S9 Notation with
GlobalCapture.
Appendix D
This appendix explains how to implement multiple-language
support in the OCR engine.

GlobalCapture Guide Appendix A 133
Appendix A
Pattern Matching using Regular Expressions
The Pattern Matching Zone matches text using specific criteria. The criteria for pattern matching is written
in a programmatic syntax called RegEx (short for regular expression). The Zone makes use of .NET RegEx.
Regular expressions can be written to be very specific or to be “robust” to allow for variations in the way the
data may be presented.
Tip: Use Regular Expressions with KeyFree. Regular expressions can be used to enable auto-
highlighting during KeyFree Indexing for Fields with the Character data type.
When a RegEx is provided for a Field that is being populated through KeyFree Indexing, GlobalSearch will
attempt to find any data on the page that matches the RegEx. Any matches found will be highlighted in
the Validation Station. If only a single match is found, the data will be highlighted and the mouse cursor
will jump to that area of the document. This feature further improves indexing speeds by bringing the
user's attention to the most likely areas where data for a particular field may be found.
Example: This RegEx is used to locate a zip code as 1) a five-digit string, 2) a five-digit string followed by
a hyphen and a four-digit string, 3) a five-digit string followed by a four-digit string:
^\d{5}(?:[-\s]\d{4})?$
• ^ = Start of the string.
• \d{5} = Match 5 digits (for all three sample patterns)
• (?:…) = Grouping
• [-\s] = Match a hyphen (for sample 2) or a space (for sample 3)
• \d{4} = Match 4 digits (for samples 2, 3)
• …? = The grouping pattern before it is optional (for sample 1)
• $ = End of the string
Pattern Matching
Search String
Description
Example
A simple string of
letters or numbers
Simple String. A RegEx expression of simple
letters or numbers will pattern match specific
phrases or words.
The search string “Number” will match the first occurrence
of the word “Number” on the scanned document (or all
occurrences of “number” into a Multi-Value Field).
(?i)
Case Sensitivity. Pattern matching is case
sensitive by default. To create a case-insensitive
search, add the modifier “(?i)” to the beginning
of the string.

134 Appendix A GlobalCapture Guide
Search String
Description
Example
Multi-line search
string
Sequence Based on Priority. A search string of
multiple lines can instruct the Template to search
for different words or phrases in a specific order
of priority.
This pattern logic can be used in cases where the
content of a document or region can take
multiple forms. Using a sequence based on
priority, pattern matching enables you to
anticipate multiple scenarios of incoming data
and adapt the behavior step by step.
The Template attempts to match “following” first. Since
a match is found, it does not continue on to match
“number.”
In a case where the first line fails to match, the Template
matches “number” on its second pass.
.
Wildcard. Many characters hold special meaning
in RegEx syntax. A period is used as a
wildcard
to
match any character or number in the document.
This can be used create patterns that match a
variety of different phrases or words with fuzzy
logic.
The search string “Attn: …..” will match both “Attn: Scott”
and “Attn: Abita.”
\
Escape Character. In cases where you want to
use a special character literally, you must strip its
special meaning with an
escape character
. In
RegEx, a backslash is used to invoke this
alternate interpretation.
|
Logical Operator.
Logical operators
allow
pattern matching an extra degree of complexity.
The pipe character signifies a logical OR
operator.
A search string “Somehow|Court” will return matches for
either of the words “Somehow” and “Court.”
[a|b]
Character Range a or b. In addition to literal
characters and wildcards, search strings can
detect groups of characters using
character
ranges
and logical operators.
The search string “[P|M]al[e|t]” detects a word which: begins
with either a “P” or an “M”; followed by “al”; and ends with
either an “e” or a “t.” When checked against the sample
document, this pattern matches both ”Pale” and “Malt.”
[abc]
Character Range a or b or c. A search string to
detect this OR this OR that.
A search string “[BCH]at” will match “Bat,” “Cat,” and “Hat.”
[^abc]
Character Range Not a or b or c. A search
string to detect characters which are
not
this OR
this OR that.
The search string “[^A]” will match any character except
capital A.
[0-9]
Character Range 0 to 9. A search string to
detect a range of digits between 0 and 9.
The search string “[0-9]” will match any one digit.

GlobalCapture Guide Appendix A 135
Search String
Description
Example
[a-z]
Character Range in Lowercase Letters.
A search string to detect letters in a range with
lowercase letters.
The search string containing “[a-z]” will match any one
lowercase letter.
[a-z|A-Z]
Character Range in Both Uppercase and
Lowercase Letters. A search string to detect
letters in a range, irregardless of the letter case.
The search string containing “[a-z|A-Z]” will match any letter
of the alphabet, whether uppercase or lowercase.
*
0 or More Quantifier. Quantifiers are used to
specify how many instances of a character or
string are required to produce a match. Use an
asterisk to search for a range of none to
unlimited.
The search string containing “7*” will match 0 to infinite 7’s.
+
1 or More Quantifier. Use a plus sign to search
for a range of one to unlimited number or
characters or strings.
The search string containing “Z+” will match 1 to infinite Z’s
?
0 or 1 Quantifier. Use a question mark to search
for a range of none or one characters or strings.
The search string containing “colou?r,” will return matches
for either of the words “color” or “colour.”
{
#
}
Exactly the Specified Number Quantifier. Use
a number surrounded by braces to search for
a specific quantify of characters or strings.
The search string containing “7{3}” detects three sevens in a
row.
{
#,
}
Exactly the Specified Number or More
Quantifier. Use a number, followed by a comma,
and surrounded by braces to search for a specific
quantify or more of characters or strings.
The search string containing “Z{3,}” detects three to infinite
Z’s.
{
#,#
}
Exactly the Specified Number or More
Quantifier. Use a number, comma, number,
surrounded by braces to search for characters or
strings between the first number and the next.
The search string containing “Z{3,5}” detects three to five
Z’s.
[0-9]{
#
}
Number with Specific Digits and Amounts of
Digits. Use a combination of
Character Range 0
to 9 and Exactly
the
Specified Number Quantifier
to search for specific patterns of digits.
The pattern “[0-9]{8}" matches any eight digits in a row,
such as an eight-digit purchase order number.
[A-Z]{
#
} [0-9]{
#
}
Compound Combinations of Letters and
Digits. Use a series of RegEx sequences of
characters to create very specific or for very
general (“robust”) search patterns.
To search for U.S.A. addresses, the pattern “[A-Z]{2} [0-
9]{5}” matches a state code plus a ZIP code (two uppercase
letters followed by a space and then a five-digit number).

136 Appendix A GlobalCapture Guide
Search String
Description
Example
[0-9]{3}\.[0-
9]{3}]\.[0-9]{4}
Compound Combinations with Escape
Characters. Use a series of RegEx sequences of
characters, including ones which use a special
character literally.
The pattern “[0-9]{3}\.[0-9]{3}]\.[0-9]{4}” matches a seven-
digit phone number plus area code, separated by periods.
Note that escape characters are required.
(([\w]+[-
._+&])*[\w]+@([-
\w]+[.])+[a-zA-
Z]{2,6})
Diversity and Robustness of Pattern
Matching. Pattern Matching with RegEx is
an extremely powerful tool. With a good
understanding of its syntax, the possibilities
are endless.
“(([\w]+[-._+&])*[\w]+@([-\w]+[.])+[a-zA-Z]{2,6})” will
match valid email addresses of various forms.
Additional Resources
Here are a few online resources that can help troubleshoot and further your understanding of pattern
matching:
https://regex101.com/
https://www.cheatography.com/davechild/cheat-sheets/regular-expressions/

GlobalCapture Guide Appendix B 137
Appendix B
Values for Formatting an Index Field
Field Type: Decimal
Formatting
Result
$#,###.00
$10,129,081.02; $954.29; $3,429.02
€#,###.00
€65,006,508,156.00; €1,546.09
Field Type: Numeric
Formatting
Result
#,###
10,129,081; 3,429
#,###
65,006,508,156; 1,546
Field Type: Date/Time
Simple
Formatting
Result
d
system formatted date – 7/9/2016
t
system formatted time – 10:20 am
Dates
Formatting
Result
M/d/yy
7/9/14; 10/20/16
MM/dd/yyyy
07/09/2014; 10/20/2016
MMM d, yyyy
Jul 9, 2014; Oct 20, 2016
MMMM d, yyyy
July 9, 2014; October 20, 2016
Times
Formatting
Result
h:mm:ss
8:46:05 am; 10:20:26 pm
hh:mm:ss
08:46:05 am; 10:20:26 pm
hh:mm:ss
08:46:05; 22:20:26

138 Appendix B GlobalCapture Guide
Standard Date and Time Format Strings
Format
specifier
Description If this is the date -> It would appear like this
"d"
Short date pattern.
6/15/2016 1:45:30 PM -> 6/15/2016 (en-US)
"D"
Long date pattern.
6/15/2016 1:45:30 PM -> Monday, June 15, 2016 (en-US)
"f"
Full date/time pattern (short time).
6/15/2016 1:45:30 PM -> Monday, June 15, 2016 1:45 PM (en-US)
"F"
Full date/time pattern (long time).
6/15/2016 1:45:30 PM -> Monday, June 15, 2016 1:45:30 PM (en-US)
"g"
General date/time pattern (short time).
6/15/2016 1:45:30 PM -> 6/15/2016 1:45 PM (en-US)
"G"
General date/time pattern (long time).
6/15/2016 1:45:30 PM -> 6/15/2016 1:45:30 PM (en-US)
"M", "m"
Month/day pattern.
6/15/2016 1:45:30 PM -> June 15 (en-US)
"O", "o"
Round-trip date/time pattern.
(See
https://msdn.microsoft.com/en-
us/library/system.datetime(v=vs.110).aspx
for information on DateTime.)
DateTime values:
6/15/2016 1:45:30 PM (DateTimeKind.Local) --> 2016-06-
15T13:45:30.0000000-07:00
6/15/2016 1:45:30 PM (DateTimeKind.UTC) --> 2016-06-
15T13:45:30.0000000Z
6/15/2016 1:45:30 PM (DateTimeKind.Unspecified) --> 2016-06-
15T13:45:30.0000000
DateTimeOffset values:
6/15/2016 1:45:30 PM -07:00 --> 2016-06-15T13:45:30.0000000-07:00
"R", "r"
RFC1123 pattern.
6/15/2016 1:45:30 PM -> Mon, 15 Jun 2016 20:45:30 GMT
"s"
Sortable date/time pattern.
6/15/2016 1:45:30 PM -> 2016-06-15T13:45:30
"t"
Short time pattern.
6/15/2016 1:45:30 PM -> 1:45 PM (en-US)
"T"
Long time pattern.
6/15/2016 1:45:30 PM -> 1:45:30 PM (en-US)
"u"
Universal sortable date/time pattern.
6/15/2016 1:45:30 PM -> 2016-06-15 20:45:30Z
"U"
Universal full date/time pattern.
6/15/2016 1:45:30 PM -> Monday, June 15, 2016 8:45:30 PM (en-US)
"Y", "y"
Year month pattern.
6/15/2016 1:45:30 PM -> June, 2016 (en-US)
Any other
single
character
Unknown specifier.
Throws a run-time exception.

GlobalCapture Guide Appendix B 139
Custom Date and Time Format Strings
Format
specifier
Description If this is the date -> It would appear like this
"d"
The day of the month, from 1 through 31.
6/1/2016 1:45:30 PM -> 1
6/15/2016 1:45:30 PM -> 15
"dd"
The day of the month, from 01 through 31.
6/1/2016 1:45:30 PM -> 01
6/15/2016 1:45:30 PM -> 15
"ddd"
The abbreviated name of the day of the week.
6/15/2016 1:45:30 PM -> Mon (en-US)
"dddd"
The full name of the day of the week.
6/15/2016 1:45:30 PM -> Monday (en-US)
"f"
The tenths of a second in a date and time value.
6/15/2016 13:45:30.617 -> 6
6/15/2016 13:45:30.050 -> 0
"ff"
The hundredths of a second in a date and time value.
6/15/2016 13:45:30.617 -> 61
6/15/2016 13:45:30.005 -> 00
"fff"
The milliseconds in a date and time value.
6/15/2016 13:45:30.617 -> 617
6/15/2016 13:45:30.0005 -> 000
"ffff"
The ten thousandths of a second in a date and time value.
6/15/2016 13:45:30.6175 -> 6175
6/15/2016 13:45:30.00005 -> 0000
"fffff"
The hundred thousandths of a second in a date and time
value.
6/15/2016 13:45:30.61754 -> 61754
6/15/2016 13:45:30.000005 -> 00000
"ffffff"
The millionths of a second in a date and time value.
6/15/2016 13:45:30.617542 -> 617542
6/15/2016 13:45:30.0000005 -> 000000
"fffffff"
The ten millionths of a second in a date and time value.
6/15/2016 13:45:30.6175425 -> 6175425
6/15/2016 13:45:30.0001150 -> 0001150
"F"
If non-zero, the tenths of a second in a date and time value.
6/15/2016 13:45:30.617 -> 6
6/15/2016 13:45:30.050 -> (no output)
"FF"
If non-zero, the hundredths of a second in a date and time
value.
6/15/2016 13:45:30.617 -> 61
6/15/2016 13:45:30.005 -> (no output)
"FFF"
If non-zero, the milliseconds in a date and time value.
6/15/2016 13:45:30.617 -> 617
6/15/2016 13:45:30.0005 -> (no output)
"FFFF"
If non-zero, the ten thousandths of a second in a date and
time value.
6/1/2016 13:45:30.5275 -> 5275
6/15/2016 13:45:30.00005 -> (no output)
"FFFFF"
If non-zero, the hundred thousandths of a second in a date
and time value.
6/15/2016 13:45:30.61754 -> 61754
6/15/2016 13:45:30.000005 -> (no output)

140 Appendix B GlobalCapture Guide
"FFFFFF"
If non-zero, the millionths of a second in a date and time
value.
6/15/2016 13:45:30.617542 -> 617542
6/15/2016 13:45:30.0000005 -> (no output)
"FFFFFFF"
If non-zero, the ten millionths of a second in a date and time
value.
6/15/2016 13:45:30.6175425 -> 6175425
6/15/2016 13:45:30.0001150 -> 000115
"g", "gg"
The period or era.
6/15/2016 1:45:30 PM -> A.D.
"h"
The hour, using a 12-hour clock from 1 to 12.
6/15/2016 1:45:30 AM -> 1
6/15/2016 1:45:30 PM -> 1
"hh"
The hour, using a 12-hour clock from 01 to 12.
6/15/2016 1:45:30 AM -> 01
6/15/2016 1:45:30 PM -> 01
"H"
The hour, using a 24-hour clock from 0 to 23.
6/15/2016 1:45:30 AM -> 1
6/15/2016 1:45:30 PM -> 13
"HH"
The hour, using a 24-hour clock from 00 to 23.
6/15/2016 1:45:30 AM -> 01
6/15/2016 1:45:30 PM -> 13
"K"
Time zone information.
(See
https://msdn.microsoft.com/en-
us/library/system.datetime(v=vs.110).aspx
for information on DateTime.)
With DateTime values:
6/15/2016 1:45:30 PM, Kind Unspecified ->
6/15/2016 1:45:30 PM, Kind UTC -> Z
6/15/2016 1:45:30 PM, Kind Local -> -07:00
(depends on local computer settings)
With DateTimeOffset values:
6/15/2016 1:45:30 AM -07:00 --> -07:00
6/15/2016 8:45:30 AM +00:00 --> +00:00
"m"
The minute, from 0 through 59.
6/15/2016 1:09:30 AM -> 9
6/15/2016 1:09:30 PM -> 9
"mm"
The minute, from 00 through 59.
6/15/2016 1:09:30 AM -> 09
6/15/2016 1:09:30 PM -> 09
"M"
The month, from 1 through 12.
6/15/2016 1:45:30 PM -> 6
"MM"
The month, from 01 through 12.
6/15/2016 1:45:30 PM -> 06
"MMM"
The abbreviated name of the month.
6/15/2016 1:45:30 PM -> Jun (en-US)
"MMMM"
The full name of the month.
6/15/2016 1:45:30 PM -> June (en-US)
"s"
The second, from 0 through 59.
6/15/2016 1:45:09 PM -> 9
"ss"
The second, from 00 through 59.
6/15/2016 1:45:09 PM -> 09
"t"
The first character of the AM/PM designator.
6/15/2016 1:45:30 PM -> P (en-US)
"tt"
The AM/PM designator.
6/15/2016 1:45:30 PM -> PM (en-US)

GlobalCapture Guide Appendix B 141
"y"
The year, from 0 to 99.
1/1/0001 12:00:00 AM -> 1
1/1/0900 12:00:00 AM -> 0
1/1/1900 12:00:00 AM -> 0
6/15/2009 1:45:30 PM -> 9
6/15/2019 12:00:00 AM -> 19
"yy"
The year, from 00 to 99.
1/1/0001 12:00:00 AM -> 01
1/1/0900 12:00:00 AM -> 00
1/1/1900 12:00:00 AM -> 00
6/15/2016 1:45:30 PM -> 16
"yyy"
The year, with a minimum of three digits.
1/1/0001 12:00:00 AM -> 001
1/1/0900 12:00:00 AM -> 900
1/1/1900 12:00:00 AM -> 1900
6/15/2016 1:45:30 PM -> 2016
"yyyy"
The year as a four-digit number.
1/1/0001 12:00:00 AM -> 0001
1/1/0900 12:00:00 AM -> 0900
1/1/1900 12:00:00 AM -> 1900
6/15/2019 1:45:30 PM -> 2019
"yyyyy"
The year as a five-digit number.
1/1/0001 12:00:00 AM -> 00001
6/15/2016 1:45:30 PM -> 02016
"z"
Hours offset from UTC, with no leading zeros.
6/15/2016 1:45:30 PM -07:00 -> -7
"zz"
Hours offset from UTC, with a leading zero for a single-digit
value.
6/15/2016 1:45:30 PM -07:00 -> -07
"zzz"
Hours and minutes offset from UTC.
6/15/2016 1:45:30 PM -07:00 -> -07:00
":"
The time separator.
6/15/2016 1:45:30 PM -> : (en-US)
"/"
The date separator.
6/15/2016 1:45:30 PM -> / (en-US)
"string" or
'
string
'
Literal string delimiter.
6/15/2016 1:45:30 PM ("arr:" h:m t) -> arr: 1:45 P
6/15/2016 1:45:30 PM ('arr:' h:m t) -> arr: 1:45 P
%
Defines the following character as a custom format specifier.
6/15/2016 1:45:30 PM (%h) -> 1
\
The escape character.
6/15/2016 1:45:30 PM (h \h) -> 1 h
Any other
character
The character is copied to the result string unchanged.
6/15/2016 1:45:30 AM (arr hh:mm t) -> arr 01:45 A

142 Appendix B GlobalCapture Guide
Standard Numeric Format Strings
Format
specifier
Name Description Examples
"C" or
"c"
Currency
Result: A currency value.
Supported by: All numeric types.
Precision specifier: Number of decimal digits.
123.456 ("C", en-US) -> $123.46
-123.456 ("C3", en-US) -> ($123.456)
"D" or "d"
Decimal
Result: Integer digits with optional negative sign.
Supported by: Integral types only.
Precision specifier: Minimum number of digits.
Default precision specifier: Minimum number of digits required.
1234 ("D") -> 1234
-1234 ("D6") -> -001234
"E" or "e"
Exponential
(scientific)
Result: Exponential notation.
Supported by: All numeric types.
Precision specifier: Number of decimal digits.
Default precision specifier: 6.
1052.0329112756 ("E", en-US) ->
1.052033E+003
-1052.0329112756 ("e2", en-US) ->
-1.05e+003
"F" or "f"
Fixed-point
Result: Integral and decimal digits with optional negative sign.
Supported by: All numeric types.
Precision specifier: Number of decimal digits.
1234.567 ("F", en-US) -> 1234.57
1234 ("F1", en-US) -> 1234.0
-1234.56 ("F4", en-US) -> -1234.5600
"G" or "g"
General
Result: The most compact of either fixed-point or scientific notation.
Supported by: All numeric types.
Precision specifier: Number of significant digits.
Default precision specifier: Depends on numeric type.
-123.456 ("G", en-US) -> -123.456
123.4546 ("G4", en-US) -> 123.5
-1.234567890e-25 ("G", en-US) ->
-1.23456789E-25
"N" or
"n"
Number
Result: Integral and decimal digits, group separators, and a
decimal separator with optional negative sign.
Supported by: All numeric types.
1234.567 ("N", en-US) -> 1,234.57
1234 ("N1", en-US) -> 1,234.0
-1234.56 ("N3", en-US) -> -1,234.560
"P" or
"p"
Percent
Result: Number multiplied by 100 and displayed with a percent
symbol.
Supported by: All numeric types.
Precision specifier: Desired number of decimal places.
1 ("P", en-US) -> 100.00 %
-0.39678 ("P1", en-US) -> -39.7 %
"R" or "r"
Round-trip
Result: A string that can round-trip to an identical number.
123456789.12345678 ("R") ->
123456789.12345678
-1234567890.12345678 ("R") -> -
1234567890.1234567
"X" or "x"
Hexadecimal
Result: A hexadecimal string.
Supported by: Integral types only.
Precision specifier: Number of digits in the result string.
255 ("X") -> FF
-1 ("x") -> ff
255 ("x4") -> 00ff
-1 ("X4") -> 00FF
Any other single character
Unknown specifier.
Throws a run-time exception.

GlobalCapture Guide Appendix C 143
Appendix C
S9 Notation
S9 Notation is a tool for embedding variables into a variety of Workflow Nodes fields. These notations are
replaced at runtime by either a Process Field or general information. To see a list of notations available for
that Node field, type in a single brace ( { ).
Standard S9 Notations
Every GlobalCapture Workflow comes with a set of standard S9 Notations that be used as follows:
Standard S9 Notation
Formatting
Result
{LASTUSERMODIFIED}
Contains the last user to either scan or validate the process.
{PROCESSID}
Contains the numeric unique identifier for this particular process.
{TODAY}
Contains the date and time that the notation is accessed.
{p_ActiveTemplate}
The Template which was last assigned to the document through classification.
{p_BatchID}
Contains the numeric unique identifier for this particular set of process.
{p_FileType}
Contains the current file extension of the document that is being processed.
{p_FilePath}
Contains the path to the document in process if merged. (PDF and TIFs do not
populate this property mid process).
{p_OriginalFileName}
Contains the original name of the file prior to it being imported into the
GlobalCapture Workflow.
{p_ReleasedFilePath}
Contains the path to the released document following a Release Node.
Basic Process Field Notation
When simply referencing the value currently within a Process Field, the following S9 Notation can be used:
Field Name Notation
ProcessFieldName should be replaced with the name of the Field you are intending to substitute. It is
helpful to keep in mind that there can be data-type mismatch issue spawned from inserting one Process
Field into another. For example, an alpha character value cannot be placed within a numeric or decimal
Field.
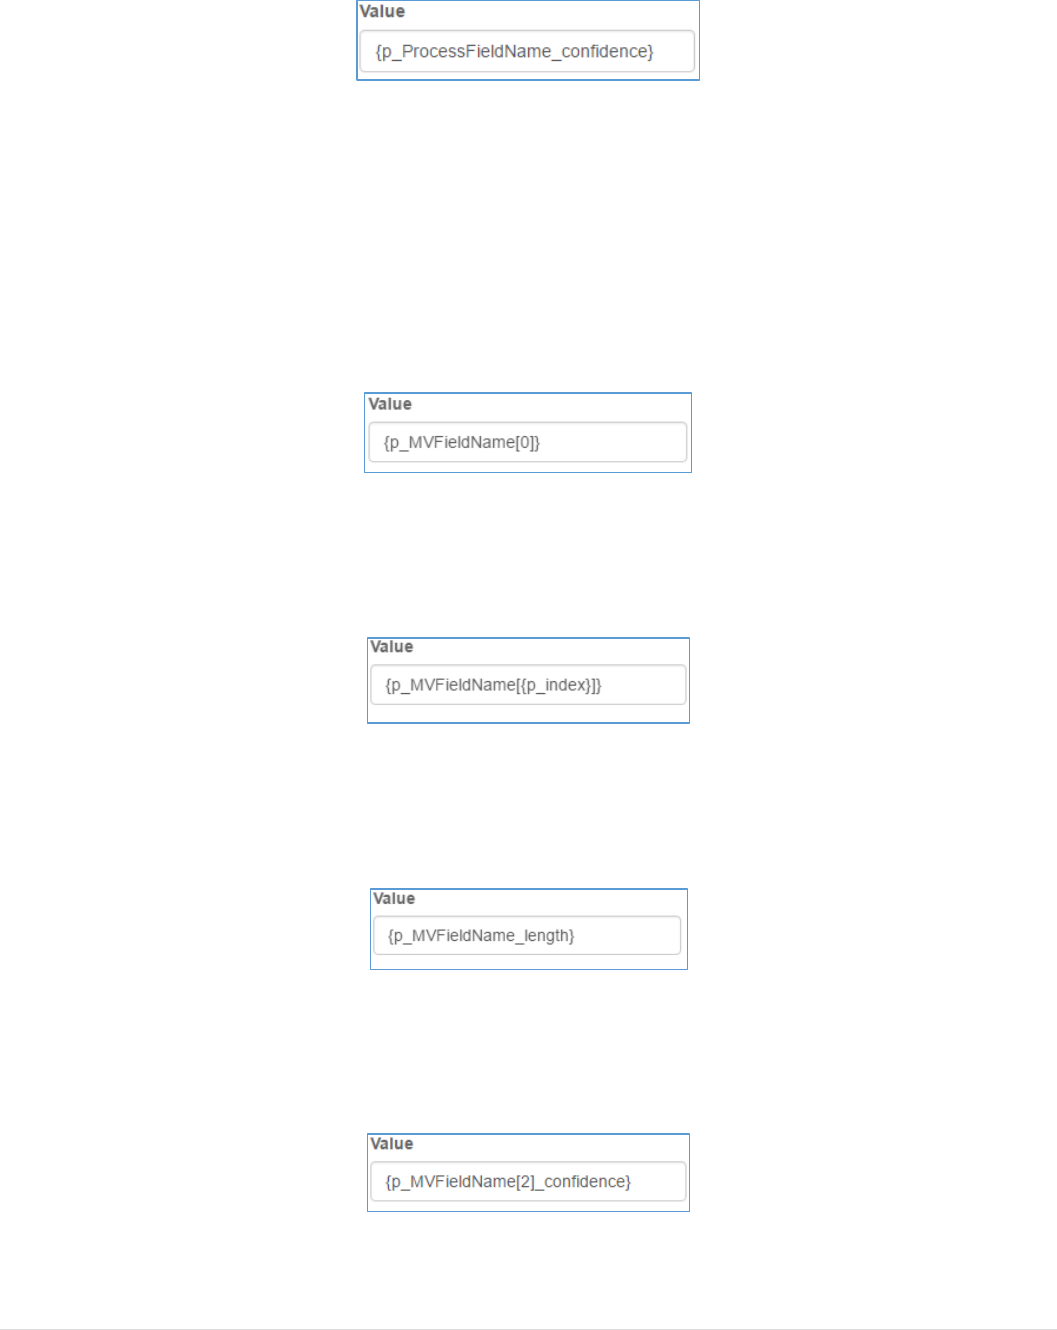
144 Appendix C GlobalCapture Guide
Field Name Notation with Confidence
Included in GlobalCapture is the ability to extract the confidence of a given Field that has passed through
the Classify Node or modified by an end user. This will return a numeric value between 0 and 100, a higher
value meaning that the capture engine is more confident in the value currently held in the Process Field.
Multi-Value Field Notation
GlobalCapture has the ability to access specific indexes of data from within a Multi-Value Field. The way this
S9 Notation functions is as follows:
Multi-Value Field Notation
In the example above an index of 0 is provided within the MVField notation. This will extract the first value
of the array of data. If an index that does not exist is attempted to be accessed an errored Batch state will be
reached.
Multi-Value Field Notation
Above is a slightly more complex example of a basic S9 Notation within a MVField notation, in this case the
value extracted from the “MVFieldName” array will be the based on the numeric value currently stored
within the “index” Process Field.
Multi-Value Field Notation with Length
With a method of extracting specific values from the MVFields, it can become very useful to access the
length of an MVField to ensure that a valid extraction is taking place. By using a trailing underscore followed
by the word “length” you now have access to the exact number of values within the MVField.
Multi-Value Field Notation with Confidence
As previously mentioned MVFields also supports confidence extraction in a similar format to normal Process
Fields.

GlobalCapture Guide Appendix C 145
TableField Notation
Similar to Multi-Value Field notation, TableFields also offer the ability to access row and column data mid
process during your Workflows.
Table Field Notation
Above is a basic example of how to access a specific value from within a TableField. It is important to note
that there are now two indexes used as coordinates of this data. The first index, a 5 in this example, is the
Field ID of the Process Field within that TableField. This points us to the column for which we are planning
on extracting data. On top of that, there is the second index which is simply the index of the array holding
the data, in this case it’s 0 meaning we’re extracting data in the first row of the Table Field.
Table Field Notation with Length
Length is also a critical and supported method of notation for Table Fields. This example attempts to see
how many rows are in the column for the Process Fields with ID 5.
Table Field Notation with a Mathematical Operation
Here is the more complex example to show what notations are really capable of. This example attempts to
extract the confidence of a particular value in our TableField. To focus on this value, it attempts
a mathematical operation within the second index of the TableField. This operation is checking the length of
the Table Field column then subtracting a counter from it to specify get the index. This index is then used to
extract the confidence from that particular piece table cell.
Notation Math
Currently both addition and subtraction are available for S9 Notation-based operations. As seen in the
following examples:
S9 Notation with Notation Mathematics
Naturally the values needed to do math are not all required to be S9 Notations but at least one of the values
included in the string does.

146 Appendix C GlobalCapture Guide
Multi-Value Field Notation with Notation Mathematics
As seen in this example, Sum and Average are also possible with the use of MVFields and TableField
columns. Naturally the MVFields or Tablefield columns needs to contain numeric or decimal data.

GlobalCapture Guide Appendix D 147
Appendix D
Multiple Language Support
In keeping with Square 9’s commitment to global business needs, GlobalCapture OCR can support
documents in a variety of single-byte languages written in Latin, Greek, or Cyrillic scripts.
Configure for Multiple Languages
• To recognize different languages, in your TextOcr.cfg file, place the following settings
(substituting “French” for the supported language of your choice):
[RecognizerParams]
TextLanguage = French
Languages Supported
Abkhaz, Adyghe, Afrikaans, Agul, Albanian, Altaic, Armenian, Avar, Aymara, Azerbaijani
Bashkir, BASIC programming language, Basque, Belarussian, Bemba, Blackfoot, Breton, Bugotu, Bulgarian, Buryat
C/C++ programming language, Catalan, Chamorro, Chechen, Simple chemical formulas, Chukcha, Chuvash, Cobol
programming language, Corsican, Crimean Tatar, Croatian, Crow, Czech
Danish, Dargwa, Dungan, Dutch, English, Eskimo, Esperanto, Estonian, Even, Evenki
Faeroese, Farsi, Fijian, Finnish, Fortran programming language, French, Frisian, Friulian
Scottish Gaelic, Gagauz, Galician, Ganda, German, Greek, Guarani
Hani, Hausa, Hawaiian, Hungarian
Icelandic, Ido, Indonesian, Ingush, Interlingua, Irish, Italian
Java programming language
Kabardian, Kalmyk, Karachay-Balkar, Karakalpak, Kasub, Kawa, Kazakh, Khakas, Khanty, Kikuyu, Kirghiz, Kongo, Koryak, Kpelle,
Kumyk, Kurdish
Lak, Sami (Lappish), Latin, Latvian, Lezgin, Lithuanian, Luba
Macedonian, Macedonian, Malagasy, Malagasy, Malay, Malinke, Maltese, Mansi, Maori, Mari, Maya, Miao, Minangkabau,
Mohawk, Mongol, Mordvin
Nahuatl, Nenets, Nivkh, Nogay, Norwegian, Nyanja
Occidental, for OCR-A and OCR B text types, Ojibway, Ossetian
Papiamento, Pascal programming language, Tok Pisin, Polish, Portuguese, Provencal
Quechua, Rhaeto-Romanic, Romanian, Romany, Ruanda, Rundi, Russian
Samoan, Selkup, Serbian, Shona, Sioux (Dakota), Slovak, Slovenian, Somali, Sorbian, Sotho, Spanish, Sunda, Swahili, Swazi,
Swedish
Tabassaran, Tabassaran, Tagalog, Tahitian, Tajik, Tatar, Tatar, Jingpo, Tongan, Tswana, Tun, Turkish, Turkmen, Tuvan
Udmurt, Uighur, Ukrainian, Uzbek, Welsh, Wolof, Xhosa, Yakut, Yiddish, Zapotec, Zulu

148 Appendix D GlobalCapture Guide
Design Templates and Extract OCR Data in German
