
SonicWall
®
Global System
Management SSL VPN
Administration Guide

Global Management System SSL VPN
Contents
1
About SSL VPN . . . . . . . . . . . . . . . . . . . . . . . . . . . . . . . . . . . . . . . . . . . . . . . . . . . . . . . . . . . . . . . . . . . . . 3
About SSL VPN NetExtender . . . . . . . . . . . . . . . . . . . . . . . . . . . . . . . . . . . . . . . . . . . . . . . . . . . . . . . . . . . . 3
What is SSL VPN NetExtender? . . . . . . . . . . . . . . . . . . . . . . . . . . . . . . . . . . . . . . . . . . . . . . . . . . . . . . 3
Benefits of SSL VPN NetExtender . . . . . . . . . . . . . . . . . . . . . . . . . . . . . . . . . . . . . . . . . . . . . . . . . . . . . 4
NetExtender Concepts . . . . . . . . . . . . . . . . . . . . . . . . . . . . . . . . . . . . . . . . . . . . . . . . . . . . . . . . . . . . . 4
Configuring Users for SSL VPN Access . . . . . . . . . . . . . . . . . . . . . . . . . . . . . . . . . . . . . . . . . . . . . . . . . . . . . 5
Configuring SSL VPN Access for Local Users . . . . . . . . . . . . . . . . . . . . . . . . . . . . . . . . . . . . . . . . . . . . . . . . 6
Configuring SSL VPN Server Behavior . . . . . . . . . . . . . . . . . . . . . . . . . . . . . . . . . . . . . . . . . . . . . . . . . . . 8
SSL VPN Status on Zones . . . . . . . . . . . . . . . . . . . . . . . . . . . . . . . . . . . . . . . . . . . . . . . . . . . . . . . . . . . . . . . 8
SSL VPN Server Settings . . . . . . . . . . . . . . . . . . . . . . . . . . . . . . . . . . . . . . . . . . . . . . . . . . . . . . . . . . . . . . . . 9
About Suite B Cryptography . . . . . . . . . . . . . . . . . . . . . . . . . . . . . . . . . . . . . . . . . . . . . . . . . . . . . . . . . 9
Configuring the SSL VPN Server . . . . . . . . . . . . . . . . . . . . . . . . . . . . . . . . . . . . . . . . . . . . . . . . . . . . . . 9
RADIUS User Settings . . . . . . . . . . . . . . . . . . . . . . . . . . . . . . . . . . . . . . . . . . . . . . . . . . . . . . . . . . . . . . . 10
SSL VPN Client Download URL . . . . . . . . . . . . . . . . . . . . . . . . . . . . . . . . . . . . . . . . . . . . . . . . . . . . . . . . . . 10
Configuring the Virtual Office Web Portal . . . . . . . . . . . . . . . . . . . . . . . . . . . . . . . . . . . . . . . . . . . . . . 11
Portal Settings . . . . . . . . . . . . . . . . . . . . . . . . . . . . . . . . . . . . . . . . . . . . . . . . . . . . . . . . . . . . . . . . . . . . . . . 11
Portal Logo Settings . . . . . . . . . . . . . . . . . . . . . . . . . . . . . . . . . . . . . . . . . . . . . . . . . . . . . . . . . . . . . . . . . . 12
Configuring SSL VPN Client Settings . . . . . . . . . . . . . . . . . . . . . . . . . . . . . . . . . . . . . . . . . . . . . . . . . . . 14
Biometric Authentication . . . . . . . . . . . . . . . . . . . . . . . . . . . . . . . . . . . . . . . . . . . . . . . . . . . . . . . . . . . . . . 14
Configuring Client Settings . . . . . . . . . . . . . . . . . . . . . . . . . . . . . . . . . . . . . . . . . . . . . . . . . . . . . . . . . . . . . 14
Creating an Address Object for the NetExtender Range . . . . . . . . . . . . . . . . . . . . . . . . . . . . . . . . . 15
Configuring the Default Device Profile . . . . . . . . . . . . . . . . . . . . . . . . . . . . . . . . . . . . . . . . . . . . . . . 15
Configuring the SonicPoint L3 Management Default Device Profile . . . . . . . . . . . . . . . . . . . . . . . . 20
Configuring SSL VPN Client Routes . . . . . . . . . . . . . . . . . . . . . . . . . . . . . . . . . . . . . . . . . . . . . . . . . . . . 22
Configuring Tunnel All Mode . . . . . . . . . . . . . . . . . . . . . . . . . . . . . . . . . . . . . . . . . . . . . . . . . . . . . . . . . . . 22
Adding Client Routes . . . . . . . . . . . . . . . . . . . . . . . . . . . . . . . . . . . . . . . . . . . . . . . . . . . . . . . . . . . . . . . . . 22
Configuring Virtual Office . . . . . . . . . . . . . . . . . . . . . . . . . . . . . . . . . . . . . . . . . . . . . . . . . . . . . . . . . . . 23
Enabling Plugin DLLs . . . . . . . . . . . . . . . . . . . . . . . . . . . . . . . . . . . . . . . . . . . . . . . . . . . . . . . . . . . . . . . . . . 25
Creating Bookmarks with Custom SSO Credentials . . . . . . . . . . . . . . . . . . . . . . . . . . . . . . . . . . . . . . . . . 26
Using Remote Desktop Bookmarks . . . . . . . . . . . . . . . . . . . . . . . . . . . . . . . . . . . . . . . . . . . . . . . . . . . . . . 26
SonicWall Support . . . . . . . . . . . . . . . . . . . . . . . . . . . . . . . . . . . . . . . . . . . . . . . . . . . . . . . . . . . . . . . . . 28
About This Document . . . . . . . . . . . . . . . . . . . . . . . . . . . . . . . . . . . . . . . . . . . . . . . . . . . . . . . . . . . . . . . . . 29
Contents

Global Management System SSL VPN
About SSL VPN
1
3
About SSL VPN
This section provides information on how to configure the SSL VPN features on the SonicWall network security
appliance. SonicWall’s SSL VPN features provide secure remote access to the network using the NetExtender
client.
NetExtender is an SSL VPN client for Windows, Mac, or Linux users that is downloaded transparently and that
allows you to run any application securely on the company’s network. It uses Point-to-Point Protocol (PPP).
NetExtender allows remote clients seamless access to resources on your local network. Users can access
NetExtender two ways:
• Logging into the Virtual Office web portal provided by the SonicWall network security appliance and
clicking NetExtender.
• Launching the standalone NetExtender client.
The NetExtender standalone client is installed the first time you launch NetExtender. Thereafter, it can be
accessed directly from the Start menu on Windows systems, from the Application folder or dock on MacOS
systems, or by the path name or from the shortcut bar on Linux systems.
Topics:
• About SSL VPN NetExtender
• Configuring Users for SSL VPN Access
About SSL VPN NetExtender
This section provides an introduction to the SSL VPN NetExtender feature as managed within SonicWall
®
Global
System Management Global Management System (GMS).
Topics:
• What is SSL VPN NetExtender?
• Benefits of SSL VPN NetExtender
• NetExtender Concepts
What is SSL VPN NetExtender?
SonicWall’s SSL VPN NetExtender feature is a transparent software application for Windows, Mac, and Linux
users that enables remote users to securely connect to the remote network. With NetExtender, remote users
can securely run any application on the remote network. Users can upload and download files, mount network
drives, and access resources as if they were on the local network. The NetExtender connection uses a
Point-to-Point Protocol (PPP) connection.

Global Management System SSL VPN
About SSL VPN
4
Benefits of SSL VPN NetExtender
NetExtender provides remote users with full access to your protected internal network. The experience is
virtually identical to that of using a traditional IPSec VPN client, but NetExtender does not require any manual
client installation. Instead, the NetExtender Windows client is automatically installed on a remote user’s PC by
an ActiveX control when using the Internet Explorer browser, or with the XPCOM plug-in when using Firefox. On
MacOS systems, supported browsers use Java controls to automatically install NetExtender from the Virtual
Office portal. Linux systems can also install and use the NetExtender client.
After installation, NetExtender automatically launches and connects a virtual adapter for secure SSL VPN
point-to-point access to permitted hosts and subnets on the internal network.
NetExtender Concepts
The following sections describe advanced NetExtender concepts:
• Stand-Alone Client
• Client Routes
• Tunnel All Mode
• Connection Scripts
• Proxy Configuration
Stand-Alone Client
NetExtender is a browser-installed lightweight application that provides comprehensive remote access without
requiring users to manually download and install the application. The first time a user launches NetExtender,
the NetExtender stand-alone client is automatically installed on the user’s PC or Mac. The installer creates a
profile based on the user’s login information. The installer window then closes and automatically launches
NetExtender. If the user has a legacy version of NetExtender installed, the installer first uninstalls the old
NetExtender and installs the new version.
After the NetExtender stand-alone client has been installed, Windows users can launch NetExtender from their
PC’s Start > Programs menu and configure NetExtender to launch when Windows boots. Mac users can launch
NetExtender from their system Applications folder, or drag the icon to the dock for quick access. On Linux
systems, the installer creates a desktop shortcut in /usr/share/NetExtender. This can be dragged to the
shortcut bar in environments like Gnome and KDE.
Client Routes
NetExtender client routes are used to allow and deny access for SSL VPN users to various network resources.
Address objects are used to easily and dynamically configure access to network resources.
Tunnel All Mode
Tunnel All mode routes all traffic to and from the remote user over the SSL VPN NetExtender tunnel—including
traffic destined for the remote user’s local network. This is accomplished by adding the following routes to the
remote client’s route table:

Global Management System SSL VPN
About SSL VPN
5
NetExtender also adds routes for the local networks of all connected Network Connections. These routes are
configured with higher metrics than any existing routes to force traffic destined for the local network over the
SSL VPN tunnel instead. For example, if a remote user is has the IP address 10.0.67.64 on the 10.0.*.* network,
the route 10.0.0.0/255.255.0.0 is added to route traffic through the SSL VPN tunnel.
Tunnel All mode is configured on the SSL VPN > Client Routes page.
Connection Scripts
SonicWall SSL VPN provides users with the ability to run batch file scripts when NetExtender connects and
disconnects. The scripts can be used to map or disconnect network drives and printers, launch applications, or
open files or Web sites. NetExtender Connection Scripts can support any valid batch file commands.
Proxy Configuration
SonicWall SSL VPN supports NetExtender sessions using proxy configurations. Currently, only HTTPS proxy is
supported. When launching NetExtender from the Web portal, if your browser is already configured for proxy
access, NetExtender automatically inherits the proxy settings. The proxy settings can also be manually
configured in the NetExtender client preferences. NetExtender can automatically detect proxy settings for
proxy servers that support the Web Proxy Auto Discovery (WPAD) Protocol.
NetExtender provides three options for configuring proxy settings:
• Automatically detect settings - To use this setting, the proxy server must support Web Proxy Auto
Discovery Protocol (WPAD)) that can push the proxy settings script to the client automatically.
• Use automatic configuration script - If you know the location of the proxy settings script, you can select
this option and provide the URL of the script.
• Use proxy server - You can use this option to specify the IP address and port of the proxy server.
Optionally, you can enter an IP address or domain in the BypassProxy field to allow direct connections to
those addresses and bypass the proxy server. If required, you can enter a user name and password for
the proxy server. If the proxy server requires a username and password, but you do not specify them, a
NetExtender pop-up window prompts you to enter them when you first connect.
When NetExtender connects using proxy settings, it establishes an HTTPS connection to the proxy server
instead of connecting to the SonicWall security appliance. server directly. The proxy server then forwards traffic
to the SSL VPN server. All traffic is encrypted by SSL with the certificate negotiated by NetExtender, of which the
proxy server has no knowledge. The connecting process is identical for proxy and non-proxy users.
Configuring Users for SSL VPN Access
For users to be able to access SSL VPN services, they must be assigned to the SSLVPN Services group. Users who
attempt to login through the Virtual Office who do not belong to the SSLVPN Services group are denied access.
Tunnel All Mode Routes
IP Address Subnet Mask
0.0.0.0 0.0.0.0
0.0.0.0 128.0.0.0
128.0.0.0 128.0.0.0
NOTE: Complete instructions for installing NetExtender on a SonicWall appliance can be found in How to
setup SSL-VPN feature (NetExtender Access) on SonicOS 5.9 & above (SW10657) in the Knowledge Base.

Global Management System SSL VPN
About SSL VPN
6
The maximum number of SSL VPN concurrent users for each SonicWall network security appliance model
supported is shown in Maximum number of concurrent SSL VPN users.
Configuring SSL VPN Access for Local
Users
To configure users in the local user database for SSL VPN access, you must add the users to the SSLVPN Services
user group.
To configure SSL VPN access for local users:
1 Navigate to the Users > Local Users page.
2 Click the Configure icon for the user you want to edit, or click Add to create a new user. The Edit User or
Add User dialog displays in the Settings view.
VIDEO: The video, How to configure SSL VPN, also explains the procedure for configuring NetExtender.
Maximum Number of Concurrent SSL VPN Users
SonicWall
appliance
model
Maximum
concurrent SSL
VPN connections
SonicWall
appliance
model
Maximum
concurrent SSL
VPN connections
SonicWall
appliance
model
Maximum
concurrent SSL
VPN connections
SM 9800 3000 NSA 6600 1500 TZ600 200
SM 9600 3000 NSA 5600 1000 TZ500/TZ500 W 150
SM 9400 3000 NSA 4600 500 TZ400/TZ400 W 100
SM 9200 3000 NSA 3600 350 TZ300/TZ300 W 50
NSA 2600 250
SOHO W 50

Global Management System SSL VPN
About SSL VPN
7
3 Click the Groups view.
4 In the User Groups column, select SSLVPN Services.
5 Click the Right Arrow to move it to the Member Of column.
6 Click the VPN Access view. The VPN Access view configures which network resources VPN users (GVC,
NetExtender, or Virtual Office bookmarks) can access.
7 Select one or more network address objects or groups from the Networks list and click the Right Arrow
to move them to the Access List column.
To remove the user’s access to a network address objects or groups, select the network from the Access
List, and click the Left Arrow.
8 Click Update.
NOTE: The VPN Access view affects the ability of remote clients using GVC, NetExtender, and SSL
VPN Virtual Office bookmarks to access network resources. To allow GVC, NetExtender, or Virtual
Office users to access a network resource, the network address objects or groups must be added to
the Access List in the VPN Access view.

Global Management System SSL VPN
Configuring SSL VPN Server Behavior
2
8
Configuring SSL VPN Server
Behavior
The SSL VPN > Server Settings page is used to configure details of the SonicWall security appliance’s behavior
as an SSL VPN server.
The server settings are configurable with IPv4 and IPv6 addresses. The configurations for both are nearly
identical.
Topics:
• SSL VPN Status on Zones
• SSL VPN Server Settings
• RADIUS User Settings
• SSL VPN Client Download URL
SSL VPN Status on Zones
This section displays the SSL VPN Access status on each zone:
• Green indicates active SSL VPN status.
• Red indicates inactive SSL VPN status.
To enable or disable SSL VPN access on a zone, click the Network > Zones link to jump to the Edit Zone window.

Global Management System SSL VPN
Configuring SSL VPN Server Behavior
9
SSL VPN Server Settings
Topics:
• About Suite B Cryptography
• Configuring the SSL VPN Server
About Suite B Cryptography
The GMS supports Suite B cryptography, which is a set of cryptographic algorithms promulgated by the National
Security Agency as part of its Cryptographic Modernization Program. It serves as an interoperable cryptographic
base for both classified and unclassified information. Suite B cryptography is approved by National Institute of
Standards and Technology (NIST) for use by the U.S. Government.
Most of the Suite B components are adopted from the FIPS standard:
• Advanced Encryption Standard (AES) with key sizes of 128 and 256 bits (provides adequate protection
for classified information up to the SECRET level).
• Elliptic Curve Digital Signature Algorithm (ECDSA) - digital signatures (provides adequate protection for
classified information up to the SECRET level).
• Elliptic Curve Diffie-Hellman (ECDH) - key agreement (provides adequate protection for classified
information up to the SECRET level).
• Secure Hash Algorithm 2 (SHA-256 and SHA-384) - message digest (provides adequate protection for
classified information up to the TOP SECRET level).
Configuring the SSL VPN Server
The following settings configure the SSL VPN server:
• SSL VPN Port - Enter the SSL VPN port number in the field. The default is 4433.
• Certificate Selection – From this drop-down menu, select the certificate that is used to authenticate SSL
VPN users. The default method is Use Self signed Certificate.
To manage certificates, go to the System > Certificates page.
• User Domain – Enter the user’s domain, which must match the domain field in the NetExtender client.
The default is LocalDomain.
• Enable Web Management over SSLVPN – To enable web management over SSL VPN, select Enabled
from this drop-down menu. The default is Disabled.
NOTE: There is also a Suite A that is defined by the NSA, but is used primarily in applications where Suite B
is not appropriate.
NOTE: On NSA 2600 and above appliances, you can configure the Suite B mode and specify cipher
preferences in the following two settings.
Global Management System SSL VPN
Configuring SSL VPN Server Behavior
10
• Enable SSH Management over SSLVPN – To enable SSH management over SSL VPN, select Enabled from
this drop-down menu. The default is Disabled.
• Inactivity Timeout (minutes) – Enter the number of minutes of inactivity before logging out the user.
The default is 10 minutes.
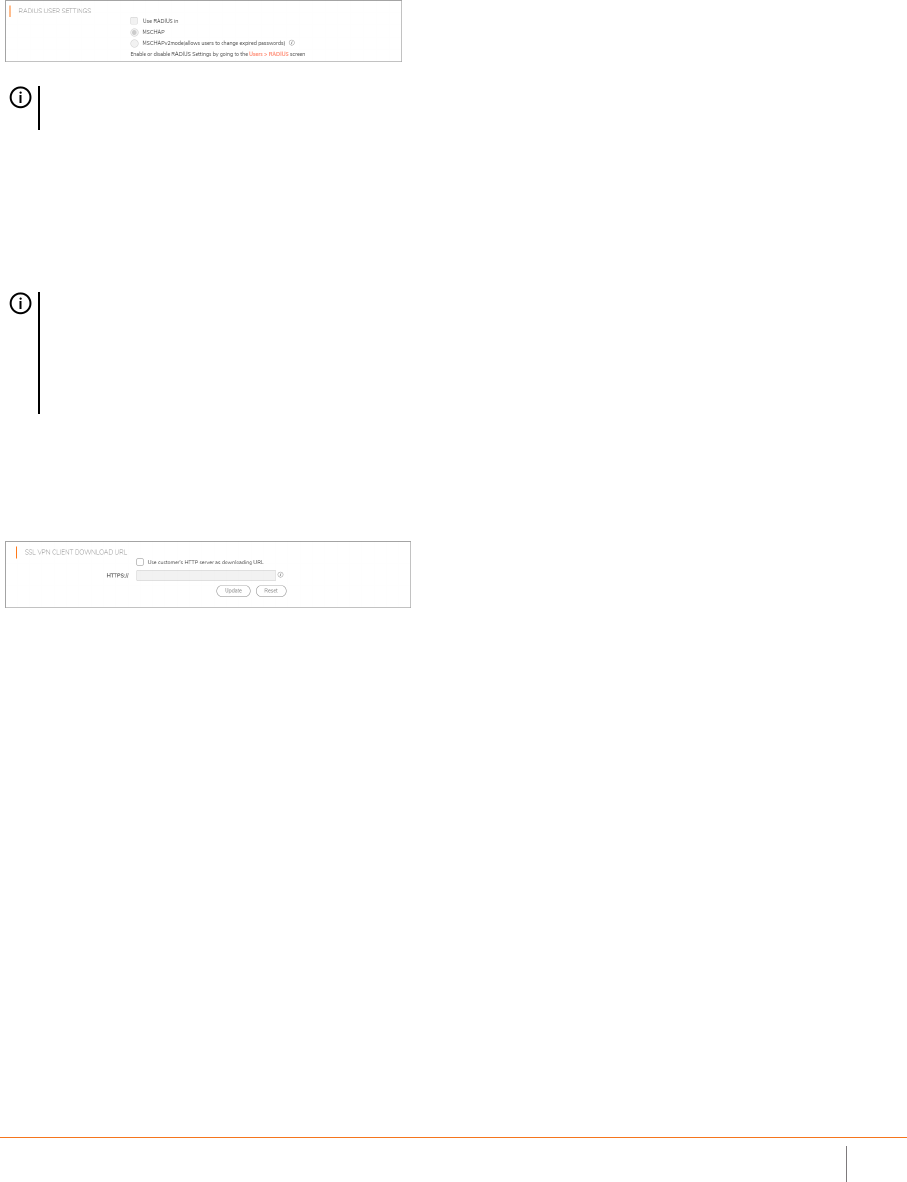
RADIUS User Settings
Select Use RADIUS in to have RADIUS use MSCHAP (or MSCHAPv2) mode. Enabling MSCHAP-mode RADIUS
allows users to change expired passwords at login time. Choose between these two modes:
• MSCHAP
• MSCHAPv2
SSL VPN Client Download URL
This section allows you to download client SSL VPN files to your HTTP server.
Select Use customer’s HTTP server as downloading URL: (http://) to enter your SSL VPN client download URL
in the provided field.
NOTE: This option is only available when either RADIUS or LDAP is configured to authenticate SSL VPN
users.
NOTE: In LDAP, password updates can only be done when using either Active Directory with TLS and
binding to it using an administrative account or Novell eDirectory.
If this option is set when is selected as the authentication method of log in on the Users > Settings page,
but LDAP is not configured in a way that allows password updates, then password updates for SSL VPN
users are performed using MSCHAP-mode RADIUS after using LDAP to authenticate the user.

Global Management System SSL VPN
Configuring the Virtual Office Web Portal
3
11
Configuring the Virtual Office Web
Portal
The SSL VPN > Portal Settings page is used to configure the appearance and functionality of the SSL VPN
Virtual Office web portal. The Virtual Office portal is the website that uses log in to launch NetExtender. It can
be customized to match any existing company website or design style.
IPv4 and IPv6 IP addresses are accepted/displayed in the Portal Settings screen.
Topics:
• Portal Settings
• Portal Logo Settings
Portal Settings
These options customize what the user sees when attempting to log in:
• Portal Site Title - Enter the text displayed in the top title of the web browser in this field. The default is
SonicWall - Virtual Office.
• Portal Banner Title - Enter the text displayed next to the logo at the top of the page in this field. The
default is Virtual Office.
• Home Page Message - Enter the HTML code that is displayed above the NetExtender icon. To:
• See how the message displays, click Preview to launch a pop-up window that displays the HTML
code.

Global Management System SSL VPN
Configuring the Virtual Office Web Portal
12
• Revert to the default message, click Example Template to launch a pop-up window that displays
the HTML code.
• Login Message - The HTML code that is displayed when users are prompted to log in to the Virtual
Office. To:
• See how the message displays, click Preview to launch a pop-up window that displays the HTML
code.
• Revert to the default message, click Example Template to launch a pop-up window that displays
the HTML code.
The following options customize the functionality of the Virtual Office portal:
• Launch NetExtender after login - Select to launch NetExtender automatically after a user logs in. This
option is not selected by default.
• Display Import Certificate Button - Select to display an Import Certificate button on the Virtual Office
page. This initiates the process of importing the firewall’s self-signed certificate onto the web browser.
This option is not selected by default.
• Enable HTTP meta tags for cache control recommended) - Select to insert into the browser HTTP tags
that instruct the web browser not to cache the Virtual Office page. This option is not selected by default.
• Display UTM management link on SSL VPN portal (not recommended) – Select to display the SonicWall
appliance’s management link on the SSL VPN portal. This option is not selected by default.
• Example Template - Resets the Home Page Message and Login Message fields to the default example
template.
• Preview - Launch a pop-up window that displays the HTML code.
Portal Logo Settings
This section allows you to customize the logo displayed at the top of the Virtual Office portal:
• Default Portal Logo – Displays the default portal logo.
• Use Default SonicWall Logo – Select to use the SonicWall logo supplied with the appliance. This option is
not selected by default.
NOTE: This option only applies to the Internet Explorer browser on PCs running Windows when
Use Self-signed Certificate is selected from the Certificate Selection drop-down menu on the SSL
VPN > Server Settings page.
NOTE: SonicWall recommends enabling this option.
NOTE: SonicWall does not recommend enabling this option.

Global Management System SSL VPN
Configuring the Virtual Office Web Portal
13
• Customized Logo (Input URL of the Logo) — The Customized Logo field is used to display a logo other
than the SonicWall logo at the top of the Virtual Office portal. Enter the URL of the logo in the
Customized Logo field. The logo must be in GIF format of size 155 x 36, and a transparent or light
background is recommended.
TIP: The logo must be in GIF format of size 155 x 36; a transparent or light background is
recommended.

Global Management System SSL VPN
Configuring SSL VPN Client Settings
4
14
Configuring SSL VPN Client
Settings
The SSL VPN > Client Settings page allows you to edit the Default Device Profile to enable SSL VPN access on
zones, configure client routes, and configure the client DNS and NetExtender settings. The SSL VPN > Client
Settings page displays the configured IPv4 and IPv6 network addresses and zones that have SSL VPN access
enabled.
You can also edit the SonicPoint Layer 3 Management Default Device Profile on this page.
NetExtender IP address ranges are configured by first creating an address object for the NetExtender IP address
range, and then using this address object when configuring one of the Device Profiles. See Creating an Address
Object for the NetExtender Range.
Topics:
• Biometric Authentication
• Configuring Client Settings
Biometric Authentication
The GMS introduces support for biometric authentication in conjunction with SonicWall Mobile Connect.
Mobile Connect is an app that allows users to securely access private networks from a mobile device. Mobile
Connect 4.0 supports using finger touch for authentication as a substitute for username and password.
The GMS provides configuration settings on the SSL VPN > Client Settings page to allow this method of
authentication when using Mobile Connect to connect to the firewall.
After configuring biometric authentication on the SSL VPN > Client Settings page, on the client smart phone or
other mobile device, enable Touch ID (iOS) or Fingerprint Authentication (Android).
IMPORTANT: To use this feature, ensure that Mobile Connect 4.0 or higher is installed on the mobile
device, and configure it to connect with the firewall.

Global Management System SSL VPN
Configuring SSL VPN Client Settings
15
Configuring Client Settings
The following tasks are configured on the SSL VPN > Client Settings page:
• Creating an Address Object for the NetExtender Range
• Configuring the Default Device Profile
Creating an Address Object for the
NetExtender Range
You can create address objects for both an IPv4 address range and an IPv6 address range to be used in the SSL
VPN > Client Settings configuration.
The address range configured in the address object defines the IP address pool from which addresses are
assigned to remote users during NetExtender sessions. The range needs to be large enough to accommodate
the maximum number of concurrent NetExtender users you wish to support plus one (for example, the range
for 15 users requires 16 addresses, such as 192.168.168.100 to 192.168.168.115).
To create an address object for the NetExtender IP address range:
1 Navigate to the Firewall > Address Objects page.
2 Click Add New Address Object. The Add Address Object dialog displays.
3 For Name, type in a descriptive name for the address object.
4 For Zone Assignment, select SSLVPN from the drop-down menu.
5 For Type, select Range. The dialog changes adding starting and ending IP addresses.
6 In the Starting IP Address field, type in the lowest IP address in the range you want to use.
7 In the Ending IP Address field, type in the highest IP address in the range you want to use.
8 Click Update. When the address object has been added, a message displays.
9 Optionally, repeat Step 3 through Step 8 to create an address object for an IPv6 address range.
10 Click Close.
NOTE: For how to configure SSL VPN settings for SonicPoint management over SSL VPN, see Creating an
Address Object for the NetExtender Range.
NOTE: In cases where there are other hosts on the same segment as the SSL VPN appliance, the address
range must not overlap or collide with any assigned addresses.
NOTE: The IP address range must be on the same subnet as the interface used for SSL VPN services.

Global Management System SSL VPN
Configuring SSL VPN Client Settings
16
Configuring the Default Device Profile
Edit the Default Device Profile to select the zones and NetExtender address objects, configure client routes, and
configure the client DNS and NetExtender settings.
SSL VPN access must be enabled on a zone before users can access the Virtual Office web portal. SSL VPN
Access can be configured on the Network > Zones page by clicking the Configure icon for the zone.
Topics:
• Configuring the Settings view
• Configuring the Client Routes view
• Configuring the Client Settings view
Configuring the Settings view
To configure the Settings view of the Default Device Profile:
1 Navigate to Default Device Profile section of the SSL VPN > Client Settings page.
2 Click Configure for the Default Device Profile. The Edit Device Profile dialog displays.
3 For the zone binding for this profile, on the Settings view, select SSLVPN or a custom zone from the Zone
IP V4 drop-down menu.
4 From the Network Address IP V4 drop-down menu, select the IPv4 NetExtender address object that you
created. See Creating an Address Object for the NetExtender Range for instructions. This setting selects
the IP Pool and zone binding for this profile. The NetExtender client gets the IP address from this address
object if it matches this profile.
5 Select SSLVPN or a custom zone from the Zone IP V6 drop-down menu. This is the zone binding for this
profile.
6 From the Network Address IP V6 drop-down menu, select the IPv6 NetExtender address object that you
created.
7 Click the Client Routes view to proceed with the client settings configuration. See Configuring the Client
Routes view.
8 To save settings and close the dialog, click Update.
Configuring the Client Routes view
The Client Routes view allows you to control the network access allowed for SSL VPN users. The NetExtender
client routes are passed to all NetExtender clients and are used to govern which private networks and resources
remote users can access through the SSL VPN connection.
The following tasks are configured on the Client Routes view:
NOTE: For the GMS to terminate SSL VPN sessions, HTTPS for Management or User Login must be
enabled on the Network > Interfaces page, in the Edit Interface dialog for the WAN interface.
NOTE: The Name and Description of the Default Device Profile cannot be changed.

Global Management System SSL VPN
Configuring SSL VPN Client Settings
17
• Configuring Tunnel All Mode
• Adding Client Routes
Configuring Tunnel All Mode
Select Enabled from the Tunnel All Mode drop-down menu to force all traffic for NetExtender users over the
SSL VPN NetExtender tunnel—including traffic destined for the remote user’s local network. This is
accomplished by adding the following routes to the remote client’s route table:
NetExtender also adds routes for the local networks of all connected Network Connections. These routes are
configured with higher metrics than any existing routes to force traffic destined for the local network over the
SSL VPN tunnel instead. For example, if a remote user is has the IP address 10.0.67.64 on the 10.0.*.*
network, the route 10.0.0.0/255.255.0.0 is added to route traffic through the SSL VPN tunnel.
To configure SSL VPN NetExtender users and groups for Tunnel All Mode:
1 Navigate to the Users > Local Users or Users > Local Groups page.
2 Click Configure for an SSL VPN NetExtender user or group. The Edit Group dialog displays.
3 Click the VPN Access view.
4 Select the WAN RemoteAccess Networks address object.
5 Click the Right Arrow.
6 Click Update.
7 Repeat Step 1 through Step 6 for all local users and groups that use SSL VPN NetExtender.
Routes to be Added to Client’s Route Table
IP Address Subnet Mask
0.0.0.0 0.0.0.0
0.0.0.0 128.0.0.0
128.0.0.0 128.0.0.0
NOTE: To configure Tunnel All Mode, you must also configure an address object for 0.0.0.0, and assign
SSL VPN NetExtender users and groups to have access to this address object.

Global Management System SSL VPN
Configuring SSL VPN Client Settings
18
Adding Client Routes
Client Routes are used to configure access to network resources for SSL VPN users.
To configure Client Routes for SSL VPN:
1 Navigate to Default Device Profile section of the SSL VPN > Client Settings page.
2 Click Configure for the Default Device Profile. The Edit Device Profile dialog displays.
3 Click the Client Routes view.
4 From the Networks list, select the address object to which you want to allow SSL VPN access.
5 Click the Right Arrow to move the address object to the Client Routes list.
6 Repeat Step 4 and Step 5 until you have moved all the address objects you want to use for Client Routes.
Creating client routes causes access rules allowing this access to be created automatically. Alternatively,
you can manually configure access rules for the SSL VPN zone on the Firewall > Access Rules page.
To configure SSL VPN NetExtender users and groups to access Client Routes:
1 Navigate to the Users > Local Users or Users > Local Groups page.
2 Click Configure for an SSL VPN NetExtender user or group.
3 Click the VPN Access view.
4 Select the address object for the Client Route.
5 Click the Right Arrow.
6 Click Update.
7 Repeat Step 1 through Step 6 for all local users and groups that use SSL VPN NetExtender.
NOTE: After configuring Client Routes for SSL VPN, you must also configure all SSL VPN NetExtender
users and user groups to be able to access the Client Routes on the Users > Local Users or Users >
Local Groups pages.
IMPORTANT: Add the NetExtender SSL VPN gateway to the DPI SSL excluded IP addresses.

Global Management System SSL VPN
Configuring SSL VPN Client Settings
19
Configuring the Client Settings view
NetExtender client settings are configured in the Edit Device Profile dialog.
To configure Client Settings:
1 Navigate to the Default Device Profile section of the SSL VPN > Client Settings page.
2 Click Configure for the Default Device Profile. The Edit Device Profile dialog displays.
3 Click the Client Settings view.
4 In the DNS Server 1 field, either:
• Enter the IP address of the primary DNS server.
• Click the Default DNS Settings to use the default settings for both the DNS Server 1 and DNS
Server 2 fields. The fields are populated automatically.
5 (Optional) In the DNS Server 2 field, if you did not click Default DNS Settings, enter the IP address of the
backup DNS server.
6 (Optional) In the DNS Search List field:
a Enter the IP address for a DNS server.
b Click Add to add it to the list below.
c Repeat Step a and Step b as many times as necessary.
Use the up and down arrow buttons to scroll through the list, as needed.
NOTE: Both IP v4 and IP v6 are supported.

Global Management System SSL VPN
Configuring SSL VPN Client Settings
20
To remove an address from the list, select it, and then click Remove.
7 (Optional) In the WINS Server 1 field, enter the IP address of the primary WINS server.
8 (Optional) In the WINS Server 2 field, enter the IP address of the backup WINS server.
9 To customize the behavior of NetExtender when users connect and disconnect, select Enabled or
Disabled for each of the following settings under NetExtender Client Settings. By default, all have been
set to Disabled.
• Enable Client Autoupdate - The NetExtender client checks for updates every time it is launched.
• Exit Client After Disconnect - The NetExtender client exits when it becomes disconnected from
the SSL VPN server. To reconnect, users have to either return to the SSL VPN portal or launch
NetExtender from their Programs menu.
• Allow Touch ID on IOS devices – The NetExtender client allows Touch ID authentication on IOS
smart phones.
• Allow Fingerprint Authentication on Android devices – The NetExtender client allows fingerprint
authentication on Android devices.
• Enable NetBIOS over SSL VPN – The NetExtender client allows NetBIOS protocol.
• Uninstall Client After Exit - The NetExtender client uninstalls when it becomes disconnected from
the SSL VPN server. To reconnect, users have to return to the SSL VPN portal.
• Create Client Connection Profile - The NetExtender client creates a connection profile recording
the SSL VPN Server name, the Domain name, and optionally the username and password.
10 To provide flexibility in allowing users to cache their usernames and passwords in the NetExtender
client, select one of these actions from the User Name & Password Caching field. These options enable
you to balance security needs against ease of use for users.
• Allow saving of user name only
• Allow saving of user name & password
• Prohibit saving of user name & password
11 When finished on all views, click Update.
Configuring the SonicPoint L3 Management
Default Device Profile
The Default Device Profile for SonicPointN L3 settings are configured in the Edit Device Profile dialog.
NOTE: Only IPv4 is supported.

Global Management System SSL VPN
Configuring SSL VPN Client Settings
21
To configure Client Settings:
1 Navigate to the SonicPoint L3 Management Default Device Profile section of the SSL VPN > Client
Settings page.
2 Click Configure for the Default Device Profile. The Edit Device Profile dialog displays.
3 For the zone binding for this profile, on the Settings view, select SSLVPN or a custom zone from the Zone
IP V4 drop-down menu.
4 From the Network Address IP V4 drop-down menu, select the IPv4 NetExtender address object that you
created. See Creating an Address Object for the NetExtender Range for instructions. This setting selects
the IP Pool and zone binding for this profile. The NetExtender client gets the IP address from this address
object if it matches this profile.
5 Click the Client Routes view.
6 From the Networks list, select the address object to which you want to allow SSL VPN access.
7 Click the Right Arrow to move the address object to the Client Routes list.
8 Repeat Step 6 and Step 7 until you have moved all the address objects you want to use for Client Routes.
Creating client routes causes access rules allowing this access to be created automatically. Alternatively,
you can manually configure access rules for the SSL VPN zone on the Firewall > Access Rules page. For
more information, see Firewall > Access Rules on page.
9 Click the SP L3 Settings view.
10 Select an interface from the WLAN Tunnel Interface drop-down menu.
11 Click Update.
NOTE: The Name and Description of the Default Devices Profile for SonicPointN cannot be
changed.
NOTE: After configuring Client Routes for SSL VPN, you must also configure all SSL VPN NetExtender
users and user groups to be able to access the Client Routes on the Users > Local Users or Users >
Local Groups pages.

Global Management System SSL VPN
Configuring SSL VPN Client Routes
5
22
Configuring SSL VPN Client Routes
The SSL VPN > Client Routes page allows the administrator to control the network access allowed for SSL VPN
users. The NetExtender client routes are passed to all NetExtender clients and are used to govern which private
networks and resources remote users can access through the SSL VPN connection.
The following tasks are configured on SSL VPN > Client Routes page:
• Configuring Tunnel All Mode
• Adding Client Routes
Configuring Tunnel All Mode
Select Enabled from the Tunnel All Mode drop-down menu to force all traffic for NetExtender users over the
SSL VPN NetExtender tunnel—including traffic destined for the remote user’s local network. This is
accomplished by adding the following routes to the remote client’s route table:
NetExtender also adds routes for the local networks of all connected Network Connections. These routes are
configured with higher metrics than any existing routes to force traffic destined for the local network over the
SSL VPN tunnel instead. For example, if a remote user is has the IP address 10.0.67.64 on the 10.0.*.*
network, the route 10.0.0.0/255.255.0.0 is added to route traffic through the SSL VPN tunnel.
Adding Client Routes
The Add client routes drop-down menu is used to configure access to network resources for SSL VPN users.
Select the address object to which you want to allow SSL VPN access. Alternatively, you can manually configure
access rules for the SSL VPN zone on the Firewall > Access Rules page. For more information, see Configuring
Access Rules.
Additional Routes
IP Address Subnet Mask
0.0.0.0 0.0.0.0
0.0.0.0 128.0.0.0
128.0.0.0 128.0.0.0

Global Management System SSL VPN
Configuring Virtual Office
6
23
Configuring Virtual Office
The SSL VPN > Virtual Office page displays the Virtual Office web portal inside of the GMS management
interface.
To configure the SSL VPN > Virtual Office page:
1 Navigate to the SSL VPN > Virtual Office page.
2 Click Add. The Add Portal Bookmark window displays.
When user bookmarks are defined, you see the defined bookmarks from the SonicWall SSL VPN Virtual
Office home page. Individual members are not able to delete or modify bookmarks created by the
administrator.
3 Type a descriptive name for the bookmark in the Bookmark Name field.
4 Enter the fully qualified domain name (FQDN) or the IPv4 address of a host machine on the LAN in the
Name or IP Address field. In some environments you can enter the host name only, such as when
creating a VNC bookmark in a Windows local network.
Some services can run on non-standard ports, and some expect a path when connecting. Depending on
the choice in the Service field, format the Name or IP Address field similar to one of the examples shown
in the following table:

Global Management System SSL VPN
Configuring Virtual Office
24
5 For the specific service you select from the Service drop-down menu, additional fields could appear. Fill
in the information for the service you selected. Select one of the following service types from the Service
drop-down menu:
• Terminal Services (RDP)
• In the Screen Size drop-down menu, select the default terminal services screen size to be
used when users execute this bookmark. Because different computers support different
screen sizes, when you use a remote desktop application, you should select the size of the
screen on the computer from which you are running a remote desktop session.
Additionally, you might want to provide a path to where your application resides on your
remote computer by typing the path in the Application and Path field.
• In the Colors drop-down menu, select the default color depth for the terminal service
screen when users execute this bookmark.
• Optionally enter the local path for this application in the Application and Path (optional)
field.
• In the Start in the following folder field, optionally enter the local folder in which to
execute application commands.
• Select Login as console/admin session to allow login as console or admin. Login as admin
replaces login as console in RDC 6.1 and newer.
Name or IP Address Field Examples
Service Type Format Example for Name or IP Address Field
RDP - (HTML5-RDP) IP Address
IP:Port (non-standard)
FQDN
Host name
10.20.30.4
10.20.30.4:6818
JBJONES-PC.sv.us.SonicWall.com
JBJONES-PC
VNC IP Address
IP:Port (mapped to session)
FQDN
Host name
Note: Do not use session or
display number instead of port.
10.20.30.4
10.20.30.4:5901 (mapped to session 1)
JBJONES-PC.sv.us.SonicWall.com
JBJONES-PC
Note: Do not use 10.20.30.4:1
Tip: For a bookmark to a Linux server, see the Tip
below this table.
Telnet IP Address
IP:Port (non-standard)
FQDN
Host name
10.20.30.4
10.20.30.4:6818
JBJONES-PC.sv.us.SonicWall.com
JBJONES-PC
SSHv2 IP Address
IP:Port (non-standard)
FQDN
Host name
10.20.30.4
10.20.30.4:6818
JBJONES-PC.sv.us.SonicWall.com
JBJONES-PC
TIP: When creating a Virtual Network Computing (VNC) bookmark to a Linux server, you must specify the
port number and server number in addition to the Linux server IP the Name or IP Address field in the form
of ipaddress:port:server. For example, if the Linux server IP address is 192.168.2.2, the port
number is 5901, and the server number is 1, the value for the Name or IP Address field would be
192.168.2.2:5901:1.

Global Management System SSL VPN
Configuring Virtual Office
25
• For RDP on Windows clients, or on Mac clients running Mac OS X 10.5 or above with RDC
installed, expand Show Windows advanced options and select the checkboxes for any of
the following redirect options: Redirect Printers, Redirect Drives, Redirect Ports, Redirect
SmartCards, Redirect clipboard, or Redirect plug and play devices to redirect those
devices or features on the local network for use in this bookmark session. You can hover
your mouse pointer over the Help icon next to certain options to display tooltips that
indicate requirements.
To see local printers show up on your remote machine (Start > Settings > Control Panel >
Printers and Faxes), select Redirect Ports as well as Redirect Printers.
Select the checkboxes for any of the following additional features for use in this bookmark
session: Display connection bar, Auto reconnection, Desktop background, Window drag,
Menu/window animation, Themes, or Bitmap caching.
If the client application is RDP 6 (Java), you can select any of the following options as well:
Dual monitors, Font smoothing, Desktop composition, or Remote Application.
Remote Application monitors server and client connection activity; to use it, you need to
register remote applications in the Windows 2008 RemoteApp list. If Remote Application
is selected, the Java Console displays messages regarding connectivity with the Terminal
Server.
• For RDP on Windows clients, optionally select Enable plugin DLLs and enter the name(s)
of client DLLs that need to be accessed by the remote desktop or terminal service.
Multiple entries are separated by a comma with no spaces. The Enable plugin DLLs option
is not available for RDP - Java. See Enabling Plugin DLLs.
• Optionally select Automatically log in and select Use SSL VPN account credentials to forward
credentials from the current SSL VPN session for login to the RDP server. Select Use custom
credentials to enter a custom username, password, and domain for this bookmark. For more
information about custom credentials, see Creating Bookmarks with Custom SSO Credentials.
• Virtual Network Computing (VNC)
• No additional fields
• Telnet
• No additional fields
• Secure Shell version 2 (SSHv2)
• Optionally select Automatically accept host key.
• If using an SSHv2 server without authentication, such as a SonicWall firewall, you can
select Bypass username.
6 Click Update to save your configuration.
Enabling Plugin DLLs
The plugin DLLs feature is available for RDP, and allows for the use of certain third-party programs such as print
drivers, on a remote machine. This feature requires RDP Client Control version 5 or higher.
To enable plugin DLLs for the RDP client:
1 Navigate to the SSL VPN > Virtual Office page.
NOTE: The RDP Java client on Windows is a native RDP client that supports Plugin DLLs by default. No
action (or checkbox) is necessary.

Global Management System SSL VPN
Configuring Virtual Office
26
2 Click the configure icon corresponding to the user bookmark you wish to edit, or if adding a new
bookmark, click Add.
3 Select RDP as the Service and configure as described in the section Configuring Virtual Office.
4 Enter the name(s) of client DLLs that need to be accessed by the remote desktop or terminal service.
Multiple entries are separated by a comma with no spaces.
5 Ensure that any necessary DLLs are located on the individual client systems in %SYSTEMROOT% (for
example: C:\Windows\system32).
Creating Bookmarks with Custom SSO
Credentials
The administrator can configure custom Single Sign On (SSO) credentials for each user, group, or globally in RDP
bookmarks. This feature is used to access resources that need a domain prefix for SSO authentication. Users can
log in to SonicWall SSL VPN as username, and click a customized bookmark to access a server with
domain\username. Either straight textual parameters or variables can be used for login credentials.
To configure custom SSO credentials:
1 Create or edit an RDP bookmark as described in Configuring Virtual Office.
2 On the Edit Portal Bookmark page, select Use custom credentials.
3 Enter the appropriate Username, Password, and Domain, or use dynamic variables as follows:
4 Click Update.
Using Remote Desktop Bookmarks
Remote Desktop Protocol (RDP) bookmarks enable you to establish remote connections with a specified
desktop. SonicWall SSL VPN supports the RDP5 standard clients. The basic functionality of the client supports
the following features:
• Redirect clipboard
• Redirect plug and play devices
• Display connection bar
• Auto reconnection
• Desktop background
• Window drag
NOTE: Ensure that your Windows system and RDP client are up-to-date prior to using the Plugin DLLs
feature. This feature requires RDP 5 Client Control or higher.
Examples
Text Usage Variable Example Usage
Login Name %USERNAME% US\%USERNAME%
Domain Name %USERDOMAIN% %USERDOMAIN\%USERNAME%
Group Name %USERGROUP% %USERGROUP%\%USERNAME%

Global Management System SSL VPN
Configuring Virtual Office
27
• Menu/window animation
• Themes
• Bitmap caching
If the Java client application is RDP 6, it also supports:
• Dual monitors
• Font smoothing
• Desktop composition
1 Click the RDP bookmark. Continue through any warning screens that display by clicking Yes or OK.
2 Enter your Username, and Password at the login screen and enter the Domain in the Domain field.
3 A window displays indicating that the Remote Desktop Client is loading. The remote desktop then loads
in its own windows. You can now access all of the applications and files on the remote computer.
NOTE: RDP bookmarks can use a port designation if the service is not running on the default port.
TIP: To terminate your remote desktop session, be sure to log off from the RDP session. If you wish
to suspend the RDP session (so that it can be resumed later) you can simply close the remote
desktop window.

Global Management System SSL VPN
SonicWall Support
24
SonicWall Support
Technical support is available to customers who have purchased SonicWall products with a valid maintenance
contract.
The Support Portal provides self-help tools you can use to solve problems quickly and independently, 24 hours
a day, 365 days a year. To access the Support Portal, go to https://www.sonicwall.com/support.
The Support Portal enables you to:
• View knowledge base articles and technical documentation
• View and participate in the Community forum discussions at
https://community.sonicwall.com/technology-and-support.
• View video tutorials
• Access MySonicWall
• Learn about SonicWall professional services
• Review SonicWall Support services and warranty information
• Register for training and certification
• Request technical support or customer service
To contact SonicWall Support, visit https://www.sonicwall.com/support/contact-support.

Global Management System SSL VPN
SonicWall Support
25
About This Document
GMS Administration Guide
Updated - December 2020
Software Version - 9.3
232-005127-00 Rev B
Copyright © 2020 SonicWall Inc. All rights reserved.
The information in this document is provided in connection with SonicWall and/or its affiliates’ products. No license, express or implied, by
estoppel or otherwise, to any intellectual property right is granted by this document or in connection with the sale of products. EXCEPT AS
SET FORTH IN THE TERMS AND CONDITIONS AS SPECIFIED IN THE LICENSE AGREEMENT FOR THIS PRODUCT, SONICWALL AND/OR ITS
AFFILIATES ASSUME NO LIABILITY WHATSOEVER AND DISCLAIMS ANY EXPRESS, IMPLIED OR STATUTORY WARRANTY RELATING TO ITS
PRODUCTS INCLUDING, BUT NOT LIMITED TO, THE IMPLIED WARRANTY OF MERCHANTABILITY, FITNESS FOR A PARTICULAR PURPOSE, OR
NON-INFRINGEMENT. IN NO EVENT SHALL SONICWALL AND/OR ITS AFFILIATES BE LIABLE FOR ANY DIRECT, INDIRECT, CONSEQUENTIAL,
PUNITIVE, SPECIAL OR INCIDENTAL DAMAGES (INCLUDING, WITHOUT LIMITATION, DAMAGES FOR LOSS OF PROFITS, BUSINESS
INTERRUPTION OR LOSS OF INFORMATION) ARISING OUT OF THE USE OR INABILITY TO USE THIS DOCUMENT, EVEN IF SONICWALL AND/OR
ITS AFFILIATES HAVE BEEN ADVISED OF THE POSSIBILITY OF SUCH DAMAGES. SonicWall and/or its affiliates make no representations or
warranties with respect to the accuracy or completeness of the contents of this document and reserves the right to make changes to
specifications and product descriptions at any time without notice. and/or its affiliates do not make any commitment to update the
information contained in this document.
For more information, visit https://www.sonicwall.com/legal.
End User Product Agreement
To view the SonicWall End User Product Agreement, go to: https://www.sonicwall.com/legal/end-user-product-agreements/.
Open Source Code
SonicWall is able to provide a machine-readable copy of open source code with restrictive licenses such as GPL, LGPL, AGPL when applicable
per license requirements. To obtain a complete machine-readable copy, send your written requests, along with certified check or money
order in the amount of USD 25.00 payable to “SonicWall Inc.”, to:
General Public License Source Code Request
SonicWall Inc. Attn: Jennifer Anderson
1033 McCarthy Blvd
Milpitas, CA 95035
Legend
NOTE: A NOTE icon indicates supporting information.
IMPORTANT: An IMPORTANT icon indicates supporting information that may need a little extra attention.
TIP: A TIP indicates helpful information.
CAUTION: A CAUTION icon indicates potential damage to hardware or loss of data if instructions are not followed.
WARNING: A WARNING icon indicates a potential for property damage, personal injury, or death.
