
Microsoft Word 2010 - Level 2
© Watsonia Publishing Page 105 Templates
CHAPTER 11 TEMPLATES
A template is a preformatted document that you can use to create
new documents. Templates are commonly used in organisations as
a basis for creating standard business documents, such as letters,
memos and faxes. A template will contain all of the required
formatting, page layout, headers and footers, styles and so on,
needed to create the new document, so all you need to do is type!
In Microsoft Word all documents are based on a template, even if it
is the blank Normal template. You can use one of the many
templates provided by Word to create new documents, or you can
create your own templates.
In this session you will:
gain an understanding of templates
learn how to use a sample template
learn how to download an online template
learn how to create a template
learn how to modify a template
learn how to use a custom template
learn how to attach a template to a document
learn how to copy styles between templates
learn how to create a template from an existing template
gain an understanding of how to develop effective
templates.
INFOCUS
WPL_W814

Microsoft Word 2010 - Level 2
© Watsonia Publishing Page 106 Templates
UNDERSTANDING TEMPLATES
A template is a preformatted document that is
used to create other documents. Templates can
automate the process of sending out routine
correspondence, such as letters, memos and
faxes. A well-designed template will contain all of
the required page layout and formatting, so all you
need to do is create a document based on that
template, then click and type the required text.
Elements Of A Template
A document template might contain the following elements that help to automate and speed up
document production, especially for common business documents:
Styles to format headings, text and paragraphs
Page Layout: such as page size and orientation, margins, headers and footers (for
letterhead and logos, for example), cover pages and so on
Page Formatting: such as borders, lines and other visual elements
Boilerplate text to be used, such as greetings, salutations, standard content and so on.
This text may also be held in placeholders, which control the position and format of
text
Macros to automate routine tasks, such as shortcuts for inserting the date, updating
the file location or inserting a particular block of text
Building blocks that can be used to insert blocks of standard text, closing signatures,
phrases or images into a document
Themes that comprise coordinated colours, fonts (such as heading and body styles)
and effects.
Using Available Templates
By default, all new documents in Word are based on the Normal.dotx template, which can be
modified to suit your needs. You can create your own templates, or Word includes many
installed sample templates that you can use to create new documents. To view the full range
of installed templates, click on the File tab, click on New, then click on Sample Templates.You
can also modify sample templates to suit your needs.
If this range is still not enough to satisfy you, Microsoft Office Online contains an extensive
library of templates that you can download and use freely. These are available at
www.office.com.
Differences Between Templates And Documents
A Word template is similar to a Word document except that it can contain building blocks. You
can also tell the difference between a template and a document by their file extensions. Word
documents use the file extension *.docx while templates, by default, include the file extension
*.dotx. Templates can also include the file extension *.dotm. Templates with the file extension
*.dotm support VBA macro code while templates with the file extension *.dotx cannot store
VBA macro code.
Locating Templates
Unless you specify the save location, templates are stored in the default Templates folder. It is
recommended that you store all of your templates in this folder so that they will appear in the
list of available templates in the New dialog box (via the File tab, New, My Templates).
To find out where your templates are stored, click on the File tab and then click on Options.
Click on Advanced, scroll down and click on [File Location]. Your templates reside in the
folder specified in User templates. To view the full address path or to modify the template’s
location, click on Modify.

Microsoft Word 2010 - Level 2
© Watsonia Publishing Page 107 Templates
USING A SAMPLE TEMPLATE
Try This Yourself:
Before starting this exercise ensure that
Word is open...
Click on the File tab, then click on
New to display Available
Templates
Click on Sample Templates to
view thumbnails of the available
templates
Click on Equity Letter, then click
on [Create] to open the template as
a new document
Click on [Pick the date], then click
on the drop arrow and click on
[Today] to insert today’s date
These text placeholders, or fields,
help to control the format and
position of text…
Click on [Type the sender
company name], then click on the
handle of the placeholder to select
the placeholder, and then press
Repeat step 5 to delete the [Type
the sender company address]
placeholder
Click in the remaining placeholders,
such as Type the salutation, and
type details appropriate for a letter
– just make up the information as
you go along
Save the document as My Letter in
the course files folder, then close
the document
For Your Reference…
To use a sample template:
1. Click on the File tab, click on New, then click
on Sample Templates
2. Click on a template, then click on [Create]
3. Click in the placeholders and type, or press
to delete the placeholders
Handy to Know…
To make changes to a template, navigate to
the Templates folder in Windows Explorer,
right-click on the template and select Open.
This will open the template in Word as a
template. You can then modify, save and
close the template.
2
4
Word includes many sample templates available
for you to use, such as letters, resumes, faxes
and report templates. You can create a document
based on one of these templates, or you can
modify a sample template to suit your needs. You
can view the full range of sample templates via the
File tab, then by clicking on Sample Templates.

Microsoft Word 2010 - Level 2
© Watsonia Publishing Page 108 Templates
DOWNLOADING AN ONLINE TEMPLATE
Try This Yourself:
Before starting this exercise ensure
you are connected to the internet...
Click on the File tab and click
on New
All categories of online
templates are displayed under
Office.com Templates…
Click on Greeting Cards
under Office.com Templates
A series of folders will appear.
Here you can select the
holiday type…
Click on Holidays to preview
the range of greeting card
templates
Scroll down to and click on
Father’s Day card to select it
Click on [Download]
The template will download
and open in Word as a new
document. You can now
modify and save the document
as required…
Close the document without
saving
For Your Reference…
To download an online template:
1. Click on the File tab and then click on New
2. Click on a category under Office.com
Templates and then click on the template
3. Click on [Download]
4. Modify and save the document as required
Handy to Know…
Many of the online templates have been
created with earlier versions of Word. When
you save the document, a message may
appear informing you that you are saving the
document to a newer version. In most cases
you can simply click on [OK] to save the
document without any problems.
2
4
As well as the many sample templates available,
Microsoft has many more templates available
online. You can browse for the desired template
via the File tab, and here you will find many
template designs for a whole range of document
types, such as calendars, brochures, business
cards, newsletters, invoices, the list goes on!
3

Microsoft Word 2010 - Level 2
© Watsonia Publishing Page 109 Templates
CREATING A TEMPLATE
Try This Yourself:
Before starting this exercise ensure that Word
is open...
Click on the File tab, click on New,
ensure Blank document is selected
and click on [Create]
Type Monthly Sales Report, press
and type The Sales department has
achieved the following figures for the
month of <month>:
Click in the heading, click on the dialog
box launcher for Styles on the Home
tab to display the Styles dialog box
Click on Heading 1 to apply this style to
the heading text
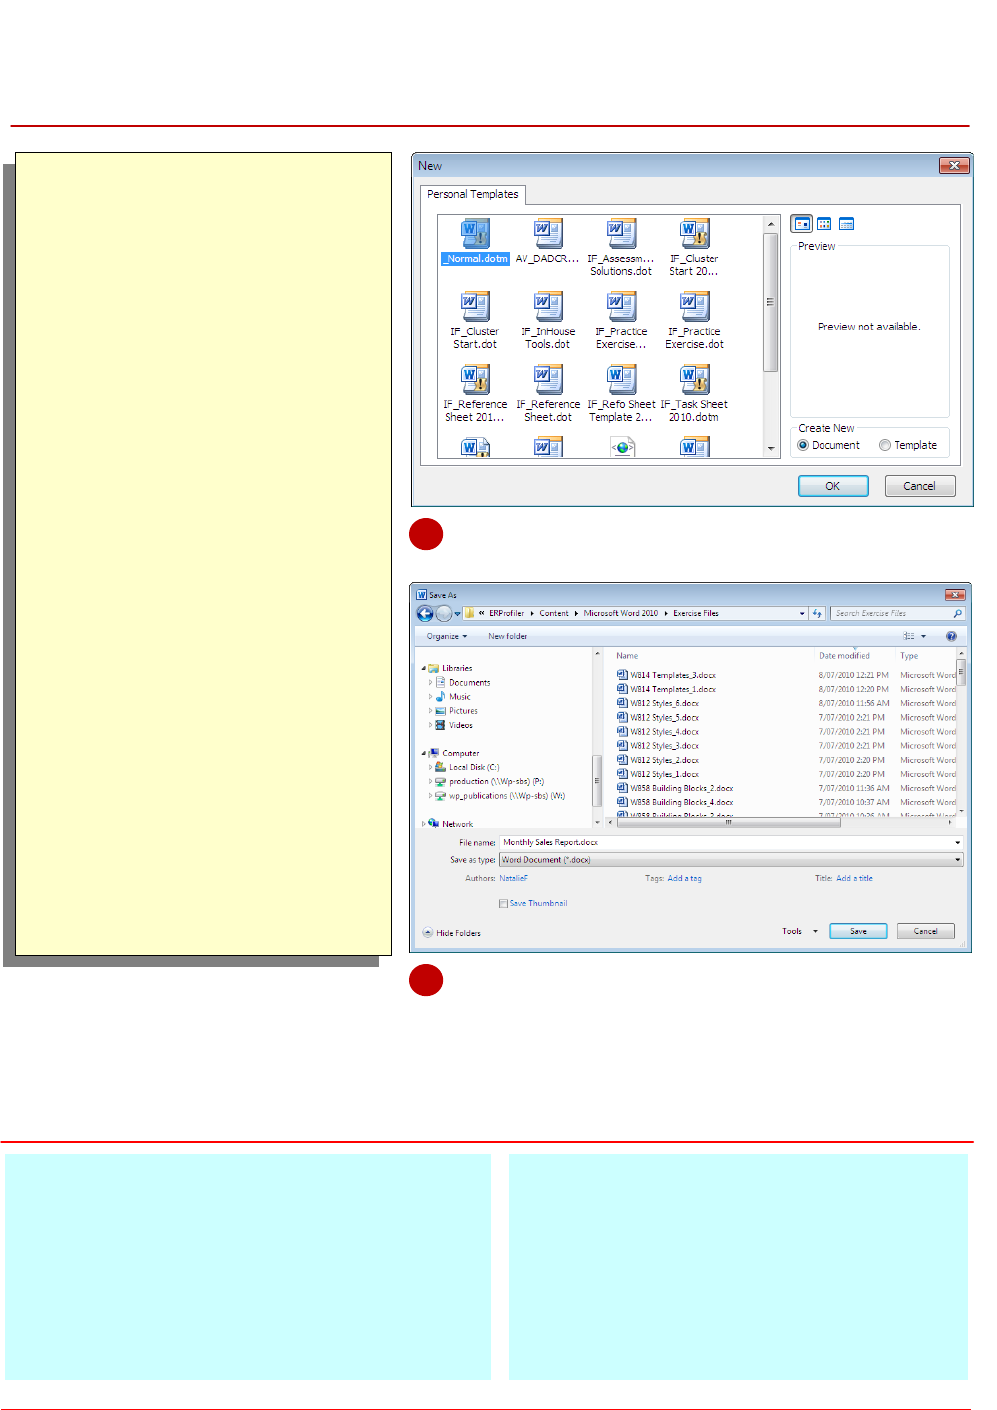
Click on the File tab, then click on Save
As to display the Save As dialog box
You will leave the filename as it is…
Click on the drop arrow for Save as
type and select Word Template
(*.dotx)
As you have selected to save as a
template the default save location
changes…
Click on [Save] to save the template,
and then close the template
Click on the File tab, click on New and
then click on My Templates to display
the My Templates dialog box
You will notice that your new template
appears in this list ready for you to
use…
Click on [Cancel]
For Your Reference…
To create a template:
1. Press +
to create a new blank
document and format as required
2. Press + to display the Save As
dialog box, type a filename, then click on the
drop arrow for Save as type, select Word
Template (*.dotx) and click on [Save]
Handy to Know…
To make it easy to create documents based
on templates that you’ve created, you must
save the template in the default Templates
folder. This ensures that your custom
template will appear in the My Templates
dialog box.
8
To create your own template, simply open a new
document, apply the required formatting and
page layout, create styles and so on, and then
save the document as a template. Templates
contain the file name extension .dotx, and when
you save a template it will by default save it in the
My Templates folder, which makes it easy to
access your templates.
4
6

Microsoft Word 2010 - Level 2
© Watsonia Publishing Page 110 Templates
MODIFYING A TEMPLATE
Try This Yourself:
Before starting this exercise ensure
Word is open...
Click on the File tab, then click
on Open to display the Open
dialog box, or press +
Click on the button to the right
of File name and select Word
Templates (*.dotx)
Scroll to the top of the left
pane and click on the
Templates folder
All templates will be displayed
in the right pane…
Click on Monthly Sales
Report.dotx, then click on
[Open]
You will now make changes to
the template…
Ensure that the insertion point
is in the heading, then click on
Centre in the Paragraph
group
Select the heading, then click
on Italics in the Font
group
Save and close the template
For Your Reference…
To modify an existing template:
1. Click on the File tab and then click on Open
2. Select Word Templates or All Word
Templates and navigate to the correct folder
3. Double-click on the template, make the
changes and save the template
Handy to Know…
If you want to open a template that contains
macros or was created with an earlier
version of Word, make sure you select All
Word Templates (*.dotx, *.dotm, *.dot) for
File of Type (next to File name) in the Open
dialog box.
3
6
You can modify existing templates as required,
including the Normal.dotx template. For
example, you might need to change the font type
to ensure consistency with corporate fonts. To
modify a template, you must open the template as
a template, make the required changes and then
save.
Microsoft Word 2010 - Level 2
© Watsonia Publishing Page 111 Templates
USING A CUSTOM TEMPLATE
Try This Yourself:
Before starting this exercise ensure
Word is open...
Click on the File tab, then click
on New
Click on My Templates under
Templates to open the New
dialog box
Locate and click on Monthly
Sales Report.dotx, then click
on [OK]
The template will open as a
new, blank document…
Create a fictional report by
typing a month and adding
some figures below
Click on the File tab, then click
on Save to open the Save
dialog box
Ensure that Monthly Sales
Report.docx appears in File
name, then navigate to the
course files folder
Click on [Save] to save the
document, and then close the
document
For Your Reference…
To use a custom template:
1. Click on the File tab, then click on New
2. Click on My Templates
3. Double-click on the desired template
4. Make the required changes, and then save
the document
Handy to Know…
As well as creating a document based on a
template, you can also create a template
based on a template! To do this, click on
Template under Create New in the New
dialog box and then click on [OK].
2
6
Once you have created your template, you can
then use it to create new documents. By using
custom templates, you can produce documents
with a consistent look and feel. It is common for
organisations to create a range of custom
templates for their standard business documents
that include the same or similar page layout,
formatting and the like.

Microsoft Word 2010 - Level 2
© Watsonia Publishing Page 112 Templates
ATTACHING A TEMPLATE TO A DOCUMENT
Try This Yourself:
Open
File
Before starting this exercise you MUST
open the file W814 Templates_1.docx...
Click on the File tab, click on Options to
display the Options dialog box, and
then click on Customise Ribbon
You will first ensure that the Developer
ribbon is displayed, as this ribbon
contains the commands we want to work
with…
Click on Developer under Main Tabs so
that it appears with a tick and then click
on [OK]
The Developer tab will now appear…
Click on the Developer tab, then click
on Document Template in the
Templates group to open the
Templates and Add-ins dialog box
You will now attach a template...
Click on [Attach] to open the Attach
Template dialog box
Navigate to the course files folder, click
on W714 Templates_2.dotx and click
on [Open]
Click on Automatically update
document styles until it appears ticked
This will ensure that all styles in the
document with the same name will be
updated by the new template…
Click on [OK] to apply the template to
the document, and then save and close
the document
For Your Reference…
To attach a template to a document:
1. From the Developer tab, click on Document
Template in the Templates group
2. Click on [Attach] and then double-click on
the template
3. Tick Automatically update document
styles, then click on [OK]
Handy to Know…
When you click on Attach Template, the
Open dialog box will navigate to the
Templates folder by default.
1
3
It may be necessary to apply a different template
to an existing document. In Word this is known as
attaching a template. When you attach a
template, Word will override the current template
with the attached template. When you attach a
template to an existing document, all styles and
formatting within the document will be updated to
reflect those in the template.

Microsoft Word 2010 - Level 2
© Watsonia Publishing Page 113 Templates
COPYING STYLES BETWEEN TEMPLATES
Try This Yourself:
Open
File
Before starting this exercise you
MUST open the file W814
Templates_2.dotx...
Click on the Developer tab, then
click on Document Template in
the Templates group to open the
Templates and Add-ins dialog box
Click on [Organiser] to open the
Organiser dialog box
Click on [Close File] under
Normal.dotm, then click on [Open
File] to open the Open dialog box
You will copy a style from the
current, open template to another
template…
Navigate to the course files folder,
then double-click on W714
Templates_4.dotx
Click on Highlighted Text in the
box on the left, then click on [Copy]
to copy the style to W714
Templates_4.dotx
Click on [Close], then click on
[Yes] to save the template
Click on the Home tab, then click
on the dialog box launcher for
Styles to display the Styles dialog
box
You will notice that the copied style
is now listed…
Save and close the document
For Your Reference…
To copy styles between templates:
1. From the Developer tab, click on Document
Template in the Templates group, then
click on [Organiser]
2. Ensure that the two files are open
3. Click on the style to be copied, then click on
[Copy]
Handy to Know…
You can use and to select multiple
styles to copy.
To hide the Developer tab (or any tab), click
on the File tab and then click on Options.
Click on Customise Ribbon and then click
on Developer under Main Tabs so that it
appears without a tick. Click on [OK].
2
7
Word provides a feature called the Organiser
which lets you copy styles between documents
and templates. This nifty feature can save you
quite a bit of time because it is based on the
premise that if you have a set of styles that you
have already created, why create them again?

Microsoft Word 2010 - Level 2
© Watsonia Publishing Page 114 Templates
CREATING A TEMPLATE FROM A TEMPLATE
Try This Yourself:
Open
File
Before starting this exercise you
must open the file W814
Templates_5.dotx...
Click on the File tab, then click
on Save As to display the Save
As dialog box
Type My Template in File
name, ensure that the course
files folder is open, then click on
[Save]
Now let’s modify the template
so that the sender’s company
details will be included in the
template...
Click on [TYPE THE SENDER
COMPANY NAME] in the
orange bar and type Alpheius
Global Enterprises
Click on [Type the sender
company address] in the
orange bar and type
414 St Edmonds Road
Melbourne VIC 3304
Click on [Type the sender
phone number] and type
61 3 9844 0000
Click on [Type the sender
email address] and type
alpheius@alpheiusge.com.au
Save and close the template
For Your Reference…
To create a template from an existing template:
1. Open the template
2. Make the required changes
3. Click on the File tab, then click on Save As
4. Select Word Template
5. Type the File name, then click on [Save]
Handy to Know…
You can create a template from a sample
template or from any of the templates stored
in the My Templates folder. Click on the File
tab, click on New, click on the template, click
on Template in Create New, then click on
[Save].
6
These days there’s hardly a need to create
templates from scratch. With the seemingly
endless range of sample templates you’re sure to
find a particular design and layout that suits your
needs. But even if you can’t find exactly what
you’re looking for, save time by modifying an
existing template design—you’ll have a new
template in no time at all!

Microsoft Word 2010 - Level 2
© Watsonia Publishing Page 115 Templates
TIPS FOR DEVELOPING TEMPLATES
Templates will certainly save you time when
creating business documents. Templates also
ensure consistency across organisational
documents. However, it is important to ensure
that users know how to use templates, as well as
ensuring that your templates are accurate. Below
we have included some tips and hints to consider
when developing templates for business use.
Consider Your Target Audience
Your templates must be designed to suit the purpose of the communication. This purpose is closely
aligned with what the audience feels they need. For example, if you have to develop a template that
will be used to create product specification sheets or bulletins, it is important to ensure that the
features included in the bulletin template are precisely what the audience will expect to find.
Templates used in this way can serve as a good tool for ensuring that the author presents
information that is relevant to the reader.
Conform To Company Guidelines and Standards
Templates that don’t adhere to or even deliberately flaunt company standards and guidelines are
doomed to fail. Before embarking on a new template, ensure that you are familiar with the
company’s standards for fonts, paragraphs, margins, colours, use of logos, and the like.
Proof The Template Thoroughly
One of the primary benefits in using templates is accuracy. If your template contains errors then
those errors will appear in every document generated from the template! Use on-screen print
preview to refine the appearance of the text and the overall layout. Zoom in on critical areas to
obtain a better look. Print a copy on a laser printer and check the spelling and grammar thoroughly.
Also, read the document several times to ensure that it is readable and that the information flows as
it should. If it is a colour document, print the document on a colour printer as screen colours do not
always reproduce as expected in printed format.
Test A Sample Document
If possible, produce a sample document from the template and give it to a potential user to see
whether or not any further changes are required.
Train Other Users
Train other users to use the template correctly. If training is not possible produce a set of instructions
or explanatory notes on the correct use of the template.

Microsoft Word 2010 - Level 2
© Watsonia Publishing Page 116 Templates
NOTES:
1
4
