
7 - 1
MODULE 7: DEPLOYMENT
Module Overview
Deploying software is essential to meet the changing application needs of
organizations. It provides these benefits:
1. When deploying Microsoft Dynamics
®
NAV 2013 clients with
Windows Server Group Policy, users no longer have to look for the
application on a network share, use a CD-ROM, or install, fix, and
upgrade software themselves.
2. Deploying Microsoft Dynamics NAV 2013 with Group Policy reduces
the time that you spend administering user systems.
3. Application life-cycle management is simplified because applications
can be redeployed, upgraded, or removed in the same manner they
were deployed.
Objectives
The objectives are:
• Explain Software Deployment with Group Policy.
• Deploy Microsoft Dynamics NAV 2013 client for Windows by using
Group Policy.

Installation and Configuration in Microsoft Dynamics
®
NAV 2013
7 - 2
Deployment Process
One of the challenges administrators in an organization typically face is
application life-cycle management. Imagine a scenario where an administrator has
to go to every single computer in a network to individually install any application
that is required by all the connected computers in the domain. Imagine an even
more complex network setup where the whole domain is scattered around the
globe.
To eliminate this problem, Windows Server 2008 offers software installation
through Group Policy. With Group Policy Software Installation, a software
management feature, administrators can manage software throughout its life-
cycle within the organization. Software Installation is available as an extension in
the Group Policy Management Console (GPMC) and works together with Group
Policy and Active Directory.
Group Policy
Group Policy provides an infrastructure for centralized configuration management
of the operating system and applications that run on the operating system. It can
be used to deliver and apply one or more desired configurations or policy settings
to a set of targeted users and computers in an Active Directory environment.
The Group Policy Infrastructure figure shows the entities that are available and can
be managed in the Group Policy infrastructure.
FIGURE 7.1: GROUP POLICY INFRASTRUCTURE
This infrastructure consists of a Group Policy engine and multiple client-side
extensions (CSEs) responsible for reading specific policy settings on target client
computers.
The Scripts extension can apply one or more scripts to a computer or users. Scripts
that apply to computers run during startup and shutdown. Scripts that apply to
users run during logon and logoff.

Module 7: Deployment
7 - 3
The Registry extension is a way to use Group Policy to centrally manage client
registry keys. This client-side extension is used to apply registry-based policy
settings (Administrative Templates) by creating and configuring the client registry
keys.
The Software Installation extension of Group Policy enables you to provide on-
demand software installation and automatic repair of applications. Group Policy
offers a convenient method for distributing software, especially if you already use
Group Policy for other purposes such as securing the client and server computers.
To start the Group Policy Management Editor, follow these steps:
1. Click Start, and then click Run.
2. In the Open box, type "mmc" and then click OK.
3. Click File > Add/Remove Snap-in.
4. Click Add.
5. Under Available snap-ins, click Group Policy Management Editor
and then click Add. The Select Group Policy Object dialog box
appears.
6. Click Browse to open the Browse for a Group Policy Object dialog
box.
7. Select the tabs and locate the Group Policy object that you want to
display.
8. Click OK to close the dialog box.
9. When you return to the Select Group Policy Object dialog box, click
Finish.
10. Click Close, and then in the Add/Remove Snap-in dialog box, click
OK.
The selected GPO is displayed in the Console Root.
Note: You must be logged on to the computer with an account that has
administrative credentials to use Group Policy Management Editor.
Installation and Configuration in Microsoft Dynamics
®
NAV 2013
7 - 4
The Group Policy Management Editor figure shows the Group Policy Management
Editor console.
FIGURE 7.2: GROUP POLICY MANAGEMENT EDITOR WINDOW
The Group Policy snap-in contains the following major branches:
• Computer Configuration
Administrators can use Computer Configuration to set policies that
are applied to the computer, regardless of who logs on to the
computers. Computer Configuration typically contains sub-items for
software settings, Windows settings, and Administrative Templates.
• User Configuration
Administrators can use User Configuration to set policies that apply to
users, regardless of which computer they log on to. User
Configuration typically contains sub-items for software settings,
Windows settings, and Administrative Templates.
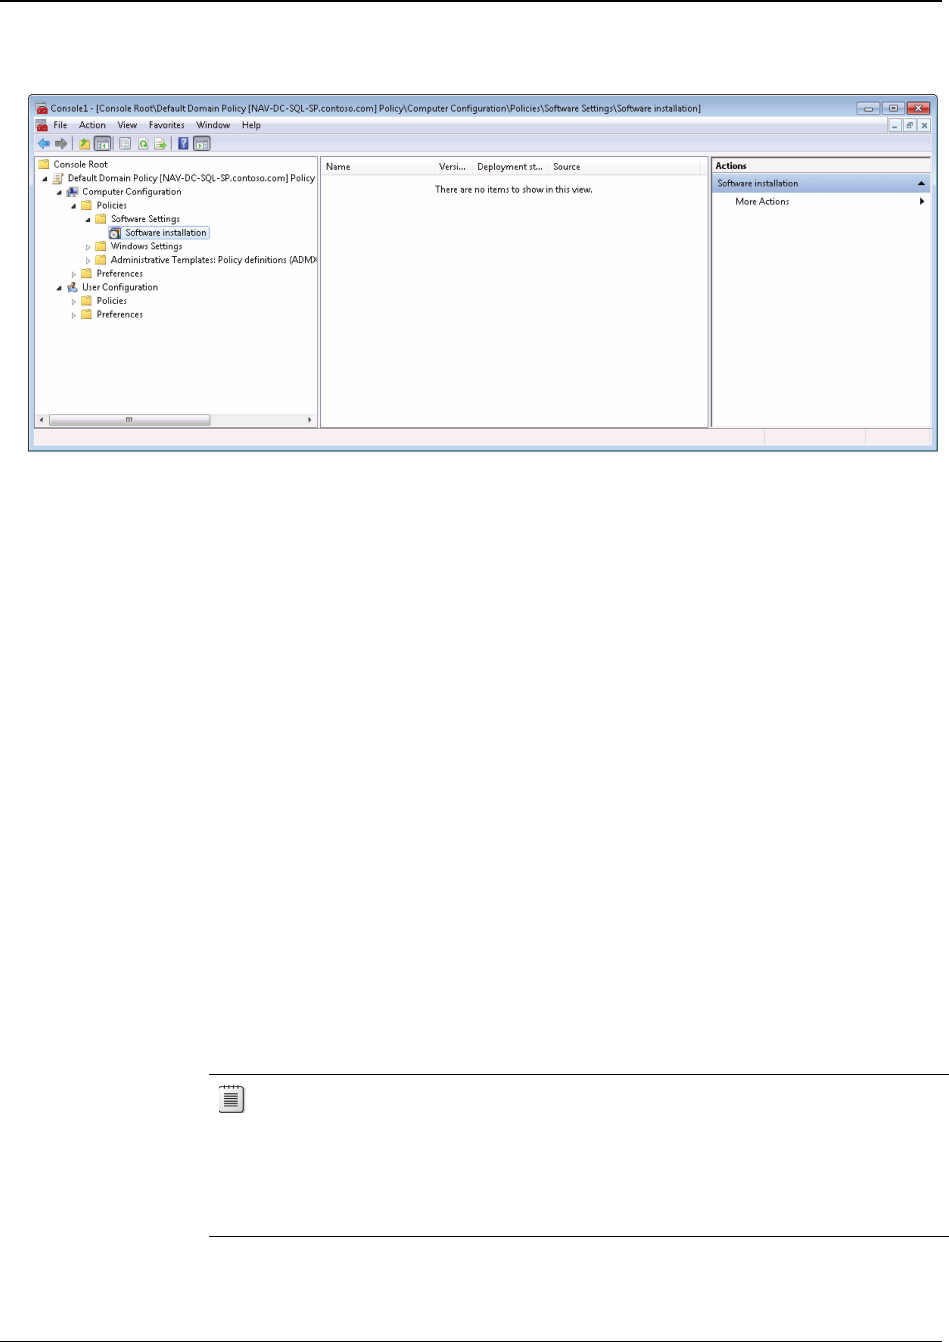
Software Installation Extension
The Software Installation extension in the Group Policy Management Editor
console is the key administrative tool for deploying software.
Note: The Software Installation extension is not available in local Group
Policy Objects. It is available only in domain-wide Group Policy Objects. To manage
a domain-wide Group Policy Object, you must use the Group Policy Management
Editor console. You can only use the Group Policy Object Editor to manage the local
group policies for a server.

Module 7: Deployment
7 - 5
Group Policy Software Installation helps you specify how applications are installed
and maintained within your organization. With Group Policy Software Installation,
you can manage an application in a Group Policy Object. This is in turn associated
with a particular Active Directory container – a site, a domain, or an organizational
unit. This makes sure of the following:
• Administrators can control which software is available to users
through the Windows Control Panel.
• Every computer or user in the domain or in any particular
organizational unit receives the package and the software is
automatically installed without any user interaction.
Applications can be managed in one of two modes: assigned or published.
• Assign Software
You can assign a program distribution to users or computers. If you
assign the program to a user, it is installed when the user logs on to
the computer. When the user first runs the program, the installation is
completed.
If you assign the program to a computer, it is installed when the
computer starts and is available to all users who log on to the
computer. When a user first runs the program, the installation is
completed.
• Publish Software
You can publish a program distribution to users. When the user logs
on to the computer, the published program is displayed in the
Add/Remove Programs dialog box (in the Windows Control Panel),
and it can be installed from there.
A workable combination of these methods can be established to meet your
software management goals.
Software Distribution Points
To publish or assign a computer program, you must create a distribution point on
the publishing server. The software distribution point (SDP) is a shared folder from
which users and computers can install applications.
1. Log on to the server as an administrator.
2. Create a shared network folder where you will put the Microsoft
Windows Installer package (.msi file) that you want to distribute.
3. Set permissions on the share to allow access to the distribution
package.
Authenticated Users: Read and Execute permissions

Installation and Configuration in Microsoft Dynamics
®
NAV 2013
7 - 6
Administrators: Full Control
4. Copy or install the package to the distribution point.
Supported Installation File Types
Group Policy Software Installation (GPSI) uses the Windows Installer service to
maintain and manage the state of software installation. This service runs in the
background and enables the operating system to manage software installation,
based on information that is stored in the Windows Installer package.
Every time that you use the software installation extension of Group Policy to
deploy an application, update, or upgrade package, you must first prepare the
application for Windows Installer. If the application does not include a natively
authored Windows Installer package (.msi), you must obtain one or create a .zap
file.
GPSI supports the following file types:
• Windows Installer Packages (*.msi): A Windows Installer package (.msi
file) contains all the information that is needed for the Windows
Installer to set up an application. It covers every conceivable situation:
various platforms, different sets of previously installed products,
earlier versions of a product, and many default installation locations.
There are two types of Windows Installer Packages:
o Native Windows Installer package files: This type of Windows
Installer package is developed as a software component. The
Windows Installer service can be fully used. The native Windows
Installer package files include one product that has many features
that can be installed individually.
o Repackaged application files: Unlike the native Windows Installer
package files, repackaged application files include one product
that is installed as one feature.
• Transform files (*.mst): Transform files are used to customize
applications. They complement the ".msi" Windows Installer files in
order to customize the installation. A transform is basically a record of
changes that were made to the original package file. Transforms
enable users to customize Windows Installer packages and the
installation features when they publish or assign the application.
Through transforms, users can include and exclude features for the
installation.
• Patch files (*.msp): Patch files are used to apply software fixes (patches
or updates) to applications. They complement the .msi Windows
Installer files.

Module 7: Deployment
7 - 7
• .zap files (*.zap): Non-Windows Installer-based applications must use
a .zap file to describe their existing Setup program. A .zap file is a text
file (similar to .ini files) that provides information about how to install
a program, the application properties, and the entry points that the
application should install.
For more information about tools and procedures for authoring Windows Installer
packages or repackaging existing applications for use with Windows Installer, see
Step-by-Step Guide to Software Installation and Maintenance
(http://go.microsoft.com/fwlink/?LinkId=267427).
Software Deployment Process
The steps in the software deployment process vary, depending on whether the
application is published or assigned.
Published Applications
This is the installation process for published applications:
1. The user logs on to a client computer that is running Windows 2000
or later versions.
2. In Control Panel, the user opens Programs.
3. The Get Programs function obtains the list of published software
from Active Directory.
4. The user selects Microsoft Dynamics NAV 2013.
5. The Programs function obtains the location of the published
software from Active Directory.
6. A request for software is sent to the Software Distribution Point.
7. The Windows Installer service is started, and it installs the requested
Windows Installer package.
8. The user opens the newly installed application.
Assigned Applications
This is the sequence of the installation process for assigned applications:
1. The user logs on to a client computer that is running Windows 2000
or later versions.
2. The WinLogon process advertises applications on the user’s Desktop
or on the Start menu.
3. The user selects Microsoft Dynamics NAV 2013 from the Desktop or
the Start menu.

Installation and Configuration in Microsoft Dynamics
®
NAV 2013
7 - 8
4. The Windows Installer service retrieves the Windows Installer package.
5. A request for the software is sent to the Software Distribution Point.
6. The Windows Installer service is started, it installs the requested
Windows Installer package, and it opens the application.
Deploy Microsoft Dynamics NAV 2013
Now that you have familiarized yourself with the software deployment tools, the
Windows Installer service, and the software deployment processes, you are ready
to learn how to deploy software with Group Policy.
This lesson discusses the steps of deploying Microsoft Dynamics NAV 2013 client
software with Group Policy. The tasks to deploy software with Group Policy are as
follows:
1. Plan and prepare the software deployment.
2. Set up a Software Distribution Point (SDP).
3. Create a Group Policy Object (GPO) and a Group Policy Object.
console for software deployment.
4. Specify the software deployment properties for the GPO.
5. Add Windows Installer packages to the GPO and select the package
deployment method.
6. Set Windows Installer package properties.
Plan and Prepare
Before you can start to deploy software with Group Policy, you must plan the
deployment. When planning for software deployment, you should do the
following:
• Review your organization’s software requirements based on your
overall organizational structure within Active Directory and your
available GPOs.
• Determine how you want to deploy your applications (per user or per
computer, assign or publish).
• Prepare your software by using a format that lets you manage it
based on what your organization requires.
• Create a pilot to test the deployment.
• Test all the Windows Installer packages or repackaged software.

Module 7: Deployment
7 - 9
This table describes strategies and considerations for deploying software. Some of
these strategies might seem contradictory, but select the strategies that meet your
business goals.
Strategy Considerations
Create OUs based on software
management needs.
Lets you target applications to the
appropriate set of users. Group
Policy security settings are not
required to target the appropriate
set of users.
Deploy software close to the root
in the Active Directory tree.
Makes it easy to provide all users in
an organization with access to an
application. This reduces
administration because you can
deploy a single GPO instead of re-
creating that object in multiple
containers in the Active Directory
tree.
Deploy multiple applications with a
single GPO.
Reduces administration overhead by
letting you create and manage a
single GPO instead of multiple
GPOs.
The logon process is faster because
a single GPO deploying 10
applications processes faster than
10 GPOs, each deploying one
application. This is appropriate in
organizations where users share the
same core set of applications.
Publish or assign an application
only one time in the same GPO or
in a series of GPOs that might
apply to a single user or computer.
Makes it easier to determine which
instance of the application applies
to the user or computer.
Licenses and Software Guidelines
Software licenses are required for software written by independent software
vendors and distributed by using Software Distribution Points. It is your
responsibility to match the number of users who can access software to the
number of licenses that are available.
It is also your responsibility to verify that you are working within the software
guidelines provided by each independent software vendor.

Installation and Configuration in Microsoft Dynamics
®
NAV 2013
7 - 10
Software Preparation
Before you start the deployment, you must obtain the Windows Installer packages
(.msi files) for the software. Perform any necessary modifications to the packages,
and collect the transform (.mst) or patch (.msp) files. If you want to deploy
multiple applications, you should determine the correct installation order.
Set Up a Software Distribution Point
After you have finished planning and preparing for the software deployment,
copy the software to a Software Distribution Points (SDP). A Software Distribution
Point is a network location from which users can retrieve the software that they
need.
To set up a software distribution point, follow these steps:
1. Create the folder for the software on the server that will be the SDP.
2. Share the folder on the network.
3. Set the appropriate permissions on the folder. Administrators must be
able to change the files (Full Control), and users must only view
(Read) the files from the shared SDP folder.
4. Copy the necessary software (Windows Installer packages,
transformations, patches and other components) to the SDP.
Now you can use Group Policy to manage the software within the appropriate
Group Policy object.
Using Distributed File System to Manage SDPs
The Microsoft Distributed File System (DFS) gives users convenient access to
shared folders that are distributed throughout a network. With DFS, you can make
files distributed across multiple servers appear to users as if they are located in
one place on the network. For a software deployment with Group Policy, you can
set up DFS to automatically direct users to the nearest software distribution point.
The DFS technologies offer WAN-friendly replication and simplified, highly-
available access to geographically dispersed files. Distributed File System is
implemented as a role service of the File Services role. The two technologies in
DFS are as follows:
• DFS Namespaces enable you to group shared folders that are
located on different servers into one or more logically structured
namespaces. Each namespace appears to users as a single shared
folder with a series of subfolders. This structure increases availability
and automatically connects users to shared folders in the same Active
Directory Domain Services site, when it is available, instead of routing
them over WAN connections.

Module 7: Deployment
7 - 11
• DFS Replication is an efficient, multiple-master replication engine
that you can use to keep folders synchronized between servers across
limited bandwidth network connections. It replaces the File
Replication Service (FRS) as the replication engine for DFS
Namespaces, and for replicating the AD DS SYSVOL folder in domains
that use the Windows Server 2008 domain functional level.
For more information about how to install and set up Distributed File Services, see
DFS Step-by-Step Guide for Windows Server 2008
(http://go.microsoft.com/fwlink/?LinkId=267428).
Create a Group Policy Object
As soon as you have set up your distribution point and copied the software to it,
you can create a Group Policy Object to manage software installation. We
recommend that you use a separate Group Policy Object (GPO) for software
deployment. However, we do not recommend that you create a separate GPO for
each application that you want to distribute.
You can either create a new Group Policy Object or change an existing Group
Policy Object. When you create a new object, you can link it directly to a domain,
site, or organizational unit in the Active Directory.
To create a new GPO and link it to a domain or OU, follow these steps:
1. Under Administrative Tools, open the Group Policy Management
console.
2. Right-click the site, domain, or OU to which you want to apply the
new Group Policy, and then click Properties.
3. Select Create a GPO in this domain and Link it here.
4. In the New GPO dialog box, enter the name for the new Group Policy
Object. For example: Software Installation GPO.
5. Click OK.
By default, the new GPO is linked to the site, domain, or OU where it was created.
Create an MMC for the Software Installation GPO
As soon as you have created your new GPO, you can edit the GPO by using the
Group Policy Management Console (GPMC). The GPMC is a scriptable Microsoft
Management Console (MMC) snap-in. It provides a single administrative tool for
managing Group Policy across the enterprise. GPMC is the standard tool for
managing Group Policy.

Installation and Configuration in Microsoft Dynamics
®
NAV 2013
7 - 12
The Group Policy Management Console integrates the Group Policy functionality
that is provided by the following tools into a single console:
• Active Directory Users and Computers
• Active Directory Sites and Services
• Resultant Set of Policy
• ACL Editor
• GPMC Delegation Wizard
Administrators can perform core Group Policy tasks by using the GPMC instead of
these other tools. The GPMC provides a comprehensive set of COM interfaces that
can be used to programmatically access many of the operations supported by the
console.
FIGURE 7.3: GROUP POLICY MANAGEMENT WINDOW
The GPMC does not replace the Active Directory Users and Computers snap-in
and the Active Directory Sites and Services snap-in. The GPMC is intended for
Group Policy administration, whereas the Active Directory snap-ins are intended
for directory administration tasks such as creating user, computer, and group
objects.

Module 7: Deployment
7 - 13
The Default Domain Policy GPO and Default Domain Controllers Policy GPO are
important to the health of any domain. As a best practice, you should not edit the
Default Domain Controllers Policy GPO or the Default Domain Policy GPO, except
in the following cases:
• Account policy settings are required to be configured in the Default
Domain GPO.
• You must modify the policy settings in the Default Domain
Controllers Policy GPO because you installed applications on domain
controllers requiring modifications to User Rights or Audit policy
settings.
You can start GPMC by using several methods.
• Press the Windows logo key + R to open the Run dialog box. Type
"gpmc.msc" in the text box, and then click OK.
• Click Start > All Programs > Accessories > Run. Type "gpmc.msc"
in the text box, and then click OK.
• Click Start > All Programs > Accessories > System Tools >
Control Panel > System and Security > Administrative Tools >
Group Policy Management.
• On the Windows Taskbar, click Start. In the Search programs and
files box, type "Group Policy Management", press Enter, and then
click the Group Policy Management link in the list.
To edit a Group Policy Object, right-click the Group Policy that you want to edit in
the GPMC and select Edit.
Instead of using the GPMC to edit a Group Policy Object, you can also create a
separate MMC for one or more specific Group Policy Objects.
To create an MMC for a GPO, follow these steps:
1. Click Start > Run.
2. In the Run dialog box, type "mmc" and then click OK.
3. Click File > Add/Remove Snap-In.
4. In the Available snap-ins list, select Group Policy Management
Editor.
5. Click Add.
6. In the Select Group Policy Object dialog box, click Browse to find
the GPO.
7. In the Browse For A Group Policy Object dialog box, click the All
tab.
8. Select the GPO to edit.
9. Click OK.

Installation and Configuration in Microsoft Dynamics
®
NAV 2013
7 - 14
10. Click Finish to close the Select Group Policy Object dialog box.
11. Click OK to close the Add or Remove Snap-ins dialog box.
12. In the MMC, click File > Save As.
13. Select a path for the console.
14. In the File Name box, type a name.
15. Click Save.
You can now use the MMC to directly access and edit the GPO.
Specify Software Installation Properties
After you create your GPO for software installation, you can start to define your
software deployment. First, enter several default settings for the software to install.
You can configure default settings for software installation on a per-GPO basis. To
specify software installation defaults for the selected GPO, use the Software
Installation Properties dialog box, shown in the Software Installation Properties
Window figure.
FIGURE 7.4: SOFTWARE INSTALLATION PROPERTIES WINDOW

Module 7: Deployment
7 - 15
To open this window, follow these steps:
1. Open the GPO for software installation in Group Policy Management
Editor. (If you have created a separate MMC for the GPO, you can use
that console to edit the GPO.)
2. In the User Configuration or Computer Configuration node, click
Policies > Software Settings.
3. Right-click the Software Installation node, and then click
Properties.
The Software Installation Properties window has four tabs: General, Advanced,
File Extensions, and Categories.
In the General and Advanced tabs, specify how you want all Windows Installer
packages in the GPO to be deployed and managed.
In the File Extensions tab, specify which application is installed when users open
a file that has an unknown file name extension. If multiple applications are
associated with a specific file name extension, you can also set an installation
priority for the applications. (The application that has the highest priority is
installed first.) File name extensions are managed on a per-GPO basis, so
changing the priority in a GPO affects only the users who have that GPO applied.
In the Categories tab, designate categories for organizing assigned and published
applications to make it easier for users to locate the appropriate applications
under Programs (or Add/Remove Programs) in Control Panel. You can, for
example, make separate categories for productivity applications and development
applications.
Setting Default Location for Software
In the General tab of the Software Installation Properties dialog box, you must
enter the default location for software packages in the selected GPO. To do this,
type the Uniform Naming Convention (UNC) path
(\\<servername>\<sharename>) to the software distribution point for the
Windows Installer packages (.msi files) in the GPO in the Default Package
Location box.
Note: You must browse for the software distribution point that you created in
the previous section in relation to the network share location, instead of the local
drive on the server. This makes sure that you are managing software from the
network share location that users can access. Users typically cannot access the
package from the local drive of the server.

Installation and Configuration in Microsoft Dynamics
®
NAV 2013
7 - 16
Setting Options for New Packages and User Interface
To control what happens when you add a new package to the selected GPO, you
use the General tab in the Software Installation Properties dialog box, and set
options in the New packages frame. The default behavior is that the Deploy
Software dialog box appears every time, and the administrator can select one of
the choices from that dialog box.
FIGURE 7.5: GENERAL TAB
The following table lists the options for New packages frame:
Option Description
Display the Deploy Software
dialog box
Select this option to specify that
when you add new packages to the
GPO, the Deploy Software dialog
box appears. This lets you decide
whether to assign, publish, or
configure package properties. This is
the default setting.
Module 7: Deployment
7 - 17
Option Description
Publish Select this option to specify that
when you add new packages to the
GPO, they are published by default
with standard package properties.
Note: Packages can be
published only to users, not
computers. If this is an installation
under the Computer Configuration
node of the Group Policy
Management Editor console, the
Publish choice is unavailable.
Assign Select this option to specify that
when you add new packages to the
GPO, they are assigned by default
with standard package properties.
Packages can be assigned to users
and computers.
Advanced Select this option to specify that
when you add new packages to the
GPO, the Properties dialog box for
the package appears. This lets you
configure all properties for the
package.
If you plan to deploy several packages to a GPO as published without transforms,
you can select Publish in the New Packages frame, and every package that is
deployed is automatically published. If you plan to add a package with a
transform (customization or .mst file), you must select Advanced.
Note: You cannot add or change transforms (.mst files) after the software is
deployed.
This setting is most useful when an administrator is adding several applications at
one time. For example, if an administrator is adding five applications to this GPO
and they are all to be published without a transforms, then the administrator
could set this to Publish.

Installation and Configuration in Microsoft Dynamics
®
NAV 2013
7 - 18
Similarly, the options in the Installation user interface options frame let the
administrator set how much of the user interface (UI) the Windows Installer
presents to a user during installation. The Basic UI (the default option) only
presents progress bars and messages. No user choices are presented other than
Cancel. The Maximum UI option shows the UI (including all messages and
windows) that the author of the Windows Installer package defined.
Setting Advanced Options
You can use the options on the Advanced tab of the Software Installation
Properties window to automatically remove the application when it is no longer
managed, to publish OLE information to the Active Directory, and to make 32-bit
applications available on 64-bit platforms.
FIGURE 7.6: ADVANCED TAB

Module 7: Deployment
7 - 19
Select any of these options, to be applied to all packages in the GPO:
• Uninstall the applications when they fall out of the scope of
management: select this option to remove the application if it no
longer applies to users or computers.
• Include OLE information when you deploy applications: select this
option to specify whether to deploy information about COM
components with the package.
• Make 32-bit X86 Windows Installer applications available to
Win64 computers: select this option to specify whether 32-bit
Windows Installer applications (.msi files) can be assigned or
published to 64-bit computers.
• Make 32-bit X86 down-level (ZAP) applications available to
Win64 computers: select this option to specify whether 32-bit
application files (.zap files) can be assigned or published to 64-bit
computers.
Setting File Extensions Options
You can use the File Extensions tab to select the file name extension for which
you want to specify an automatic software installation. This means that when a
specific application is not already installed, selecting this option causes the
application to be automatically installed when the user opens a file that has this
file association, for example, by double-clicking the file.
Note: If a user opens a file that has an unknown file name extension and
there is no software application associated to this file name extension in the
Software Installation Properties window, the user sees the Open With dialog box
and is asked to select the best alternative from the software already present on his
or her computer.
You can associate multiple applications to the same file name extension. In
addition, you can define the precedence or priority with which Windows starts
applications when a user opens a document that has the selected extension. For
example, when you deploy both Microsoft Visual Studio 2010 and Microsoft
Office SharePoint Designer by using Group Policy, both applications can edit ASPX
files that have the .aspx extension. To configure the file name extension priority so
that users who are managed by this GPO always install Microsoft Office
SharePoint Designer, set Microsoft Office SharePoint Designer as the application
that has the highest priority for the .aspx extension. When a user who is managed
by this GPO has installed neither Microsoft Visual Studio 2010 nor Microsoft Office
SharePoint Designer, Software Installation installs Microsoft Office SharePoint
Designer and opens the file for editing when the user double-clicks an ASPX file.

Installation and Configuration in Microsoft Dynamics
®
NAV 2013
7 - 20
FIGURE 7.7: FILE EXTENSIONS TAB
You can use the Application precedence list to change the priority of an
application. Move the application that has the highest precedence to the top of
the list by using the Up and Down buttons. The application at the top of the list is
automatically installed if a document that has the selected file name extension is
invoked before the application is installed.

Module 7: Deployment
7 - 21
Setting Category Options
When an organization has a large amount of software to manage, administrators
can create categories for software. These categories can then be used to filter the
software in the Programs (or Add/Remove Programs) in Control Panel. For
example, you could create a category called Productivity Applications and
include software such as word processing and database management applications.
FIGURE 7.8: CATEGORIES TAB
Although there is a Categories tab on the Software installation Properties
dialog box, categories are established on a per-domain basis. This means the
domain administrator can create and edit the categories from any of the
Software installation Properties pages for any GPO in the domain.
Administrators can then use these categories with software that they are
managing within any GPO in the domain. There are no default or supplied
categories.
Best Practice: Because Categories are established per domain instead of per
GPO, an organization should standardize the Categories and create them in a
centralized manner.

Installation and Configuration in Microsoft Dynamics
®
NAV 2013
7 - 22
To create a new category, click Add, enter the name of the application category,
and then click OK. To modify the name of an existing category, select the
category, click Modify, modify the name, and then click OK. To remove a
category, select the category and then click Remove.
Add Software Packages to the GPO
Now you are ready to add the software packages that you want to deploy to the
software installation GPO. When you add a software package to the GPO, you
must specify how it will be deployed (published or assigned).
Best Practice: Before you add any software package to the GPO, you must
decide whether you want to deploy the application per user or per computer, and
whether you want to publish or assign it.
To modify or update the software application, any modifications must be
associated with the Windows Installer package at deployment time instead of
when the Windows Installer is actually using the package. Transform (.mst) and
update (.msp) files are applied to Windows Installer packages (which have the .msi
file name extension) in an order specified by the administrator. This order must be
determined before the application is assigned or published.
To add a software package to the software installation GPO and select the
deployment method, follow these steps:
1. Open the GPO for software installation in Group Policy Management
Editor. (If you have created a separate MMC for the GPO, you can use
that console to edit the GPO.)
2. In the User Configuration or Computer Configuration node, click
Policies > Software Settings.
3. Right-click the Software Installation node, and then select New >
Package.
4. In the Open dialog box, select the UNC path
(\\<servernames>\<sharename>) of the software distribution point
that contains the Windows Installer package.
5. Click Open.
6. In the Deploy Software dialog box, select the deployment method:
Deployment Method Description
Published Select this option to publish the
Windows Installer package to users
without applying modifications to the
package.

Module 7: Deployment
7 - 23
Deployment Method Description
Assigned Select this option to assign the Windows
Installer package to users or computers
without applying modifications to the
package.
Advanced Select this option to set properties for
the Windows Installer package,
including published or assigned options
and modifications.
7. Click OK.
If you selected Published or Assigned, the Windows Installer Package is
successfully added to the GPO and appears in the details pane. If you selected
Advanced, the Properties dialog box for the Windows Installer package appears.
In the dialog box, you can set properties for the Windows Installer package, such
as deployment options and modifications. The figure, Software Installation GPO
Containing the Client for Windows as a Published Application, shows an example.
FIGURE 7.9: SOFTWARE INSTALLATION GPO CONTAINING THE CLIENT FOR WINDOWS
AS A PUBLISHED APPLICATION
Set Software Package Properties
In this step, you can fine-tune the deployment of each application by setting
Windows Installer package properties in the Properties dialog box for the
package.

Installation and Configuration in Microsoft Dynamics
®
NAV 2013
7 - 24
The Setting Software Package Properties figure shows the Properties dialog box
for a published application.
FIGURE 7.10: SETTING SOFTWARE PACKAGE PROPERTIES WINDOW
To open the Properties dialog box, right-click the software package in the details
pane of the GPO and select Properties. The Properties dialog box for the
Windows Installer package contains the following tabs: General, Deployment,
Upgrades, Categories, Modifications, and Security.
Note: When you add a software package to the GPO and select Advanced in
the Deploy Software dialog box, the Properties dialog box appears immediately.
On the General tab, you can change the default name of the package and
designate a support URL. Users can select the support URL from the Programs
and Features (or Add Or Remove Programs) window to be directed to a
support webpage. A support URL can contain helpful information such as
frequently asked questions and can help reduce calls to a help desk or support
team.

Module 7: Deployment
7 - 25
In the Deployment tab, you can change the way the application is deployed and
the user interface options. In the Deployment Type section, you can select the
deployment option:
Deployment Type Description
Published Select this option to enable users in
the selected site, domain, or OU to
install the application by using either
Add Or Remove Programs in
Control Panel or application
installation by file activation.
If this is an application under the
Computer Configuration node, the
Published option is unavailable,
because packages can only be
assigned to computers, not
published.
Assigned Select this option to enable users in
the selected site, domain, or OU to
receive this application the next time
that they log on (for assignment to
users) or when the computer restarts
(for assignment to computers).
In the Deployment Options section of the Deployment tab, you can select the
following options:
Deployment Option Description
Auto-install this application
by file extension activation
Select this option to use the
application precedence for the file
name extension as determined in the
File Extensions tab of the Software
Installation Properties dialog box.
The application is automatically
installed when a user opens a file
that is associated with the
application.
If this is an application under the
Computer Configuration node, the
check box appears selected and
dimmed, because by default the
application is installed automatically.

Installation and Configuration in Microsoft Dynamics
®
NAV 2013
7 - 26
Deployment Option Description
Uninstall this application
when it falls out of the scope
of management
Select this option to remove the
application when the associated
GPO is no longer applicable for the
user or computer.
This typically happens when users log
on or computers start if there is
relocation to a site, domain, or OU
for which the application is not
deployed.
Do not display this package
in the Add/Remove Programs
control panel
Select this option to specify that the
application is not displayed in the
Programs and Features (or
Add/Remove Programs) item in
Control Panel.
Install this application at
logon
Select this option to specify that this
package should be fully installed
instead of just advertised by a
shortcut.
This option is available only for
assigned applications.
Avoid this option if the computer or
user to which the application is
assigned has a slow connection
because the startup and logon
procedures require a long time when
the application is first assigned.
In the Installation user interface options area, select one of the following:
• Basic to provide only a basic display to users during the installation
process.
• Maximum to provide all installation messages and screens to users
during the package installation.
You can click Advanced to open the Advanced Deployment Options dialog box
and set any of the following options:
Option Description
Ignore language when
deploying this package
Select this option to specify whether
to deploy the package even if it is in
a different language.
Module 7: Deployment
7 - 27
Option Description
Make this 32-bit X86
application available to
Win64 computers
Select this option to specify whether
the 32-bit program is assigned or
published to 64-bit computers.
Include OLE class and product
information
Select this option to specify whether
to deploy information about COM
components with the package.
In the Upgrades tab, you can select the software package(s) the current package
will upgrade. The Upgrades tab does not appear for packages created from
application files (.zap files).
On the Categories tab, you can select the categories under which the application
is listed in the Get Programs (or Add/Remove Programs) item in Control Panel.
This makes it easier for users to find the application. To link a category to the
application, select the category in the Available categories list and then click
Select. To remove an application from a category, select the category in the
Selected categories list and then click Remove.
In the Modifications tab, you can indicate the modifications (transforms or
updates) you want to apply to the package and specify the order in which the
modifications apply to the package:
• To add modifications, click Add. In the Open dialog box, browse to
find the transform file (.mst) or update file (.msp), and then click
Open. You can add multiple modifications.
• To remove modifications, click the modification that you want to
remove and then click Remove. Repeat this step until each unwanted
modification is removed.
• To set the order of modifications, select a modification and then click
Move Up or Move Down. Modifications are applied according to the
order specified in the list.
Note: Do not click OK in the Modifications tab until you have finished
configuring the modifications. When you click OK, the package is assigned or
published immediately. If the modifications are not configured correctly, you have
to uninstall or upgrade the package with a correctly configured version.
Finally, in the Security tab, you can indicate permissions for the software
installation. Permissions set for software installation pertain only to the package
installation. Administrators who manage the application installation should have
the Full Control permission set to Allow. Users who use the software assigned or
published by the application should have the Read permission set to Allow.
When you are finished setting the properties, click OK to apply the new settings.

Installation and Configuration in Microsoft Dynamics
®
NAV 2013
7 - 28
Best Practices
Here are several best practices for administrators who want to deploy software
through Group Policy:
• Test all software installation packages before you deploy them.
• Use and enforce standard configurations for applications if you can
do this.
• Create the software installation GPO as high in the Active Directory
hierarchy or tree as you can. Software should be deployed close to
the root in the Active Directory tree because it lets administrators use
one GPO to deploy software to multiple users.
• A Windows Installer package should be assigned or published only
one time in a GPO.
• Create application categories when there are lots of published
applications in your organization. This makes it easier for users to find
applications in the Get Programs (or Add/Remove Programs) item
in Control Panel.
Remove Applications Deployed Through Group Policy
Published applications that are installed can be uninstalled in two ways:
• Automatically through Group Policy.
• Manually, by uninstalling the application from the Programs and
Features (or Add/Remove Programs) item in Control Panel.
We recommend that you do not install these applications manually, because this
makes it more complex to redeploy the application through Group Policy.
To remove an application through Group Policy, follow these steps:
1. Open the GPO for software installation in Group Policy Management
Editor. (If you have created a separate MMC for the GPO, you can use
that console to edit the GPO.)
2. In the User Configuration or Computer Configuration node, click
Policies > Software Settings > Software Installation.
3. Right-click the application you want to remove, and select All Tasks
> Remove.
4. In the Remove Software dialog box, select one of the two removal
methods:

Module 7: Deployment
7 - 29
Removal Method Description
Immediately uninstall the
software from users and
computers
This option immediately removes the
software when the computer is
restarted or the next time the user
logs on to the computer.
Let users continue to use the
software, but prevent new
installations
This option prevents new instances of
the application from being installed.
But it still permits users who have
already installed the application to
continue using it.
5. Click OK to remove the application from the GPO.
FIGURE 7.11: REMOVE SOFTWARE DIALOG BOX

Installation and Configuration in Microsoft Dynamics
®
NAV 2013
7 - 30
Lab 7.1: Microsoft Dynamics NAV 2013 Deployment
Scenario
Tim is preparing to deploy Microsoft Dynamics NAV 2013 RoleTailored client and
Web client in the company domain. Instead of installing the clients on all
computers either manually or with Remote Desktop, Tim wants to use a Group
Policy to install the applications automatically. Tim plans to have the Web client
installed on all computers in the domain. The RoleTailored client is then made
available for installation. Tim wants to create a software distribution point and a
new Group Policy Object (known as Software Installation GPO). He then wants to
copy both clients to the software distribution point and add the clients to the
GPO. Tim has verified that the .NET Framework 4.0 is installed on every computer
in the domain.
Objectives
Deploy Microsoft Dynamics NAV 2013 client through Group Policy.
Exercise 1: Deploy Microsoft Dynamics NAV Clients
Exercise Scenario
Tim wants to create a new software distribution point and copy the client software
to it. Next he plans to add a new GPO and add the clients to it.
Task 1: Log On the Server
High Level Steps
1. Logon to the server as Administrator.
Detailed Steps
1. Logon to the server as Administrator.
a. On the Desktop, press Ctrl+Alt+Del.
b. In the Password field, type the password for the Administrator
user:
"Passw0rd".
c. Press Enter.

Module 7: Deployment
7 - 31
Task 2: Create a New SDP
High Level Steps
1. Open a Command Prompt.
2. Create a new SDP folder.
3. Create subfolders for the Microsoft Dynamics NAV 2013 client
software.
4. Set permissions for the SDP folder.
Detailed Steps
1. Open a Command Prompt.
d. On the Windows Taskbar, click Start > Run.
e. In the Run dialog box, type "cmd" and then click OK.
2. Create a new SDP folder.
a. At the Command Prompt, type "md \sdp" and press Enter.
3. Create subfolders for the Microsoft Dynamics NAV 2013 client
software.
a. At the Command Prompt, type "md \sdp\NAV2013" and press
Enter.
b. Type Exit, and press Enter to close the Command Prompt.
4. Set permissions for the SDP folder.
a. Open Windows Explorer.
b. Click Computer to see a list of available drives.
c. Select Drive C.
d. In the right-side pane, right-click the SDP folder and select Share
with > Specific People.
e. In the File Sharing dialog box, in the Choose people on the
network to share with box, type "Domain Users", and then click
Add.
f. Click Share.
g. Click Done.
h. Close Windows Explorer.

Installation and Configuration in Microsoft Dynamics
®
NAV 2013
7 - 32
Task 3: Copy the Software to the SDP
High Level Steps
1. Insert the Microsoft Dynamics NAV 2013 DVD in the DVD drive.
2. Copy the RoleTailored client software to the SDP.
3. Copy the Web client software to the SDP.
Detailed Steps
1. Insert the Microsoft Dynamics NAV 2013 DVD in the DVD drive.
a. Open the DVD drive by pressing the Eject button on the physical
drive.
b. Put the DVD on the tray.
c. Press the Close button to close the DVD drive.
2. Copy the RoleTailored client software to the SDP.
a. Open Windows Explorer.
b. Click Computer in the left pane to see a list of available drives.
c. Select the DVD drive that contains the product DVD.
d. In the root folder of the selected drive, right-click the
RoleTailored Client folder and select Copy.
e. In Windows Explorer, browse to the newly created SDP folder on
the local hard disk.
f. Right-click the NAV2013 folder, and select Paste.
3. Copy the Web client software to the SDP.
a. Select the DVD drive that contains the product DVD.
b. In the root folder of the selected drive, right-click the WebClient
folder and select Copy.
c. In Windows Explorer, browse to the newly created SDP folder on
the local hard disk.
d. Right-click the NAV2013 folder, and select Paste.

Module 7: Deployment
7 - 33
Task 4: Create a New GPO
High Level Steps
1. Open Group Policy Management console.
2. Create a new GPO.
Detailed Steps
1. Open Group Policy Management console.
a. On the Windows Taskbar, click Start.
b. In the Search programs and files box, type "Group Policy
Management".
c. Click the corresponding link in the list.
2. Create a new GPO.
a. In the Group Policy Management console, right-click the
CONTOSO.COM domain and select Create a GPO in this
domain and Link it here.
b. In the New GPO dialog box, in the Name field, type "Software
Installation GPO".
c. Click OK to create the GPO.
Task 5: Add Clients to the GPO
High Level Steps
1. Select the newly created GPO.
2. Add the RoleTailored client package to the GPO.
3. Add the Web client package to the GPO.
4. Close Group Policy Management Editor console.
5. Close Group Policy Management console.
Detailed Steps
1. Select the newly created GPO.
a. In the Group Policy Management console, select the Group
Policy Objects node.
b. Right-click the Software Installation GPO, and select Edit.
2. Add the RoleTailored client package to the GPO.
a. In the Group Policy Management Editor console, click User
Configuration.
b. Click Policies > Software Settings.
c. Right-click the Software Installation extension, and select New >
Package.

Installation and Configuration in Microsoft Dynamics
®
NAV 2013
7 - 34
d. In the Open dialog box, in the File Name field, type "\\NAV-DC-
SQL-SP\SDP\NAV2013\RoleTailored Client\Microsoft Dynamics
NAV RoleTailored Client.msi".
e. Click Open.
f. In the Deploy Software dialog box, select Published.
g. Click OK.
3. Add the Web client package to the GPO.
a. In the Group Policy Management Editor console, click User
Configuration.
b. Click Policies > Software Settings.
c. Right-click the Software Installation extension, and select New >
Package.
d. In the Open dialog box, in the File Name field, type "\\NAV-DC-
SQL-SP\SDP\NAV2013\WebClient\Microsoft Dynamics NAV 2013
Webclient.msi".
e. Click Open.
f. In the Deploy Software dialog box, select Assigned.
g. Click OK.
4. Close Group Policy Management Editor console.
a. In the Group Policy Management Editor console, click File > Exit.
5. Close Group Policy Management console.
a. In the Group Policy Management console, click File > Exit.

Module 7: Deployment
7 - 35
Exercise 2: Create a GPO Console for the Software
Installation GPO
Exercise Scenario
Tim wants to create an MMC so he can directly edit the newly created Software
Installation GPO.
Task 1: Create an MMC
High Level Steps
1. Open Microsoft Management Console.
2. Add a snap-in.
3. Save the console.
4. Close the console window.
Detailed Steps
1. Open Microsoft Management Console.
a. On the Windows Taskbar, click Start > Run.
b. In the Run box, type "mmc" and press Enter.
2. Add a snap-in.
a. In Microsoft Management Console window, click File >
Add/Remove Snap-ins.
b. In the Add or Remove Snap-ins dialog box, in the Available
snap-ins list, select Group Policy Management Editor.
c. Click Add.
d. In the Select Group Policy Object dialog box, click Browse.
e. In the Browse for a Group Policy Object dialog box, click the
All tab.
f. In the All Group Policy Objects stored in this domain list,
select the Software Installation GPO.
g. Click OK.
h. In the Select Group Policy Object dialog box, click Finish.
i. In the Add or Remove Snap-ins dialog box, click OK.

Installation and Configuration in Microsoft Dynamics
®
NAV 2013
7 - 36
3. Save the console.
a. In Microsoft Management Console window, click File > Save
As.
b. In the Save As dialog box, in the Save in drop-down list, select
Desktop.
c. In the File Name field, type the name for the console window:
"Software Installation GPO".
d. Click Save.
4. Close the console window.
a. In the console window, select File > Exit.

Module 7: Deployment
7 - 37
Module Review
Module Review
• The tasks for deploying software with Group Policy are as follows:
plan and prepare the software deployment, set up a Software
Distribution Point (SDP), create a GPO, specify the software
installation properties for the GPO, add Windows Installer packages
to the GPO, and set Windows Installer package properties.
• For a software deployment with Group Policy, you can set up
Distributed File System (DFS) to automatically direct users to the
nearest SDP.
• You can define software deployment properties that affect all
Windows installer packages in a GPO.
• You can also define software deployment properties that affect
individual Windows Installer packages in a GPO.
Test Your Knowledge
Test your knowledge with the following questions.
1. Which tool can you use to edit domain-wide Group Policy Objects?
( ) Active Directory Users and Computers
( ) The Group Policy Object Editor snap-in in Microsoft Management
Console
( ) The Group Policy Management Editor snap-in in Microsoft
Management Console
( ) Microsoft Windows Registry
2. What is a Software Distribution Point?
( ) A local folder that contains software applications.
( ) A shared network folder used to deploy software applications through
Group Policy.
( ) A snapshot of a running computer system’s hard disk made before
installation of a new software application.
( ) A public Microsoft website where you can download updates and
service packs.

Installation and Configuration in Microsoft Dynamics
®
NAV 2013
7 - 38
3. What is true about published and assigned applications?
( ) Both published and assigned applications can be deployed to users
and computers.
( ) Published applications are installed automatically. Assigned
applications can be installed at any time by the user.
( ) Assigned applications are installed automatically. Published
applications can be installed at any time by the user who uses the
Programs (or Add/Remove Programs) item in Control Panel.
( ) Published applications have a Windows Installer package. Assigned
applications do not.
4. Which files can be deployed using the Software Installation extension?
( ) *.exe files
( ) *.bat files
( ) *.msi files
( ) *.cmd files
( ) *.pif files

Module 7: Deployment
7 - 39
Test Your Knowledge Solutions
Module Review and Takeaways
1. Which tool can you use to edit domain-wide Group Policy Objects?
( ) Active Directory Users and Computers
(√) The Group Policy Object Editor snap-in in Microsoft Management
Console
( ) The Group Policy Management Editor snap-in in Microsoft
Management Console
( ) Microsoft Windows Registry
2. What is a Software Distribution Point?
( ) A local folder that contains software applications.
(√) A shared network folder used to deploy software applications through
Group Policy.
( ) A snapshot of a running computer system’s hard disk made before
installation of a new software application.
( ) A public Microsoft website where you can download updates and
service packs.
3. What is true about published and assigned applications?
( ) Both published and assigned applications can be deployed to users
and computers.
( ) Published applications are installed automatically. Assigned
applications can be installed at any time by the user.
(√) Assigned applications are installed automatically. Published
applications can be installed at any time by the user who uses the
Programs (or Add/Remove Programs) item in Control Panel.
( ) Published applications have a Windows Installer package. Assigned
applications do not.

Installation and Configuration in Microsoft Dynamics
®
NAV 2013
7 - 40
4. Which files can be deployed using the Software Installation extension?
( ) *.exe files
( ) *.bat files
(√) *.msi files
( ) *.cmd files
( ) *.pif files
