
Creating a Resource Map with Google My Maps
Date: September 8, 2022
Author: Lillie Greiman (Lillie.greiman@umontana.edu)
Introduction
This tutorial was designed to help guide you through the process of creating a community living
resource map. Community living resource mapping is a strategy that can help support your
outreach and connections in the rural communities you serve. Resource mapping not only
highlights the resources available in a community but as you connect with partners it puts your
CIL on the map in rural communities!
The accompanying materials can help you get started:
• Example resource list-Helena, MT Community Resources: this is an example resource
list you can work with to learn how to make a resource map. The resources in this file
are the same resources you will see highlighted in the tutorial.
• Resource list template: you can use this resource list template to start to build your
own resources list for your community. It already has the column headers labeled so all
you need to do is start filling in information!
• Functional needs for Community Living Factsheet: This factsheet gives you more
information about what we call the Functional needs for Community Living. These are a
range of resource classifications that cover the types of resources that may exist in a
community to support people with disabilities to live independently. These can help
guild you in your map classifications and determine what resources to put on the map.
You aren't limited to only these however, it is just a starting place!
Create your data file
Before you get started, you will need a list of resources in an excel file (see the accompanying
materials). For this tutorial you can either use the pre-populated file with resources in Helena,
MT, or create your own resource list using the resource template provided. Feel free to add or
edit the template as you need. However, do not add blank rows or columns as this can create
problems when importing or uploading the data. You will need to upload this data in step 10.
Once you have your data file ready you can start building your map!


4. Click on the textboxes under “Map title” and “Description”
Edit the title of your map as well as the description. You can come back and edit both the title
and description at any time if you decide to change it.
5. Click on “Save”
Be sure to always save your edits.

6. Click on the word “Untitled layer”
7. Edit the Layer Name
Use a simple descriptive layer title that describes what you are mapping.

8. Click on “Save”
9. Click on the work “Import” to bring in data from a CSV file, spreadsheet or KML
Import your resource spreadsheet to get your resources on the map.

10. Click on “Select a File from Your Device”
Navigate to where you have saved your resource list.
11. Upload your File
Select "Helena resources map example spreadsheet.xlsx", or your own resources lists, from the
file upload menu.

12. Place Resource Placemarks on the Map
Google will automatically identify the different columns in your resource sheet and ask which
column you want to use to place resource placemarks on the map. Select the address column.
13. Click on “Continue”

14. Label Your Placemarks with the Resource Name Column
15. Click on “Finish”
16. Google Has Added Your Resources to the Map!

17. Edit How Placemarks are Displayed
To edit how placemarks are displayed on the map, click on the paint roller icon next to "uniform
style."
17. Use the Drop-Down Menus to Customize Your Placemarks

18. Group Places by "Classification" and Set Your Labels to "Resource Name"

19. Edit Placemark Colors and Icons
Highlight one of the classification categories. Then, click on the paint can icon on the right to
edit the placemark color and icon.
20. Use the Pop-Up Box to Select Colors and Icons
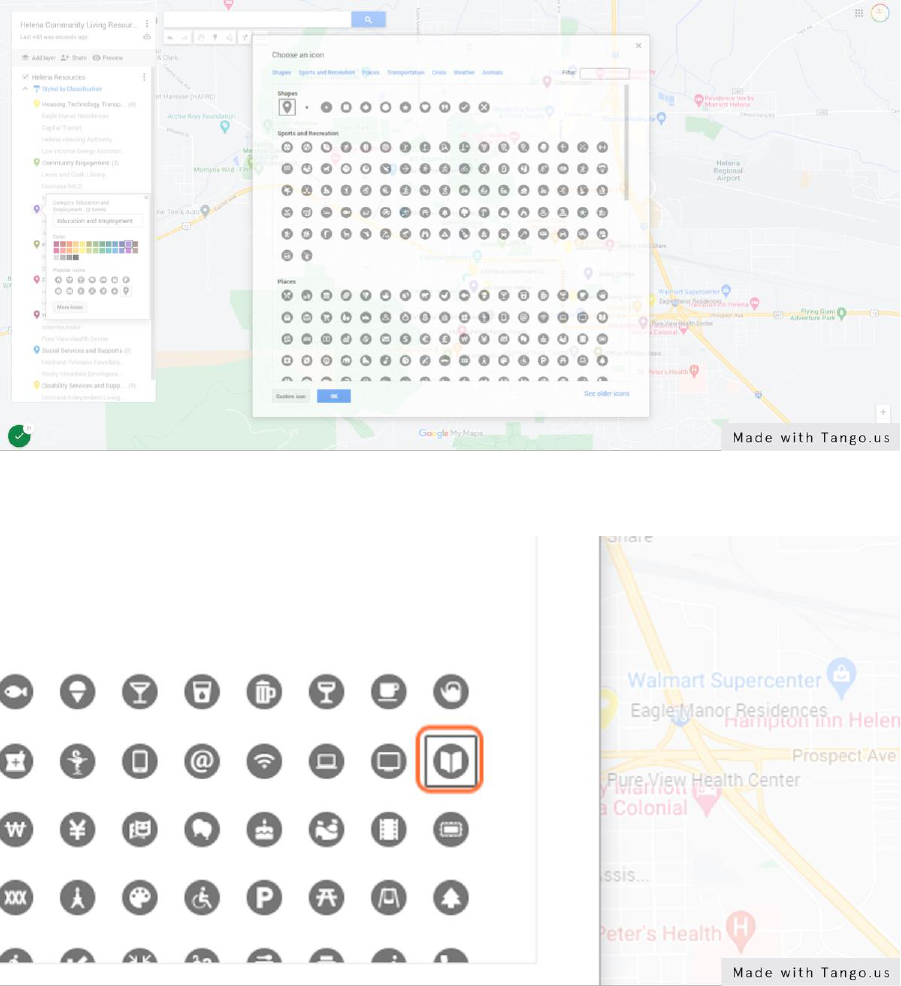
21. Click on Browse Icon Library
Google Maps has a range of icons you can select from. Choose the icon you feel is the best fit
for each classification group.
As an example, for education and employment, I used a book.
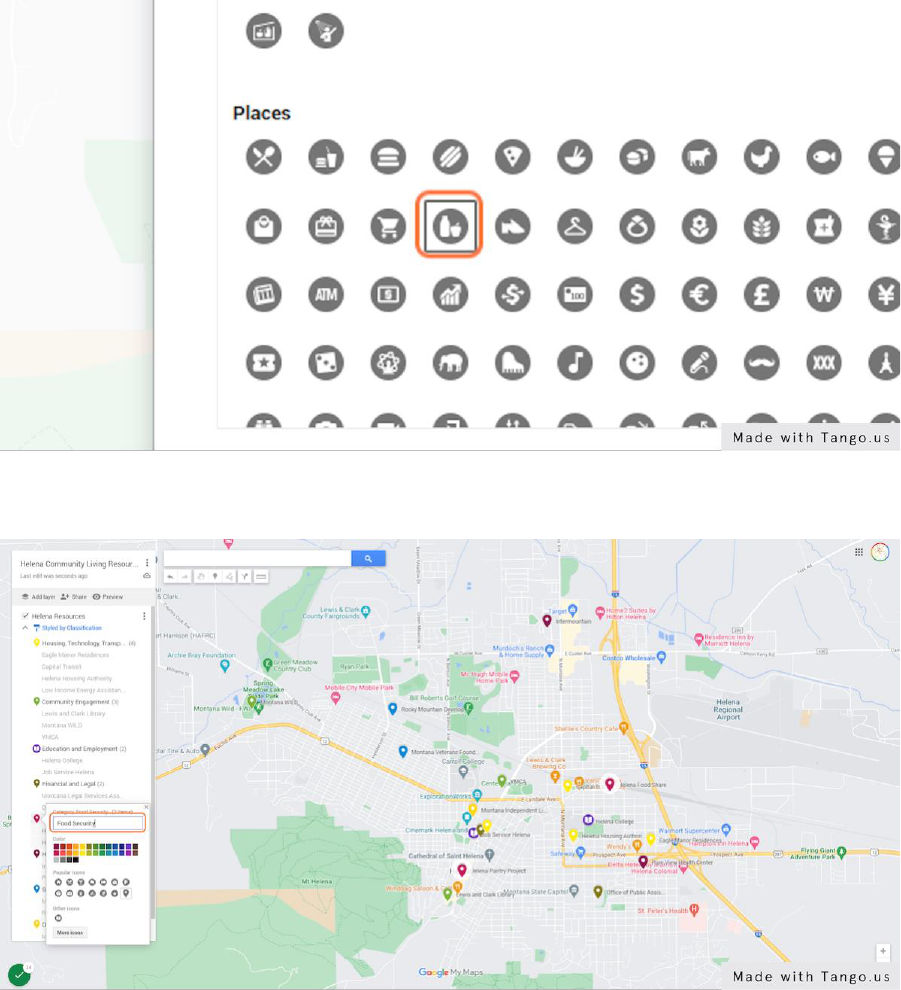
And for Food Security, I selected a groceries icon.
22. Repeat Steps 19-22 for Each Classification Group

23. Edit the Base Map
Google Maps also lets you change the look of the underlying base map. Click on the small arrow
to the left of the “Base Map” layer. This will open up a pop-up with some base map options.
Some base maps have more detail than others. Choose whichever one is the right fit for your
map. Here, I used "Mono City.” This base map is very simple, which helps my resources stand
out more.
24. Click on “Mono City”

25. Review Your Map
Take a moment to review your map. You should see all your resources displayed with the colors
and the icons you have selected. The legend on the left of the screen displays the classifications
and the names of the resources within each classification. You can expand and collapse the list
of resources by clicking on the small arrow to the left of the paint roller icon.
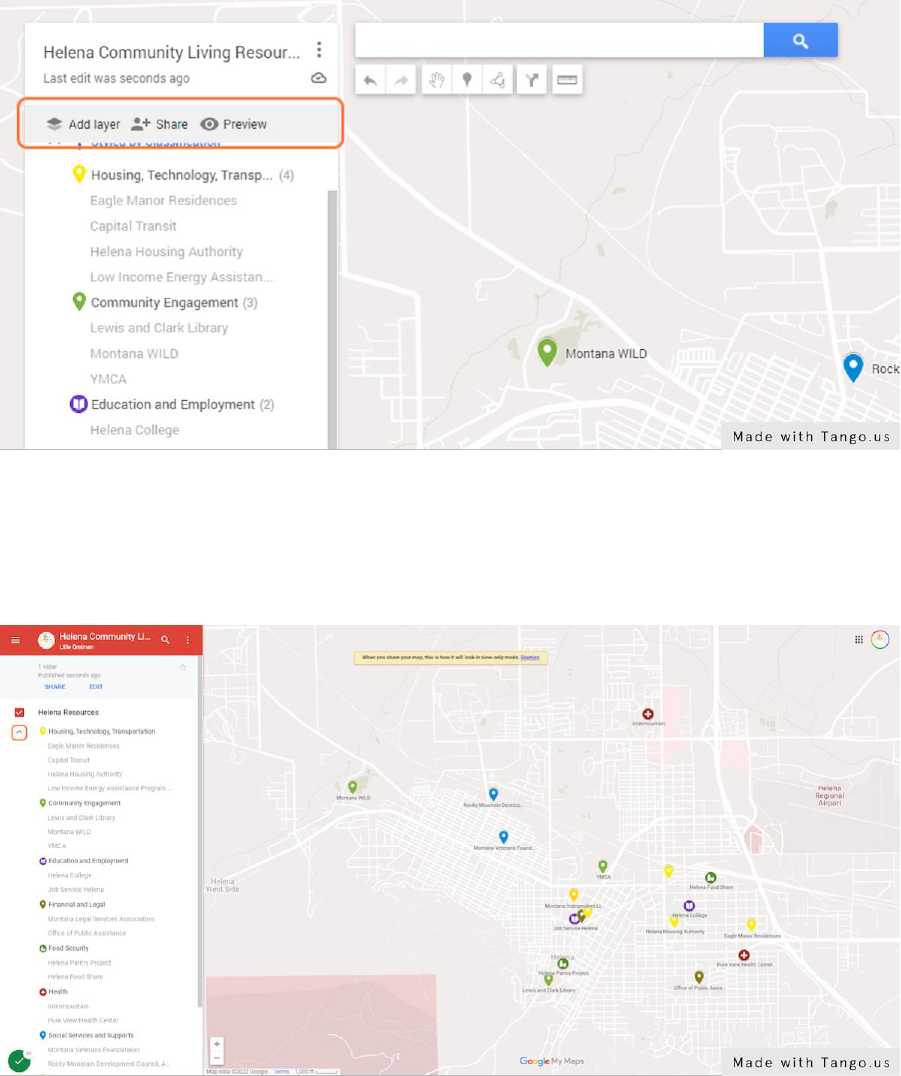
26. Now Preview Your Map
The map preview button (it looks like an eye) will display the map as it will look like to the
public. Only you (and others that you designate) will have the option to edit the map. Click on
the preview button to view your map.
27. Your Map Preview Will Open in Another Tab
This is what your map will look like to others. You can expand and collapse the classification
categories on the left.

28. Select a Resource from the List
Clicking on a resource from the list will bring up that resource’s information from the resource
Excel spreadsheet. It will also highlight the icon on the map.
29. You Can Also Select an Icon from the Map…

30. …and Information on That Resource Will Pop Out on the Left.
31. Click on “Edit” to Return to Your Editing Screen

32. Click on “Share”
33. A Share Map Dialogue Box Will Open
Use this box to set permissions for sharing and viewing your map. Copy the link to share your
map with others who might be interested!

34. Edit Resource Information
You can also edit resource information within the map. Click on a resource in your map to open
it.
To edit the content for this resource, click on the pencil icon.

35. Type in the Box to Edit the Fields You Want to Change
36. Click on “Save”

37. You Are Done!
Congratulations, you have created a resource map! Your map will be stored in your google my
maps home page. You can also save it on google drive, or save the link, to access easily from
anywhere.
If you have any questions about this tool please contact Lillie Greiman at the Research and
Training Center on Disability in Rural Communities (RTC:Rural).
Lillie.greiman@umontana.edu
1-406-243-6102
Note on accessibility: Google My Maps should be accessible to individuals who use screen
readers to navigate the internet. However, it is unclear how useable the maps will be for
individuals who use this kind of assistive technology. In order for your resource list to be
accessible to everyone, it is important to also have a copy of your resources in an accessible
table or document.
Source: Tango
View this workflow online: https://app.tango.us/app/workflow/Workflow-with-Google-
5223fed6c47241109d5b98c70edc8062
