
Developing a Document Lifecycle using
Oracle ADF, BI Publisher and Universal
Content Management
1 Introduction
1.1 Service-oriented Reporting with Oracle BI Publisher
In almost every application there is a requirement to generate documents and reports
for the business departments. In the past the output functionality was often
implemented in every application using different reporting products and approaches
which was expensive in development and maintenance.
With the new paradigm of Service-oriented Architecture (SOA) and technologies like
Web Services, Business Process Execution Language (BPEL) etc. it is a much better
approach to have a centralized Reporting Service delivering all the required
documents and reports requested by different applications. Consequently the
Reporting Service has to satisfy the sum of requirements from business applications
concerning formatting functionality, output formats, scheduling, distribution channels,
performance and requires appropriate service interfaces for integration. Oracle BI
Publisher offers this broad functionality and can be integrated using HTTP, Java
APIs or web services. Further information about Oracle BI Publisher can be found at:
http://www.oracle.com/technology/products/xml-publisher/index.html
Generating a document or report often cannot be considered as an isolated step. In
most cases it is part of a business process with requirements to store the document
together with contextual information about the process the document belongs to (date,
owner, recipients, process parameters).
Looking at a single document there is a kind of a document lifecycle starting with the
requirement for the document, followed by generating, delivering, consuming and
archiving it.
In this example Oracle Universal Content Management (UCM) will be used to
store the generated output together with metadata about the process itself. Further
information about Oracle Universal Content Management can be found at:
http://www.oracle.com/technology/products/content-management/ucm/index.html
When implementing business processes Oracle BPEL Process Manager can be used
as a backbone to control the execution of the process steps in the required sequence.
This has also advantages for integrating a Reporting Service based on Oracle BI
Publisher. As an example there could be a requirement that campaign letters should be
produced and send to customers when a product in stock exceeds a certain threshold
value. The scheduler of BI Publisher can be used to define a certain time or frequency
for the execution of a report. If like in the example the execution depends from certain
conditions this is outside of the scheduler's scope. With BPEL Process Manager it is

possible to implement such a kind of Conditional Reporting.
In this example BPEL Process Manager will not be used to keep the number of
integrated components small. Further information about Conditional Reporting with
BI Publisher and BPEL Process Manager can be found at:
http://www.slideshare.net/kanaugust/oracle-bi-publisher-and-bpel-integration
.
1.2 Components used in the Example
In the example the following components will be used:
• Oracle JDeveloper 11.1.1.2 with embedded WebLogic Application Server
• Oracle Database 11g with
o demo schema HR
o UCM content store
• Oracle BI Publisher Enterprise 10.1.3.4.1
• Oracle Universal Content Management 10.1.3.3
Figure 1 Components used in the example
1.3 Annotations to the Example
For the sake of simplicity the following aspects are excluded from the example.
• In the example no report-specific parameters will be used. Therefore all reports
can be executed when
o they are defined without parameters
o they are defined with parameters allowing the selection of all values
• The example does not implement an integrated identity and access management
solution. No LDAP is used to store the user credentials. BI Publisher and Oracle
UCM will be used with their own credential stores to maintain users and roles. In

this example it is assumed that the same user (adam) exists in Oracle BI Publisher
and UCM.
The complete sample code of the ADF application is found in BipIntegration.zip
included in the Sample Code package.
2 Developing the ADF Application
2.1 Overview of the ADF Application
Oracle Application Development Framework (ADF) is a comprehensive and
integrated set of JEE frameworks and standards to develop and run enterprise
applications. Further information about Oracle Application Development Framework
can be found at:
http://www.oracle.com/technology/products/adf/index.html
In this example the following components of Oracle ADF are used in the layered
application:
Application Layer ADF Component
Business Service Layer Web Services
Model Layer Data Binding
Presentation Layer (GUI) ADF Faces
In the business service layer web services of Oracle BI Publisher and Oracle UCM
will be called in a sequential order.
Figure 2 Sequential order of web service calls
The response of one call is the input to the next call. This sequence of calls determines
the functional flow of the application which consists of the following steps:
• display a list of available reports in a folder of the BI Publisher server
(getFolderContents)
• user selects one report from the list

• display a list of registered templates for the selected report
(getReportDefinition)
• user selects one template from the list
• user enters options for the report (format, name, etc. of the generated report)
• user starts the execution of the report (runReport)
• user can view the generated report
• user enters metadata to describe the generated report
• user checks-in the generated report into Oracle UCM (checkInUniversal)
A description of these web service methods can be found at:
• Oracle BI Publisher
http://download.oracle.com/docs/cd/E12844_01/doc/bip.1013/e12188/T42173
9T524310.htm
• Oracle UCM
http://download.oracle.com/docs/cd/E10316_01/cs/cs_doc_10/documentation/
addons/soap_wsdl_10en.pdf
http://download.oracle.com/docs/cd/E10316_01/cs/cs_doc_10/sdk/soap/wwhel
p/wwhimpl/js/html/wwhelp.htm
Using web services in Oracle ADF there are two possible implementations:
1. Generating the data controls directly for the WSDL of the web service
This approach is more straightforward and easier to implement but there are
certain limitations especially with complex datatypes.
2. Generating a Java client proxy for the web service and expose that class as a data
control.
This approach is more powerful and flexible but requires an additional layer and
more effort to implement.
In Oracle JDeveloper both implementations are supported by wizard-driven
functionality. In the example the first implementation was used to explore the
possibilites and limitations of that approach in JDeveloper 11.1.1.2.
2.2 The Business Service for BI Publisher Web Wervices
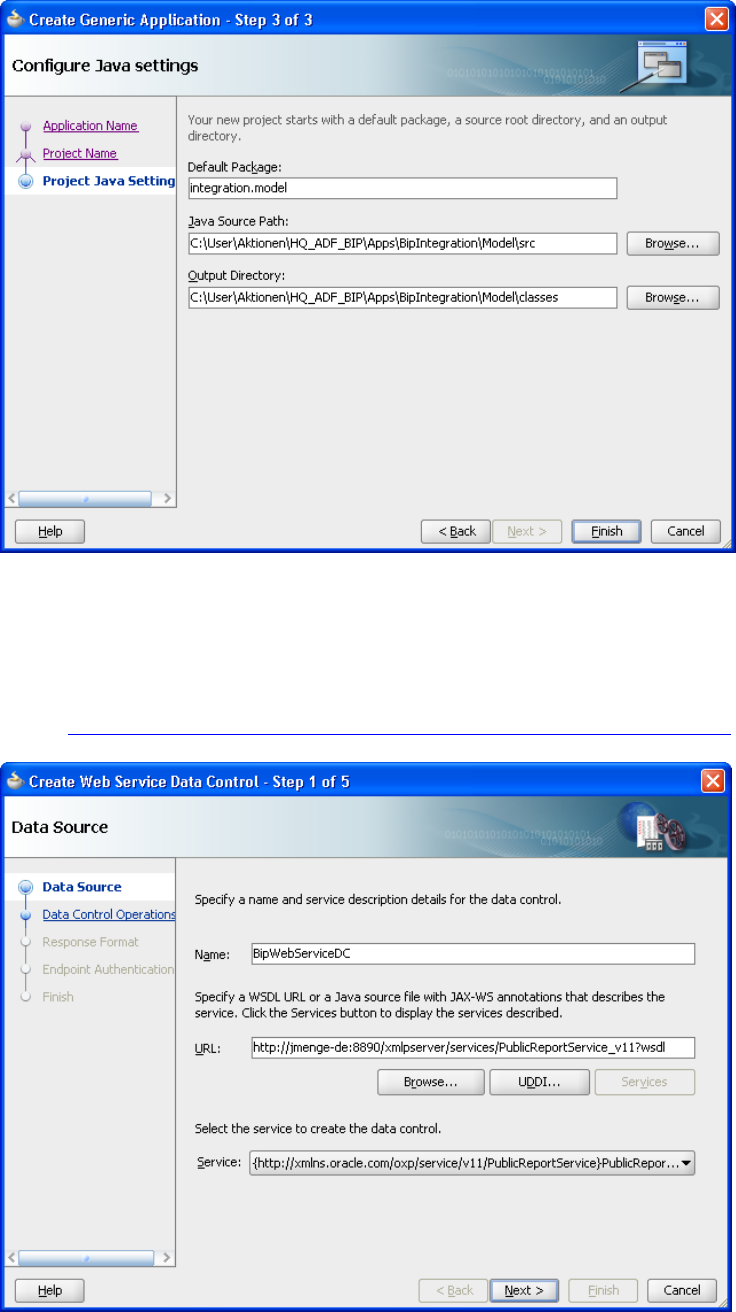
2.2.1 Creating the Application and Project Model
In the first step the data controls for accessing the BI Publisher web services will be
generated. Create an application BipIntegration of type Generic Application (package
integration) in Oracle JDeveloper and a project Model (package integration.model)
with the technology Web Services selected. (See screenshots.)

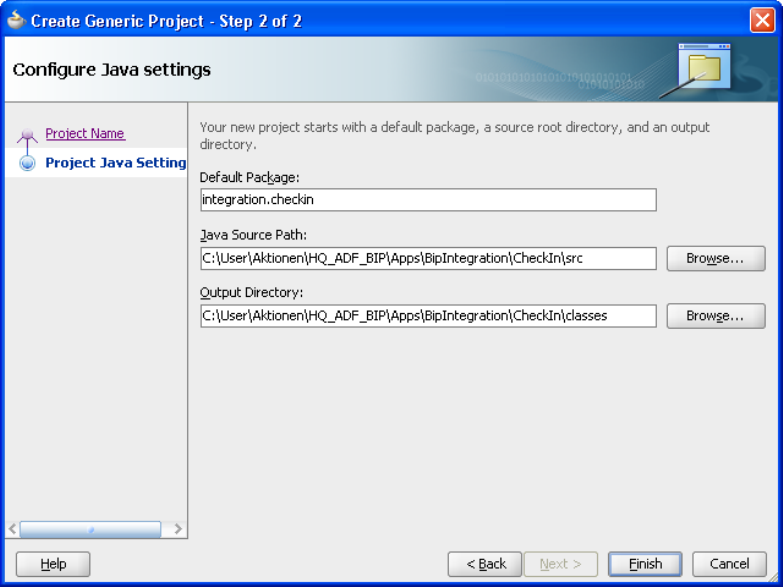
2.2.2 Generating the Data Controls for the Web Service
In the project Model select File => New => Business Tier => Web Services => Web
Service Data Control. In the wizard enter the following details:
Name of data Control. BipWebServiceDC
WSDL
http://<host>:<port>/xmlpserver/services/PublicReportService_v11?wsdl

Select the methods: getFolderContents, getReportDefinition, runReport
from the list of available methods of the web service endpoint.

For each of these methods there exists an equivalent method with the prefix inSession.
To use the inSession methods the method login has to be called first to get a valid
session token from the server. For subsequent method calls the authentication is done
by adding this token to the request parameters. In this example the methods without
the session token will be used just by adding username and password to every method
call.
It is a good idea to use the tool soapUI (www.eviware.com
) to test if the endpoint of
the web service is accessible and the methods are working as expected.
After finishing the wizard there are two results in JDeveloper visible. In the Data
Controls Palette there is a new data control BipWebServiceDC.
Because the web service methods from BI Publisher expect complex data types in the
request, several xml files in the Application Navigator reflect the structure of the
request and response data types.

2.3 The User Interface for BI Publisher Web Services
2.3.1 Creating the Project ViewController
In the application BipIntegration create a second project of type ADF ViewController
Project. Accept the name ViewController, the selected technologies and the package
name (integration.view).
Change the application name and the contect root in the project properties to
BipIntegration.

2.3.2 Creating the Taskflows and Train Stops
In the project ViewController a train will be created as a bounded task flow which
gives a better control of the user's input activities as a linear sequence of steps.
In the project ViewController select File => New => Web Tier => JSF => ADF Task
Flow.
Enter the following details:
File Name report-task-flow.xml
Create as Boundes Taskflow Checked
Create with Page Fragments Checked
Create Train Checked

In the diagram view of the bounded taskflow create the following page fragments by
dragging activities of type "View" from the Component Palette into the diagram:
• report.jsff
• layout.jsff
• destination.jsff
• options.jsff
• runReport.jsff
• checkIn.jsff
The extension .jsff indicated that these are page fragments. Because they belong to a
train they are called "train-stops" and linked together automatically in the sequence
they are created.
At the end of the train position an activity of type "Task Flow Return" and name it
"callReport". Connect the Task Flow return to the last train-stop using a Control Flow
Case and name it "return".
To get meaningful descriptions of the train-stops in the wizard-like interface it is
possible to enter a Display Name for every train-stop.

In the structure pane of the task flow, open the view node for every page fragment of
the task flow. In the structure will be a train-stop node. Right click on the train-stop
node and select "Insert inside train-stop => Display Name". Click on the new display-
name node and enter the following display text in the property inspector.
Page Fragment File Display Name
report.jsff Report
layout.jsff Template
destination.jsff Destination
options.jsff Options
runReport.jsff Run Report
checkIn.jsff Check-In
Open each page fragment in JDeveloper and add the following components.
• insert a Train (af:train) from the Common Components
• insert a PanelBox (af:panelBox) below the train
• for the panel box set the property ShowDisclosure to false
• for the panel box set the property Text to a meaningful heading
• insert a Train Button Bar (af:trainButtonBar) into the facet "toolbar

2.3.3 Creating an unbounded Taskflow with a Page
In this step a new page will be created in the unbounded task flow adfc-config.xml. In
a region of this page the bounded task flow, i.e. the train with all its page fragments,
will be displayed.
Open the file adfc-config.xml in the workspace and drag an activity of type "View"
into the diagram. Open the new created page, name it callReport.jspx and accept the
default settings.

To prepare the page to host the bounded task flow
• disable the facets "start" and "end" by deleting them in the diagram view
• insert a heading just by drag a component outputText (af:outputText) into the
facet "header" and change the value to "BI Publisher Web Service Integration"
• set the display name for the page in the adfc-config.xml by selecting the page
and enter "BI Publisher Web Service Integration" as the Display Name in the
Property Inspector.
• Place a Panel Group Layout (af:panelGroup) in the facet "center" and set the
properties Width and Height of the panel group to 100%.
Now drag the bounded task flow report-task-flow.xml from the Application Navigator
into the Panel Group and accept Region (af:region) from the list of available choices.
2.3.4 Creating a Managed Bean to store the Request Parameters
To store the parameter values entered by the user in the different train-stops a
managed bean is required so that these values are availabe when the report is run.
Create a Java bean in the project ViewController by selecting File => New =>
General => Java = Java Class.
Name it ReportBean, create it in the package integration.view and accept the other
defaults.

In this class define variables for all parameter values. For some of them you can
provide default values. With the function Generate Accessors from the JDeveloper
context menu generate get/set methods for all variables defined.
The complete code of ReportBean.java is included in the Sample Code package.
The ReportBean should be added as a managed bean to the report-task-flow.xml. In
the Overview tab of the bounded taskflow select Managed Beans and create a new
entry with the following properties:
Name ReportBean
Class integration.view.ReportBean
Scope pageFlow

2.3.5 Defining the Page Fragments for the Train Stops
In this step we proceed with the already created page fragments. To open a page
fragment just double-click on it in the bounded task flow report-task-flow.xml.
To get a better alignment of fields drag a Panel Form Layout (af:panelFormLayout)
inside the Panel Box of each page fragment. The page fragments are now prepared to
hold specific fields.
2.3.5.1 Page Fragment report.jsff
Drag the attributes atributeLocale and attributeTimezone from the complex type
ReportRequest in the Data Control Palette as Input Text Fields with Label
(af:inputText) into the Form layout container.
For the attribute reportAbsolutePath do the same but choose a Select One Choice
(af:selectOneChoice) as the implementation. This list of values should display the
response from the first web service method getFolderContents().
Leave the Base Data Source as it is and add the following iterator to the List Data
Source:
getFolderContents => Return => getFolderContentsReturn
In the Edit Action Binding dialogue enter the following values:
folderAbsolutePath /HR Manager
UserID adam
Password welcome1
in the example a hard-coded directory name of the BI Publisher repository is used to
keep the example simple. The hard-coded username and password can be replaced
later when a piece of ADF security will be implemented.

Back to the Edit List Binding map reportAbsolutePath as the Data Value to
absolutePath as the List Attribute and select absolutePath as the Display Attribute.

Because the input values should be stored in our ReportBean the bindings for the
fields have to be changed. Select each text field and open the Expression Builder for
the property Value in the Property Inspector.
Replace the existing binding by
#{pageFlowScope.ReportBean.attributeLocale} for attributeLocale
#{pageFlowScope.ReportBean.attributeTimezone}for attributeTimezone.
For the Select-One-Choice list another approach is needed because the list does not
return the value we are interested in but an index indicating the position of the value
in the list. So some program code is required in the ReportBean. There are different
ways to get the value from the list. Some of these are explained at:
• http://groundside.com/blog/DuncanMills.php?title=adf_the_list_binding_value
_problem&more=1&c=1&tb=1&pb=1
• http://sameh-nassar.blogspot.com/2009/11/getting-value-from-
selectonechoice-list.html
We will add some code in the ReportBean to get the value from the binding
definition. This code is part of the method reportChanged(). This method was created
by defining a ValueChangeListener for the Select-One-Choice list in the Property
Inspector. When the user selects a value from the list this listener gets activated and
the method reportChanged() is executed.

Now the first page fragment is finished.

2.3.5.2 Page Fragment layout.jsff
In the second page fragment repeat the same steps as before. First create an Input Text
Field with Label for the attribute attributeFormat.
For the attribute attributeTemplate create again a Select One Choice list
(af:selectOneChoice) repeating the same steps as above.
This list of values should display the response from the second web service method
getReportDefinition().
Leave the Base Data Source as it is and add the following iterator to the List Data
Source:
getReportDefinition => Return => getReportDefinitionReturn => templateIds => item
In the Edit Action Binding dialogue enter the following values:
reportAbsolutePath #{pageFlowScope.ReportBean.reportAbsolutePath}
UserID adam
Password welcome1
The value for the reportAbsolutePath was already entered by the user in the first page
fragment and it is accessible in our ReportBean.
The hard-coded username and password can be replaced later later when a piece of
ADF security will be implemented.

Back to the Edit List Binding map attributeTemplate as the Data Value to item as the
List Attribute and select item as the Display Attribute.
Replace the existing binding for the Input Text Field by
#{pageFlowScope.ReportBean.attributeFormat} for attributeFormat
Again some code is needed in the ReportBean to get the selected value from the list.
In this case we use the method templateChanged() which is called by the
ValueChangeListener of the Select-One-Choice list.
The second page fragment is now ready.

2.3.5.3 Page Fragment destination.jsff
In this page fragment create an Input Text Field with Label for the attribute
reportOutputPath and replace the existing binding by
#{pageFlowScope.ReportBean.reportOutputPath}
The reportOutputPath stores the name of the report file to be generated. The variable
reportPath in the ReportBean defines the directory where the file is stored. This
directory should be accessible by the web server, i.e. should be mapped as a virtual
directory.
This is our third page fragment.

2.3.5.4 Page Fragment options.jsff
In this page fragment create an Input Text Field with Label for the attributes
byPassCache, flattenXML and sizeOfDataChunkDownload.
Replace the existing binding by
#{pageFlowScope.ReportBean.byPassCache} for byPassCache
#{pageFlowScope.ReportBean.flattenXML}for flattenXML
#{pageFlowScope.ReportBean.sizeOfDataChunkDownload} for
sizeOfDataChunkDownload.
If these parameters should not be set by the user default values can be defined in the
ReportBean.
Our fourth page fragment is finished.

2.3.5.5 Page Fragment runReport.jsff
To display all parameters to the user before he finally runs the report create again
Input Text Fields with Labels for the parameters already used in the previous page
fragments. But now the property Disabled shopuld be set to True for all fields so that
the user cannot change the settings anymore.
Again change the binding for all fields now pointing to the ReportBean.
Before running the report all parameter values from the ReportBean will be transfered
back into the binding context. Therefore it is important that all mandatory attributes of
the web service calls are defined in the binding. If you don't want them displayed just
remove the tags from the source code of the page.
To run the report draw the method runReport from the Data Controls Palette onto the
page fragment and select ADF Button as the implementation.
This will open the dialogue Edit Action Binding where you can enter the follwing
values:
reportRequest ${bindings.reportRequestIterator.currentRow.dataProvider}
UserID adam
Password welcome1
The hard-coded username and password can be replaced later when a piece of ADF
security will be implemented.

To view the generated report create a second Button by using the component Go
Button (af:goButton) from the Component Palette and drag it onto the page.
The property Text should be changed to a meaningful label of the button.
The Go Button will navigate directly to a destination. So the name of the generated
report has to be provided in the property Destination.
By setting this property to
http://127.0.0.1:7101/BipWebServiceIntegration/#{pageFlowScope.ReportBean.repor
tName}
the name will be derived from the ReportBean.
It would be convenient when this button would be disabled before the report is
generated. This will be implemented in the next section.
This page fragment is almost finished.


2.3.6 Creating a Managed Bean to run the Report
To run the report a second managed bean is necessary.
Create a Java bean in the project ViewController by selecting File => New =>
General => Java = Java Class.
Name it RunReportBean, create it in the package integration.view and accept the other
defaults.
In this class we will transfer the parameter values from the ReportBean into the
binding context and execute the action for the button Create Report.
Additionally the second button will be activated to view the generated report by using
a boolean variable setVisible.
To disable the View button depending from this variable we have to set the property
Disabled = #{!pageFlowScope.RunReportBean.setVisible}.
The complete code of RunReportBean.java is included in the Sample Code package.
The RunReportBean should be added as a managed bean to the report-task-flow.xml.
In the Overview tab of the bounded taskflow select Managed Beans and create a new
entry with the following properties:
Name RunReportBean

Class integration.view.RunReportBean
Scope pageFlow
2.4 Business Service for UCM
2.4.1 Different Ways to check-in a Document into Oracle UCM
There are at least four different ways to check-in a document into Oracle Universal
Content Management (UCM).
1. WebDAV
This is the most simple way to check-in a document because a WebDAV folder
could be specified as a destination in BI Publisher Enterprise. It is possible to use
the web service method scheduleReport() to send the generated report directly into
the UCM document store. But there are limitations concerning the ability to pass
accompanying metadata. In the case of WebDAV metadata in Oracle UCM are
related to certain folder.
2. Remote Intradoc Client (RIDC) Java API for UCM
This is the recommend way when the number of documents is high or the
documents are large in size.
3. Standard Java Content Repository (JCR) Adapter in Oracle WebCenter
This would allow to use pre-defined portlets to connect with and use functionality
of Oracle UCM.
4. Web Service API
Oracle UCM also offers web services for common functions. A WSDL generator
can be used to adapt the web service interface to specific requirements.
Web Services in Oracle UCM are appropriate for a small number of documents
which are not too large because the content is embedded into the SOAP message
itself. Web services in Oracle UCM are secured by basic authentication.
In this example we use persistently the web service API to check-in the generated
reports into Oracle UCM
2.4.2 Generating the Data Controls for the Web Service
For the web service data controls a separate project CheckIn will be created in the
existing application with the package integration.checkin and technology Web
Services selected.
In the project CheckIn select File => New => Business Tier => Web Services => Web
Service Data Control. In the wizard enter the following details:
Name of data Control. CheckInECM
WSDL http://host:port/idc/groups/secure/wsdl/custom/CheckIn.wsdl
It is not possible to get the service details directly by entering the service endpoint
URL because the web service is secured by basic authentication. To get around create
a copy of the WSDL in a browser, add the file to the project and select it in the wizard
by using the button Browse.

Select only the method CheckInUniversal from the list of available methods of the
web service endpoint.

In step 4 of the wizard you can enter a username and password for the basic
authentication. The credentials are stored encrypted in the file cwallet.sso. Later we
will replace them by a web service policy and a way to change them during runtime.
It is also possible to use the tool soapUI to test web services with basic authentication
and embedded or attached documents like we do have in this example.
As in the first part of this example we find a new data control CheckInECM in the
Data Controls Palette and several .xml files in the Application Navigator because of
the complex data types in the request and response of the web service.

2.5 User Interface for UCM
2.5.1 Defining the Page Fragment checkIn.jsff
To structure the layout create a Panel Group (af:panelGroupLayout) with vertical
orientation inside the Panel Box.
To get a better alignment of fields drag a Panel Form Layout (af:panelFormLayout) as
the first group into the Panel Group.
From the Data Controls Palette drag the method CheckInUniversal into the Form

Layout and select ADF Parameter Form as the implementation type. From the list of
available parameters select the following parameters as Input Text Fields:
• dDocName
• dDocTitle
• dDocType
• dDocAuthor
• dSecurityGroup
As a result together with the input text fields a button will be created.
To get the report content into the message we have to add the complex type Primary
File which consists of two attributes fileName and fileContent.
Drag the iterator primaryFile (node below the CheckInUniversal_parameters) just
below the existing input text fields and select ADF Form as the implementation type.
Then you can remove the Panel Form Layout around the two fields and the field
fileContent completely from the interface and the binding.
In the Binding View check the action bindings fot the method CheckInUniversal.
For the primaryFile the binding should be
${bindings.primaryFileIterator.currentRow.dataProvider}

Next we will add the response to the page. It will display some status information
about the success or failure of the check-in process.
Drag CheckInUniversalResult under the node Return from the Data Controls Palette
below the existing Form Layout and select ADF Read-only Form as the
implementation type. All fields will be created as Output text with Label
(af:outputText).
When this page fragment will be displayed as part of the train we have to prevent the
execution of the method action until the input fields are filled by the user. We can do
that by defining a refresh condition for the two iterators belonging to the response:
• CheckInUniversalResultIterator
• StatusInfoIterator
În the Bindings View select each iterator and enter the following condition into the
property RefreshCondition:
#{not empty bindings.dDocName.inputValue}
This is the completed page fragment


2.5.2 Creating a Managed Bean to check-in the Document
To get the content of the generated report file into the SOAP message another
managed bean is needed.
Create a Java bean in the project ViewController by selecting File => New =>
General => Java = Java Class.
Name it CheckInBean, create it in the package integration.view and accept the other
defaults.
In this class define variables for fileName, fileContent and primaryFile.
With the function Generate Accessors from the JDeveloper context menu generate
get/set methods for these variables.
The complete code of CheckInBean.java is included in the Sample Code package.
The CheckInBean should be added as a managed bean to the report-task-flow.xml. In
the Overview tab of the bounded taskflow select Managed Beans and create a new
entry with the following properties:
Name CheckInBean
Class integration.view.CheckInBean
Scope pageFlow

Finally there is a modification to be done in the pagedef file of the checkIn page
fragment (checkInPageDef.xml). In the Source View the NDValue for the primaryFile
has to be set to:
NDValue="#{pageFlowScope.CheckInBean.primaryFile}"
2.6 Implementing ADF Security
2.6.1 Creating a Managed Bean for the Login
This step is optional and not required to run the application if all hard-coded
usernames and passwords are correct.
To implement ADF security using a .jspx page an additional bean is required.
Create a Java bean in the project ViewController by selecting File => New => General

=> Java = Java Class.
Name it LoginBean, create it in the package integration.view and accept the other
defaults.
The required code for the bean can be found in the Fusion Developer's Guide for ADF
(http://download.oracle.com/docs/cd/E15523_01/web.1111/b31974/adding_security.h
tm#BABDEICH).
The complete code of LoginBean.java is included in the Sample Code package.
The LoginBean should be added as a managed bean to the unbounded top level flow
adfc-config.xml. In the Overview tab of the taskflow select Managed Beans and create
a new entry with the following properties:
Name LoginBean
Class integration.view.LoginBean
Scope session

2.6.2 Creating a Login Page
Drag an activity of type "View" into the diagram of the adfc-config.xml. Open the
new created page, name it login.jspx and accept the default settings.
Do the following steps in the page login.jspx
• disable the facets "start" and "end" by deleting them in the diagram view

• insert a heading just by drag a component outputText (af:outputText) into the
facet "header" and change the value to "Login Page"
• set the display name for the page in the adfc-config.xml by selecting the page
and enter "Login Page" as the Display Name in the Property Inspector.
• place a Panel Box (af:panelBox) in the facet "center", set the property Text to
"Login" and set the properties Width and Height of the Panel Box to 100%.
• place a Panel Form Layout (af:panelFormLayout) inside the Panel Box
Now two Input Text Fields for the username and password have to be created.
For the username drag an Input Text Field (af:inputText) into the Form Layout with
Label Username
Value #{LoginBean.username}
Required True
For the password drag an Input Text Field (af:inputText) below the username field
with
Label Password
Value #{LoginBean.password}
Required True
Secret True
Finaly create a Button (af:commandButton) below the text fields with
Text Login
Action #{LoginBean.doLogin}
2.6.3 Configuration of ADF Security
Select the ViewController project and open Application => Secure => Configure ADF
Security in the JDeveloper menu. Select the option "ADF Authentication and
Authorization" and "Form-based Authentication" in the next step. Enter
/faces/login.jspx for the Login Page and /faces/error.jspx for the Error Page.

The error page can be created in the same way as the login page just with a simple
error message.
In the next step select "Grant to All Objects".
In step 4 check "Redirect Upon Succesful Authentication" and enter
/faces/callReport.jspx as the Welcome Page of the application.

The last page of the wizard show a summary of the settings before finishing the
configuration.

In the next step a policy have to be defined.
Select the ViewController project and open Application => Secure => ADF Policies
in the JDeveloper menu.
To protect the task flow report-task-flow.xml select it, remove the role "test-all" and
add the role "authenticated-role". The role "authenticated-role" is predefined in Oracle
WebLogic Server and is granted to all authenticated users.
On the second tab Web Pages do the same for the web page callReport.jspx.
In the last step a user has to be created in the jazn-data.xml to test the configuration.
Select the ViewController project and open Application => Secure => Users in the
JDeveloper menu.
Add a user and a password, in this example adam and welcome1.
Because we will use the embedded WebLogic server to test the configuration it is not
necessary to configure a security deployment.

2.6.4 Modifying existing Page Fragments to use ADF Security
At the moment there are three page fragments where hard-coded credentials will be
used when calling the web service methods of Oracle BI Publisher. Go to the
Bindings View of report.jsff, layout.jsff and runReport.jsff and edit the action binding
of the method.
report.jsff getFolderContents
layout.jsff getReportDefinition
runreport.jsff runReport
Replace the username by #{LoginBean.username}
Replace the password by #{LoginBean.password}
2.6.5 Creating a Managed Bean to Pass the Login Credentials for Oracle
UCM
Oracle UCM web service endpoint is secured by basic authentication and the
credentials entered at design time are stored in a wallet file. In this step these
credentials should be replaced by the username and password of the login user.
In the first step we will define web service security for the data control CheckInECM.
Select the file DataControls.dcx in the CheckIn project. Navigate to the node

CheckInECM in the Structure Pane and open Define Web Service Security in the
context menu (right mouse button).
In the multiline field add an entry and select oracle/wss_http_token_client_policy
from the list of available policies. This is the appropriate policy for basic
authentication which we will need for the UCM web service. Don't close the window.

Press the button Override Properties and add a credential store key (csf-key). This a
set of values consisting of a user name, a password and a key name. The csf-key
replaces the credentials we defined when the data control for the web service was
created and is stored in the file ../META-INF/cwallet.sso.

Now it is possible to reference and modify the csf-key programmatically in the
CheckInBean.
The complete code of the modified CheckInBean.java is found in the Sample Code
package.
The last step is to change the action listener for the Check In button. It still points to
the method CheckInUniversal in the binding. Change the property ActionListener to
#{pageFlowScope.CheckInBean.execute}
by using the Expression Builder or the function Edit for the property. It is accidentally
that the name of the action is execute() before and after the modification. Of course
you can choose a arbitrary for the method in the bean.

2.7 Running the application
When you run the application for the first time it is recommended to start the HTTP
Analyzer from the JDeveloper tools menu. It intercepts all HTTP requests to the
embedded WebLogic server so that you can see the content of all outgoing and
incoming messages. You have to start the recording by pressing the green triangle in
the Analyzer window before the embedded WebLogic server is started.
From within JDeveloper open the adfc-config.xml, select the page callReport and run
it through the context menu of JDeveloper. In the login page enter adam as user and
welcome1 as the password. Remember that this user will replace the static settings
defined during design time for the UCM web service.

Upon succesful login the user will be redirected to the page callReport.jspx where the
train will be displayed in a region. At the first stop (Report) select a report from the
list-of-values.

On the second stop (Template) enter a valid output format (pdf, html, ...) and select a
template from the list-of-values.
On the next stop (Destination) enter a file name including the extension.

On the next stop (Options) it is possible to modify some parameters for the execution
of the report.
On the next stop (Run Report) all input parameters are displayed in read-only mode.
The report is created by pressing the left button. After successful completion the right
button to view the result will be activated.

On the last stop (Check-In) mandatory metadata should be entered before the report
can be checked in.

After the successful completion of the check-in process the response will be displayed
at the bottom of the page. If a document with the chosen dDocName already exists
there will be a message that the document has to be checked-out before.

Going to the Oracle UCM portal the document can be searched using different search
criteria. A list with the search results will be displayed. If you check the details for the
document you will find that it was checked-in by user adam.
Additionally you can check all outgoing and incoming messages by going to the
HTTP Analyzer window in JDeveloper. For every message there is one line. You can
view the content of the message by double-click on it.

3 Final Remarks
3.1 Modifications to run the Application
To run the application in another environment the following settings have to be
modified.
• Change the connection by selecting the file DataControls.dcx in the project
Model in the Application Navigator. Then in the Structure Pane use the
context menu for the data control and select the option Edit Web Service
Connection. To change the location and name of the WSDL file it is necessary
to open the file DataControls.dcx because not all properties are visible in the
dialogue.

• The same should be done for the file DataControls.dcx in the projekt CheckIn.
Username and password are not necessary here when a csf-key is defined as
described in 2.6.5.
• Check all connection-specific entries in the file
../BipIntegration.adf/META-INF/connections.xml.
and modify them if they still not point to the correct hosts or ports.
• The variable reportPath in the ReportBean.java contains the output directory
for the generated reports. It should be a directory which is accessible by the
web server providing the generated pages. The example uses the capability of
the embedded WebLogic server to deliver the generated reports.
3.2 Possible Extensions of the Example
The example could be extended in many ways. One direction would be to offer more
flexibility by integrating additional choices for report-specific parameters, scheduling
options etc. processed by BI Publisher server.There are many more web service
methods available to implement this. Instead of passing username and password the
inSession methods could be used after obtaining a valid session token by the login
method.
Additional components could be used to gain substantial benefits like
• using Oracle BPEL Process Manager for conditional reporting
• using Oracle WebCenter with pre-build content integration and the ability to
use portlets in the user interface
Enhancement could be done for security in such a way that Oracle BI Publisher and
Oracle UCM use the same LDAP directory.
Contact:
juergen.menge@oracle.com
